User:Vincenticart
Vincent Icart RepRap Wiki
| RepRap User: Vincent Icart | |
|---|---|
| University | Penn State |
| Class of | Summer Internship 2014 |
| Major | General Engineering, École Centrale de Marseille [1] |
Contents
About
The purpose of my internship is to do research on open-source 3D printing. I was involved in a Fablab in my university back in France where we used an Ultimaker and CubeX Duo. I didn't have any hands on experience on Repraps before arriving here, so the first weeks were dedicated to understand and get confortable with the use of these machines. Then, I could start trying to fix the different machines in the lab along by working on anxiliary projects. Below are the main progresses on the printers.
Rainbow
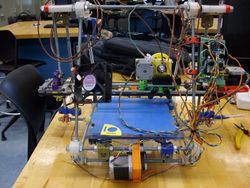
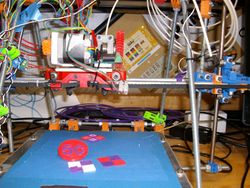
Rainbow was close from working when I got here. Here is a list of the most important works done on the printer:
- Equipped with the fan.
- Reflashing the arduino as connection issues were experienced.
- Calibration.
- Squarring of the frame.
- Removing and putting back on the extruder as it was clogged, and rewiring of the hot tip as a short kept triggering a "Max temperature" reached while printing.
The printer is now printing well, although the calibration part shows that best results could be acquired if the axis were squarred more accurately. Besides, on some specific areas, the infill doesn't reach the perimeters.
McDonalds
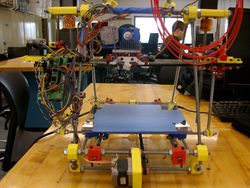
This printer required some work to get it back working.
- There was a lot of slack for the carriage which could rotate a little around the Z axis. Actually, a all new carriage was printed. Also, the long arm was printed with a new version of the file. The new version is the same as the old one, except that the four or five last layers that made the middle of the part higher where cut. This allows a tighter assembly to the main part of the carriage around the rod. This way the slack issue was fixed. As the carriage was removed, this was also the occasion to add a heat exchanger on the carriage.
- The bed was replaced by a polycarbonate one in order to prevent warpage issues. This allows better print results as first layers stick better to this kind of beds.
- X and Z axes motor drivers were replaced.
- Squarring of the frame and calibration of X axis (multiplication factor: 1.039).
- The hot tip had to be undone and the rewired, in an attempt to tighten the end of the hot tip as there was a PLA leakage during prints.
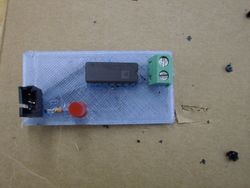
3D printed boards
Dual Extrusion
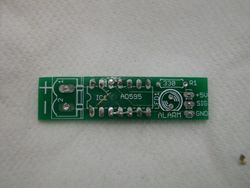
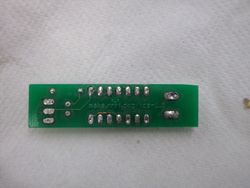
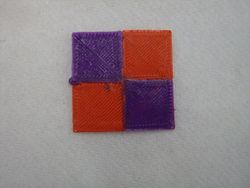
The Dual extruder was close to working when I got here and dual calibration cubes had already printed a few times. T0 extruder had to be rewired, and both extruders are now working well. However, the thermocouple boards should be handle with a lot of care as they seem to be very sensitive (especially T0) and tend to induce "Max temp." errors. New designs could be of good help in that matter as the carriage is very busy and one of the board is in the air.
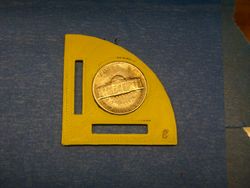
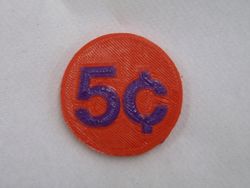
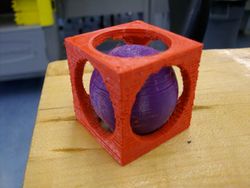
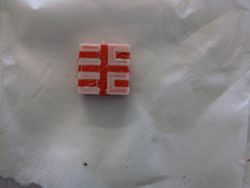
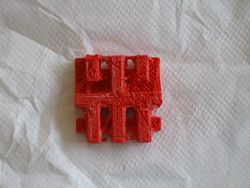
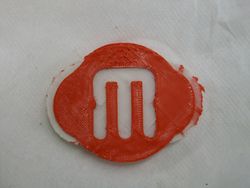
After running some test, the correct setting for the X offset between the two nozzles is 59.5 mm: extruder 0 (right one) is set as the origin, and extruder 1 (left one) is set with the 59.5 mm X offset is Sclic3r. This could be implemented in the firmware, but it is interesting to have it set this way in Slic3r as it allows to display the two different part of the assembly seperated in Pronterface or Repetier. Below are dual PLA parts we have printed:
Below are the ZIP archives with the files necessary for these prints:
| Item | Description | File Link |
|---|---|---|
| Dual Calibration cubes | Contains the two STL files and the AMF assembly | Media:Test Cube.zip |
| Dual extrusion calibration part | Contains the two STL files and the AMF assembly | Media:Plastic_Nickel_Dualstruder_Edition.zip |
| Dual ball in cube | Contains the two STL files and the AMF assembly | Media:Dualstrusion_Ball_in_Cube.zip |
Slicing
This paragraph will detail the settings used in Slic3r for our dual extrusion prints, but first it is necessery to merge the two seperate files into one assembly. Under "File", select "Combine multi-material STL files..." and select the required files, when this is done click "Cancel" and a window will pop-up to save the new file (.amf). This new file can now be opened with Slic3r. It is possible to click on "View" in order to make sure the assembly has been done correctly.
We will now explain our settings for Slic3r.
Under "Speed", make sure the acceleration parameters are set at low values. Dual extruders carriages are often heavier, and 500 mm/s² sounds like a good parameter for all accelerations on our printer.
Under "Multiple extruders", "Ooze prevention" you can tick the box in order to cool down the extruder that is idling when the other is printing. This also presents the advantage of building a skirt around the part that will act as a wiper which is very useful. Note that the skirt will be printed with the first extruder. However, with this option you might need to edit the Gcode. Indeed, the temperatures changes are made with "M109" instructions and a lot of time can be lost when the printer is waiting for the target temperature to be reached. Inserting a delay can be a better solution. If this option is not always to be used with PLA, experiments with PVA (for printing parts with disolvable support) show that is necessary as it oozes more easily. In this case, to gain time, it is possible to edit the Gcode so that the change in temperature is only set for one of the extruders. These Gcode editions will be detailed in the next paragraph.
Printer settings
Under "Extruder 1/2", tick "Retract on layer change" and "Wipe while retracting". Under "Retraction when tool is disabled", good settings for our printer with PLA seem to be respectively 5 mm and 0 mm. When PVA is used, those parameters should be investigated as this material oozes more easily.
Editing the Gcode
You can download Notepad++ in order to edit easily your Gcode.
With the option "Find", search for T0. Then identify the line starting by "M109 S..." under T0 and replace it (choose the option to replace everywhere in the document)by "M104 S(...) \nG4 Px0000" where x is the delay in seconds. This will allow you to set your target temperature and a delay for this temperature to be reached.
Do the same thing for the M109 instruction in T1 blocks. Now you just have to do the same thing to set the idle temperatures. You just need to find and replace the M104 lines above T0 or T1.
If you wan't to set idle/print temperatures just for one of the extruders you can't adapt this method. As I didn't find an option like "Find and delete" you can use the "Find and replace" option and set a delay in milliseconds that won't make you loose time.
Printing with a disolvable material
One of the most interesting thing of using dual extrusion printers is the possibility to print designs that have overhangs and that couldn't be printed with a single extruder. We have first experimented with PVA, a material that is water disolvable. An important thing about this material is to keep it in a dry place.
This material bonds very well with PLA, and it appears that extrusion at 180°C and 165°C for idle temperature are correct settings.
Below are pictures of parts using PVA support:
