User:Lanthan
Contents
Background
Lanthan & son & cat set out their journey about robotics in early 2009. The "new" manufacturing techniques exerted a significant appeal on them.
After much lurking in forums and wikis and a steady routine of scavenging in computer and printer parts dumps, they got hold of a benchtop-cnc-router-that-would-cut-a-RepStrap-that-wold-print-a-Reprap. In other therms, they took the winded, twisted long road that offered the most varied learning opportunities.
On the other hand, there weren't so many kits or printed parts available in early 2009-2010. So they decided to cut & adapt a Cupcake, having got interested by its neat plywood assembly techniques.
Early milestones:
- Learning about Arduino ans stepper motor control
- Building a primitive eggbot from discarded printer & computer parts
- Building a cartesian plotter from discarded printer & scanner parts, sorting out a parallel port interface, and driving it with EMC
- Operating a benchtop cnc router without having the neighbours going postal
- ...
Bootstrap generations
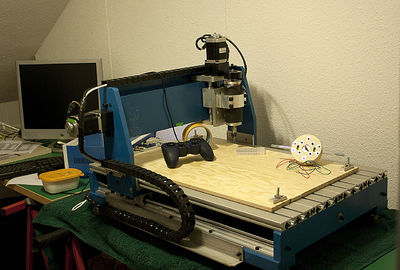
F0: Benchtop CNC router
"The poor man's laser cutter", actually a very capable solution dealing with pieces up to 550 x 360 mm with (usually) better than 0.05mm precision. Unlike the lasercutter, unwieldy for large production series, but perfect for anyone whishing to learn. The decision to get one evolved from the painstaking, but ultimately successful, hand-build of a Wimshurst machine.
- Main shortcoming: noise. An incitation to cut a smaller one for PCBs.
- Main advantage: you do exactly what you want.
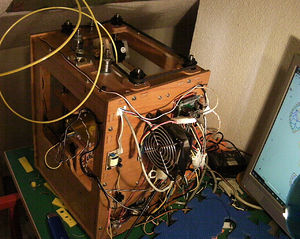
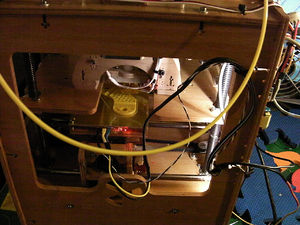
F1: Pirated cupcake
As in many cases, the work advanced episodically, was put on hold for many months due to other contingencies, and offered some opportunities for some personal interpretations research. The build was completed in summer 2011. Build details, configuration hints and links have been added to the Pirated CupCake page (will proceed with some reorganization).
While devoid of any stellar performance, and as much a musical instrument as a rapid prototyper, this has quickly turned into a reliable workhorse. Surprisingly little adjustments were needed.
Shortcomings: Like most designs around, Z axis is problematic. A complete Z rebuild with 3 x 12mm guides and LM12UU bearings is in the plans.
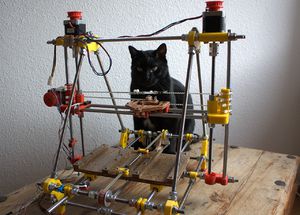
F2: Prusa's simplified mendel
By far this was the most intense and involved build construction-wise. Very promising. Needs patience, persistance and recursivity for fine adjustements.
Kitsellers heed: Since most kits already include lasercut parts, one could imagine at least two precision lasercut/routed pieces that help get the rods in the exact positions quickly and without much fuss. From what I gather, the Orca's main attrait might be there: precision parts doubling as build guides.
Build notes and (re)design pieces
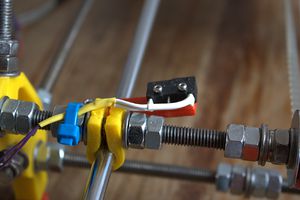
10 mm microswitch holder
Note: All due credit must be given to Adrian's who deals with 9.5mm spacing and M2.5 holes. My mod was independent of his.
M2 holes spaced 10 mm. Direct mounting of common microswitches. No additional electronics needed with the Arduino's internal pull-ups enabled.
On Thingiverse (including STL)
Files:
- Openscad
- (STL uploads currently fail on the Wiki)
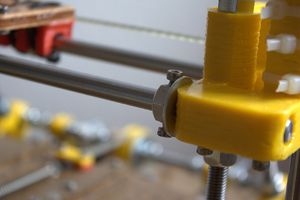
X axis reinforcement: shaft collars
This may be a bit of pre-emptive maintenance and a pure vitamin, but one you can easily make with a drill press, M8 nuts, 8mm and 2.5 mm drills, a file, a manual punch and an M3 tap.
- The problem with the current Prusa Mendel's design: the trapped nuts on the idler and motor ends of the x axis are held by very few layers of plastic. This drastically limita the pressure one can appply to fix in place the smooth rods. There will be slippage, and frequent adjustment needed to re-tension the x axis belt. It must be happening around, no?
- The plastic solution: would be to significantly increase the number of layers under the trapped nuts, increasing the overall thickness of the piece. Alternatively a separate collar piece might be used.
- Selis Mendel appears to have had more secure clamping for the X smooth rods, with bolted on collars. Might be combined with a V profile for the hole in the lower piece to ensure rod centering?
- Close the distal holes (like in a recent PrusaJr's design on Thingiverse). The problem is that this needs an exact cutting of the smooth rods. Reduced adjustement possibilities.
- The metal (provisory) solution: prepare those shaft collars, especially on the side that must absorb tension. Tighten at your heart's content. They allow for significant pressure being applied on the smooth rods.
Note: I drilled them at 180 degrees for convenience, but have learned since then that the optimal solution would be 90 degrees between the screws. 120 degrees might be a reasonable compromise.
How to:
- Drill out the nut's center and apply 5-20 circular file strokes until the nut fits snugly the 8 mm smooth rod
- punch the center of two nut's sides 120 dregrees apart
- Change to the 2.5 mm drill and drill the nut's sides
- Tap those holes to M3
- File the scrapes and adjust the collars on the axes.
Quick change magnetic X carriage
coming soon
Quick change magnetic base plates
coming soon
Details to be solved (hopefully design those parts)
Improve lateral parallelism of the Z axis
The parallelism of the Z screw rod and the Z axis is off by more than 0.2 mm, and the current Z motor mount does not allow for any adjustment at all. Task: Re-design the Z motor mounts so as to give clearance for lateral adjustment.
I hereby banish dancing motors because they are intrinsically evil (TM). I want both Z screws fixed on bearings at the bottom end too.
WHat's next?
An Orca? (where are the files?)
Lessons learned
Caveat inertial mass
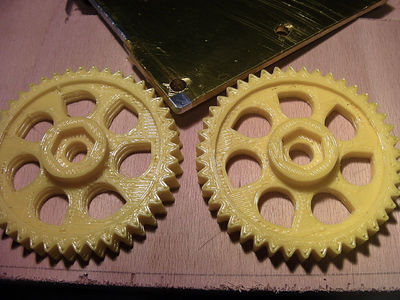
These gears were both printed from exactly the same gcode, "all other things equal", at 25 mm/s. The one on the left shows obvious lost steps on the y axis.
The only difference was the addition of an 10x110mm aluminium plate (pictured above) to have a full build platform. The additional swinging mass proved too much for the wimpy y-axis stepper.
Remedial action
- Lowered speed (skeinforge: "speed" and "limit")
- Slightly increased the y stepper current on the pololu driver.
- Print small objects without the full surface platform
So far, so good. Noisier stepper, though.
Also, possibly, in the firmware: reduce acceleration.
Foreseen explorations
- Heliostats and sun-tracking devices
- Mini solar sinterer / oven ?
- Applications of RepRap technology in biomedical/health contexts
- Homegrown mini-mill for PCBs
- Maybe importing new ideas in a stagnating professional realm
- ...
Getting in touch
lanthanid (at) gmail.com
Looking forward to meeting developers and fabbers around the Geneva (CH) Area
Acknowledgements
This has been a wonderful learning experience, and (at least for one us) a refreshing comeback to past interests and links.
As a full case of information gathering and learning endeavour catalyzed by a set of community-driven projets, we are deeply indebted to the experimental work of the many developers, testers, tinkerers and visionaries in the Reprap constellation: Thank you!
