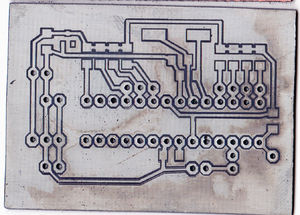
Scratch n' Etch PCBs
The Scratch n' Etch method is a method for producing PCBs with and etch resist that is scratched away with a CNC with a carbide scriber. This page documents a successful version of this method done on a McWire-style CNC by Matt Gilbert. (While some have declared the McWire a "death march", it works fine in this case. More importantly, the method shown here should be easily incorporated into a different RepRap/RepStrap design.)
The scratch n' Etch method has been described in principle on the Homebrew PCBs Yahoo group. This page documents the Scratch n' Etch process as explained on that discussion board, with one important addition: The scriber is pressure sensitive.
The etch resist used is Dykem Layout Blue (aka "machinist's paint", "machinist's blue", or "layout paint"). This paint is used by machinists because it's designed to be easily scratched off with a carbide scriber, leaving behind a fine, precise line.
The scriber exposes copper that can be removed using your favorite etch. (I prefer cupric chloride.)
Since the scratches themselves are the areas that will be removed, you must isolate the traces and areas you want to keep by scratching around them.
Since the scratches are very thin, to get adequate isolation you have to scratch a few "laps" around each trace, sort of like a lawnmower, moving a little further out each time, scratching away a thicker line. This requires your GCode to include these laps.
More to come
