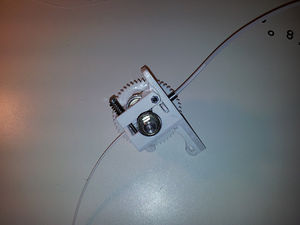
RepRapPro Huxley extruder drive assembly
| Introduction | Frame assembly | Y axis assembly | X axis assembly | Z axis assembly | Heated bed assembly |
| Hot end assembly | Extruder drive assembly | Installing the electronics | Wiring | Commissioning | Troubleshooting |
Contents
This page is under construction
Goal
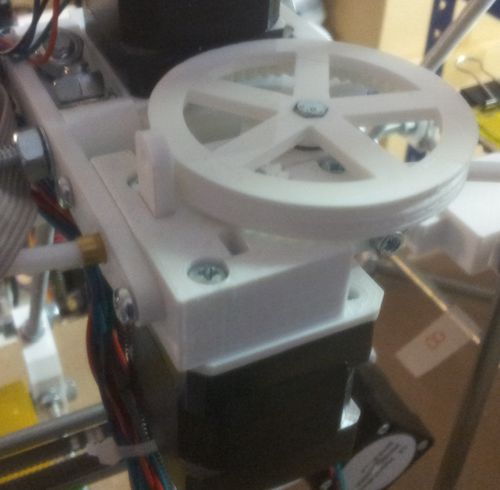
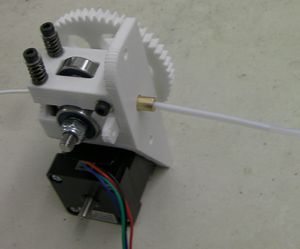
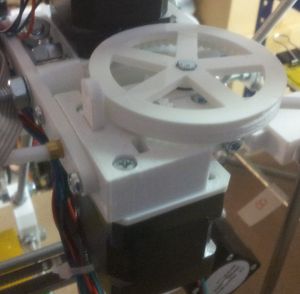
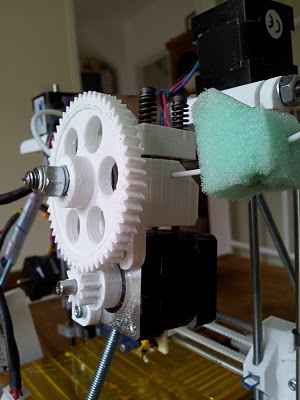
By the end of this stage, your extruder drive will be mounted on the back of your Huxley like this:
Tools
- 10mm (M6) spanner
- Adjustable spanner
- Allen key
- Phillips screwdriver
- Tweezers
- 2mm drill
Step 1: Motor and hobbed stud assembly
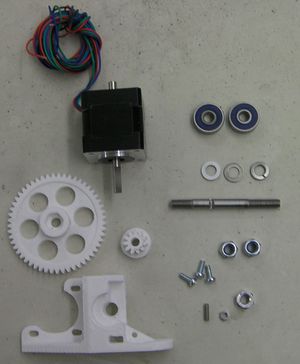
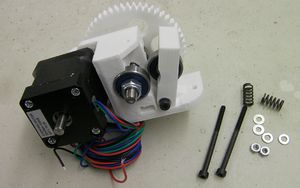
Use the 8mm M3 screws to attach the motor to the block. Put it as far from the centre as it will go in its slots. Don't do the screws up tight:
Push the M6 nut (plain, not one of the nylocks) into the hexagonal recess in the big gear.
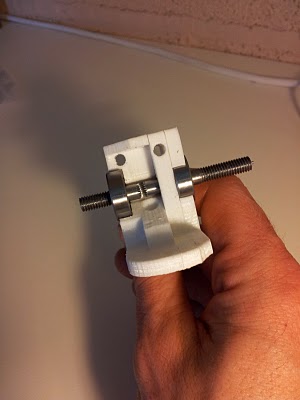
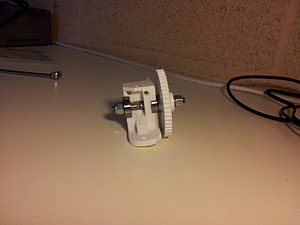
Put a bearing on the hobbed 6mm stud (note the relative positions of the short and long threads), followed by two plain M6 washers, followed by the gear with its nut. The nut should face away from the bearing.
You are going to adjust things so the gears mesh.
Put the M3 nut into the slot in the small gear and run the M3 set screw through it.
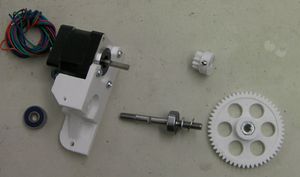
Some motors have a flat on the shaft that runs all the way to the motor case. If yours is one of these, put the small gear on the shaft with its hub towards the motor. Then put the bearing in its whole so the big gear meshes with the small one.
If the flat stops short of the case, put the bearing and the big gear on first, then put the small gear on the other way round (as in the picture below):
Take things apart and put them together again, adjusting the motor's position in its slots, until the gears mesh nicely.
When you are happy tighten all the motor screws, reassemble everything else, and tighten the small-gear set screw. Make sure that the small gear hub is not rubbing on the big gear - there should be about half a millimetre clearance between them.
Put the other bearing in on the other side of the block.
Put the split M6 washer on the side with the big gear so it bears on the gear's nut, then put M6 nylock nuts on both ends.
Tighten the nylocks, while checking the hobbing against the 2mm hole down through the block where the filament will run. The hobbing should be centred on this. Undo or do up the big gear with its nut, and the two nylocks until this is so.
Don't tighten the nylocks so far that the gears, stud, and motor can't rotate freely.
Slide the hobbed stud through the 8mm hole in the M6-block, then fit the two 626 bearings.
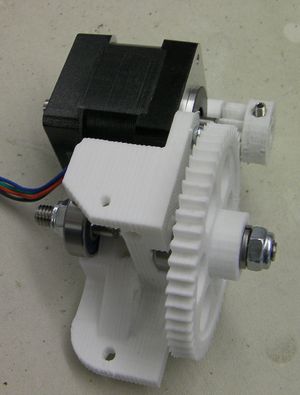
Note the orientation of the stud in the image above.
Place two M6 plain washers onto the stud, then the large gear, the M6 full nut, the M6 split washer and finally an M6 nyloc nut.
Screw the second M6 nyloc nut onto the other end of the stud until the latter can no longer move from side to side, but can still rotate easily. While you are tightening, keep checking the hobbed section - this should remain with its centre lined up with the small vertical 2mm diamete holes down which the build filament will run.
So if need be adjust the nuts until the hobb is aligned to the 2mm diameter holes which will guide the filament. When you are happy this is in the right position, tighten the M6 full nut inside the gear against the M6 nyloc nut.
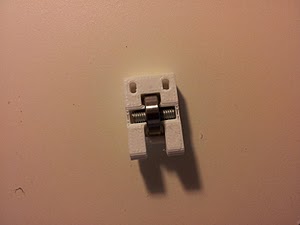
Before fitting the motor in the next step, you may want to place two captive M3 nuts in the bottom of the M6-Block; they will be needed in Step 3: Idler assembly, but are very difficult to place after the motor is mounted.
If they are not snug enough to hold themselves in, cover them with a piece of sticky-tape for now.
Step 2: Fit the motor
| RP parts | Quantity |

|
1 |
| Hardware | Quantity |
| NEMA 14 stepper motor | 1 |
| M3x10mm socket set screw | 1 |
| M3 nut | 1 |
| M3x8mm screws | 3 |
Fit the M3 nut into the recess in the small gear, then screw in the M3x10mm socket set screw. SLide this over the motor shaft with the flat on it, and tighten the M3 screw to secure the gear. Ensure the gear teeth are facing away from the motor.
Using an M3x8mm screw in the outside hole, fit the stepper motor to the M6-block, such that the two gears mesh well. Tighten this screw, then remove the hobb assembly (by removing the M6 nyloc nut furthest from the gear) so you can fit the remaining two M3x8mm screws to secure the motor.
Finally, replace the hobb assembly.
Step 3: Idler assembly
| RP parts | Quantity | 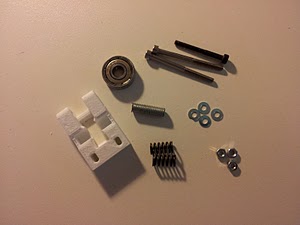
|

|
1 | |
| Hardware | Quantity | |
| M3x25mm screw | 1 | |
| 626 bearing | 1 | |
| M3x45 screws | 2 | |
| M6x20mm socket set screw | 1 | |
| M3 washers | 4 | |
| M3 full nuts | 3 | |
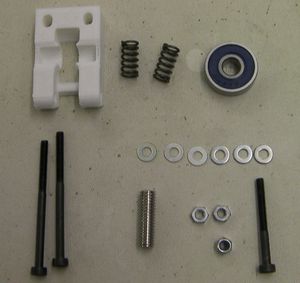
| Springs | 2 |
Slide the 626 bearing over the M6x20mm socket set screw and fit this into the Idler bracket.
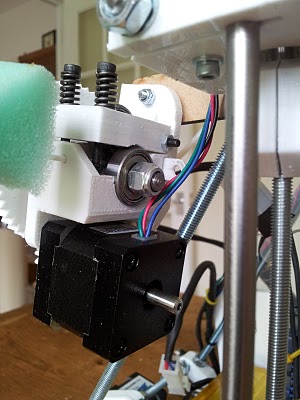
Place the idler bracket over the 3mm diameter hole in the M6-block and insert the M3x25mm screw. The springs are compressed using the M3x45mm screws pulling against the captive M3 nuts which you must slide into the hexagonal holes behind the motor.
Step 4: Fit the bowden+pneumatic fitting
You'll need
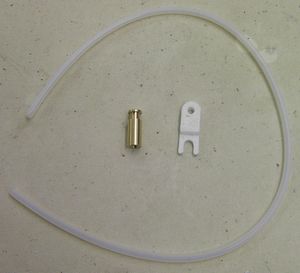
- Pneumatic fitting (push in pneumatic fitting with the O-ring on and really short M5 threaded end, just like you used in the hot end assembly)
- flat M5 nut
- Bowden tube (Teflon tube about 2mm diameter)
Just below where the 3mm x 25mm screw goes as the hinge pin is a slot. Slide the 5mm nut in here and push it in until you can see it centred in the large hole in the flat side of the body of the extruder. Screw the pneumatic fitting (If you are not sure what this is, you used one on the hot end.) into this nut. The bowden tube is the flexible translucent tube. This will push fit into the end of the pneumatic fitting. The other end of the tube connects to the hot end. You may want to wait until you are almost ready to print before you connect this tube as it may get in the way while you tidy the wires and connect things up.
Step 5: Fit your extruder drive mechanism to the frame
Loosen two M6 nuts from the top cross bars (on the opposite side to the X axis motor), fit the laser cut extruder drive holder, then tighten the two M6 nuts back up against this. Fit the extruder drive mechanism to the extruder drive holder using an M3x20mm screw and an M3 nyloc nut. The extruder block can be spaced off from the extruder drive holder by sandwiching an M3 nut between the two (on the M3 screw) if you want it to hang vertically. If you want the motor to rest on the threaded rod at an angle, just put it together without the extra M3 nut.
