PCB Heatbed
This page is a development stub. Please enhance this page by adding information, cad files, nice big images, and well structured data!
Release status: unknown
| Description | PCB Heatbed
|
| License | unknown
|
| Author | |
| Contributors | |
| Based-on | |
| Categories | addons
|
| CAD Models | |
| External Link |
About
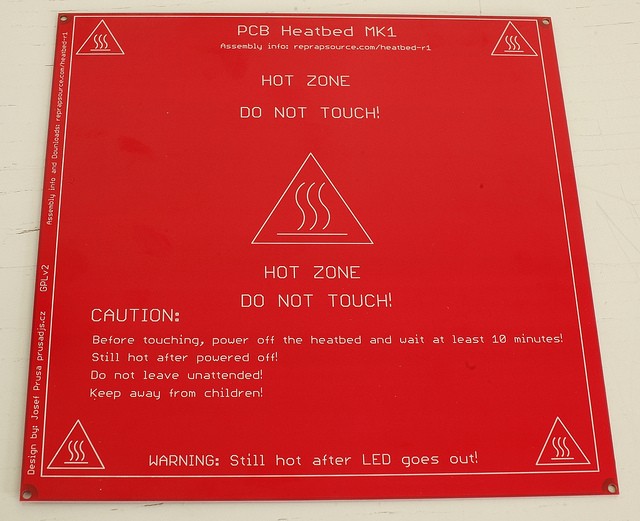
PCB heated bed. I'm working on this idea for nearly six months, inspired by neufeld.newton.ks.us/electronics/?p=864 .
Printing
Cover the bed with kapton tape. Degrease it and print.
ABS temp: 110°C PLA temp: 50-60°C
MAKE SURE YOUR PSU HAS 10 MORE AMPS SPARE!!!
Mounting
Known working solution, I (prusajr) use is Glass sheet (3mm) with glued on cork standoffs and on top of that is glued the heatbed. http://www.flickr.com/photos/prusajr/5410919911/ http://www.flickr.com/photos/prusajr/5410919707/
We are now working on simpler mounting solution!
When mounted only using the four corners, the inherent warp of the pcb can be a problem, hence it is better to use the cork mounting system above (as the piece of cork in the centre helps to keep the pcb flat). Magnets can be used in replace of the cork, this makes the bed removable. However, I (mooneyj) have only tried this on a darwin type printer (where the build platform only moves in z). During fast printing, the darwin vibrates and it seems the heatbed magnets slide over each other slightly. The acceleration of the y axis on a mendel may cause the magnets to slide also. Perhaps a hybrid of magnet and bolt mounting would work well?.
Note: According to the Eagle file posted on Thingiverse, the M3 holes are spaced 209 mm
Sides
PCB Bed has two sides, one with the traces (bottom side) and one with silkscreen (top).
Printing on top side is safer, works great.
Printing on bottom is more effective and heats up quicker. (Though the LED, resistor and wire connections are liable to collision with the print head. Also the tracks could be damaged if the print head collides. Make sure your z-bed-springs are not to strong to prevent damage during a collision).
Connection
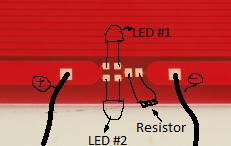
Polarity doesnt affect the pcb, however the LEDs have a polarity, so they must be oriented correctly.
LEDs
There is place for two leds you should put each of them in different direction so atleast one of them is lighten up, no matter what polarity you use.
RAMPS
There are two ways to power the heatbed: 1) You can omit the fuse on the board and use one of the mosfet outputs. 2) Plug one heatbed wire to the GND pin on the mosfet output on RAMPS and connect the 12V+ separately to your powesupply. (Better)
Its now in working state, Printed load of kits on it, working great.
Main Idea is to use resistance of pcb traces as heating element.


