HuxleyFrame
[[Image:TZHuxleyFrame.jpg|border|right|400px|Image of a Huxley Frame, assembled from a TechZoneCommunications Huxley Kit]
General
This page should guide you through assembling a RepRap Huxley from the TechZone kit, or from parts you have printed which are the same as the TechZone parts. It is a work in progress, and needs some help, feel free to edit this document to add comments of you your own, or contact us [here] and send us messages asking us for better clarification or details.
I am starting by posting the pictures I have, and over the next few days, I will fill in the instructions and detials (24 Dec 2010)
Thanks,
Lambert (TechZone R&D/Support/Documenter)
You can access this page and it's peers (for the other parts of the Huxley assembly from the Main Huxley page or from the TechZone Huxley Page
Contents
We Assemble the Frame as Units, the Top Unit, the Front Unit and the Back Unit, then we put them together. To begin with, we assemble parts just finger tight, and into aproximate areas. When it is all together, we will fix things by measurements, and tighten them up.
Top Unit
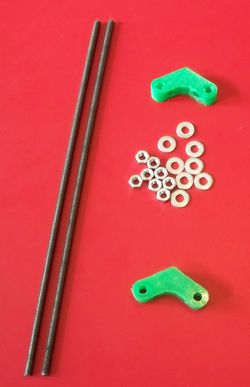
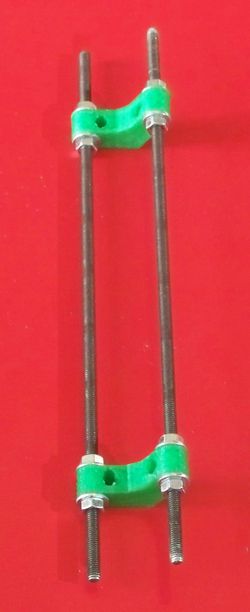
On the left is a picture of the parts used to make the top unit, simply thread the inside nuts onto the bars, then washers, followed by the top vertice pieces, more washers and the outside nuts.Make the parts just finger tight for now, we will get the exact placement and tighten it up a little more at a later time.
Front Unit
Back Unit
Put them together

