DriverSoftware
-- Main.AdrianBowyer - 16 Apr 2006
RepRap control software
There are multiple methods to control your RepRap.
- There is an all-in-one package called the reprap-host software. It can directly control a SNAP reprap and can write G-Code. This page is about the reprap-host software.
- There is Arduino_GCode_Interpreter G-Code firmware (Generation 2 electronics only) so you can control the RepRap through various controllers. Various programs can write G-Code.
This document describes the control-computer software that you use to load STL files, arrange them on the build base of the RepRap machine, and then get the machine to build them.
The software is downloadable from [Subversion the RepRap Subversion repository]. It is written in Java, and uses Java3D for rendering.
The user interface
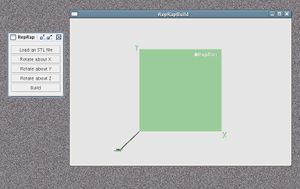
When you run the program it will open two windows on your desktop:
</a>
The large one is a plan view of the build area of the RepRap machine with the Cartesian directions indicated on it. The small one allows you to load STL files into this area, to rotate them about the axis directions to get them into the right orientation to build them, and finally actually to build them.
If you move the mouse into the large window you can change your view:
- Left mouse button: rotate the view about the origin
- Middle mouse button: zoom the view in and out
- Right mouse button: Pan the view left/right or up/down.
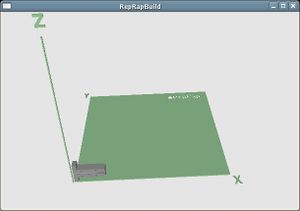
If you select the "Load an STL file" button in the small window, a new window will open that will allow you to walk your computer's file tree and select an STL file. This will then be loaded into the scene (note the view here has been rotated from that shown above):
</a>
It will be placed at the origin.
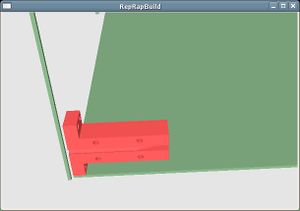
You can then select the object by clicking on it with the mouse. It will go red to indicate that it is selected:
</a>
When an object is selected the mouse changes its action to sliding it around on the build base of the RepRap machine to allow you to position it. You can also rotate it with the three rotate buttons in the small window.
To deselect the object to allow you to change the view once more, just click on the green representation of the RepRap build volume.
You can load as many objects (within reason...) as you like, and - of course - multiple copies of one object.
</a>
You can then select them and move them about to get them into the right relative positions to build them. Finally, when you are happy with the arrangement, you click the "Build" button. Motors will whirr and the RepRap will seek all its axes to the zero position. You will then probably see a small dialogue indicating that things need to warm up to working temperature. Once this is reached, your parts will print out - provided you have correctly calibrated your RepRap.
AdrianBowyer


