AssemblingDarwinElectronics
Contents
Cartesian Assembly (Electrical)
Now you've got your robot looking all Cartesian, it's time to install the electronics and get it wired (you need to have completed the mechanical assembly first.
Bill of Materials (BOM)
The BOM is on a separate page to reduce the amount of scrolling you need to do (Alt + Tab will quickly switch windows for you). It covers both mechanical and electrical sub-assemblies.
Installing the electronics
You will need to have completed the electronics section of the How to build it page.
Opto-endstops
For each axis you will need to install an opto-endstop so that each axis can find its home position. These endstops comprise of an opto-switch and a flag to trigger it.
Before installing the flags, glue some kitchen foil over the end (the opto-switch uses an infra red beam - the polymer flag on its own is unlikely to be opaque for this wavelength).
++ X axis opto-endstop
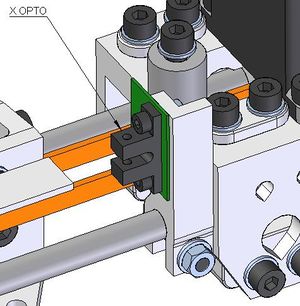
Fit the opto-switch as shown.
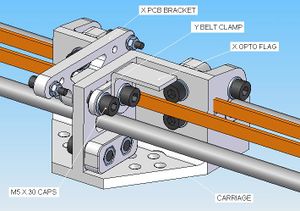
The opto-flag for the X axis is part of the three-element assembly shown below. It is bolted with two M5 x 30 caps.
Adjust the position of the opto-flag so that it slots neatly into the opto-switch, and tighten the bolts.
Y axis opto-endstop
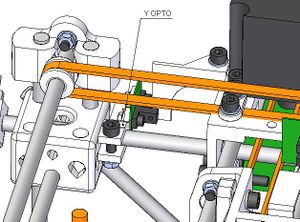
Fit the opto-switch as shown.
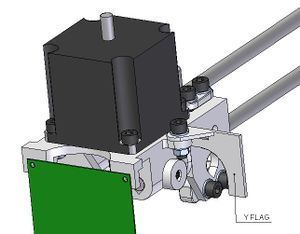
Fit the opto-flag using an M5 x 15 cap as shown.
Adjust the position of the opto-flag so that it slots neatly into the opto-switch, and tighten the bolts.
Z axis opto-endstop
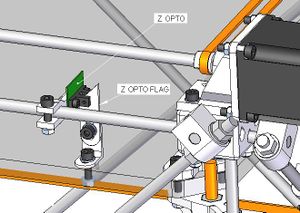
Mount the opto-flag as shown. Fit the opto-switch as shown.
Adjust the position of the opto-flag so that it slots neatly into the opto-switch, and tighten the bolts.
Mounting the PCBs
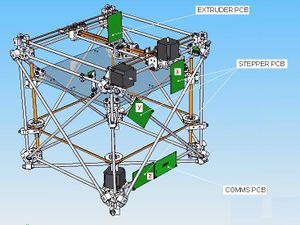
The PCBs will be installed as shown. I am finding it difficult to make this section exciting. Explaining that opto-section has fizzled my enthusiasm, but take heart dear friends, we're getting closer...!
Begin with the Extruder PCB and X stepper PCB, using M3 x 15 caps, onto the points shown in the above picture.
Take care your washers don't short circuit any of the wiring on the PCB. If in doubt (in this case) leave the washer out.
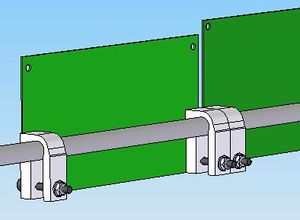
The comms board, Z stepper and Y stepper boards need to be attached to the frame using the PCB mounts as shown, using M3 x 25 caps.
Ensure the Y stepper board does not interfere with the X stepper board (i.e. move the X axis all the way over to the Y stepper motor side when installing the remaining boards).
Wiring
And now it's up to you to wire the thing. I think the most help this section can be is to point out a few things which helped me keep things tidy, but really, the wiring diagrams in SVN are completely subject to your own artistic interpretation.
Power cabling
I used speaker wire which works a treat, plus it's speaker wire which everybody can get their hands on! The connectors specified for the PCBs will take a cable with up to ~42 strands. 42 strands is possible, but once you've soldered the end off, you need square it in the vice which is a waste of everybody's time. I used medium grade speaker wire (13 strands) which fitted easily and that took the current fine.
Signal cabling
A roll of multi-coloured ribbon cable is all you need. The multi-colours will keep you from going insane and chewing your legs off when the tracing wires, and the ribbon togetherness looks dead cool for the opto-switches.
Wiring Notes
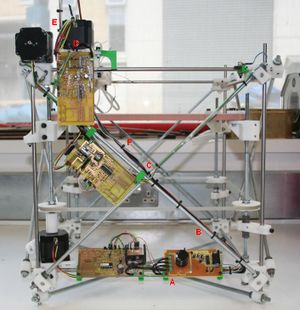
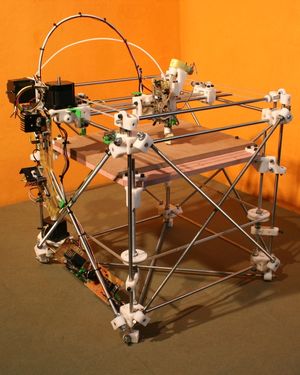
Here's a photo of how mine ended up, with some pointers.
A. Use the gap in the PCB mounts to funnel wires where possible. Otherwise use tie wraps to keep the wire bundles next the frame.
B. Use this diagonal (or its opposite) as a trunk route for all wires going up (including the z-opto wires).
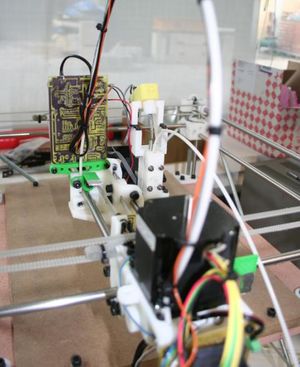
C. For the wires to reach the x-axis, they need to leave the frame at this point, dangling up to the x-axis. When measuring out the cable length make sure the x-axis is docked at its extreme position, as shown in the pic (up against the y-motor).
D. When meeting the x axis the cable should trail up and through the triangular hole in the x axis motor bracket. At this point they should be secured to the motor bracket with a cable tie so they can't be yanked out of the PCB during general x-axis movement.
E. See the section below for a simple way to bridge the cables from the x motor bracket to the carriage.
F. When you're all wired up, run the x-axis back and forth, kinking the dangling cable in such a way that the cable doesn't catch on the PCB.
Bridging to the carriage
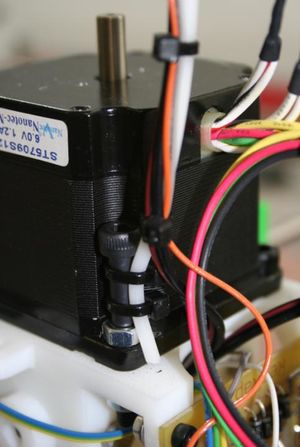
A length of build filament can act as a flexible bridge for the power and comms wires from the x motor bracket to the carriage. You will only need to run one power cable over to the carriage. It will be split between the extruders when it meets the carriage.
The filament can be anchored by replacing one of the rear motor bolts with an M5 x 40 cap and strapping it with cable ties.
This can then be bent over and locked to the carriage between the y-belt and the carriage rib, as shown below.
Completion
CONGRATULATIONS!!! Now you can put whiskey on the shopping list.
Testing
Make sure you've got the power connections the right way round.
Make sure you've got the power connections the right way round.
Make sure you've got the power connections the right way round.
Also, if the optos are wired the wrong way, they really mess the comms testing up!
-- Main.EdSells - 24 May 2007
