Moldmaking Tutorial
Contents
Soft Tooling for Casting
Overview
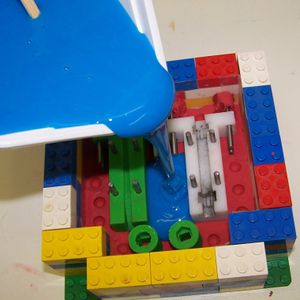
What you are going to do is to build a cavity, line the bottom with plasticine to form a split line, put components to be cast on that plasticine, and pour liquid silicone over them to fill the cavity and make half of a mould.
When the silicone is set solid, you will turn the whole thing over, peel off the plasticine from what is now the top, and pour in more silicone to solidify and form the other half of the mould.
You can then remove the original components by bending the silicone mould, put it back together, and pour other materials into it such as liquid resin to make copies of the original components.
With care this can be done with extreme accuracy and fidelity.
Before you start
You are going to need some liquid silicone rubber. The fancy name for this is polydimethylsiloxane (PDMS). It comes in a variety of different forms (the most common being bathroom sealant). It is a thermoset polymer. The less cross-linking in the polymer, the softer it is. But for a mould there is a compromise: the softer it is, the easier it is to separate the casting from the mould, but the more prone it is to distortion.
Viscosity when the PDMS is liquid before it has set is another issue - if it's too viscous then bubbles in it will stay trapped and won't rise to the surface before it sets, giving a poor-quality mould. This means that the only way to use a viscous PDMS is to cast it in a vacuum to eliminate bubbles. Fortunately, there are now very inviscid ones available. The best one I've found is Viscolo 22 liquid silicone from Tomps.
You will also need something to mix the PDMS in (disposable coffee mugs from a vending machine are good), something to catch drips and spills (paper party plates are good), and sticks to mix with (sticks are good...). Electronic scales accurate to 1g will allow you to mix the PDMS in the right proportions easily.
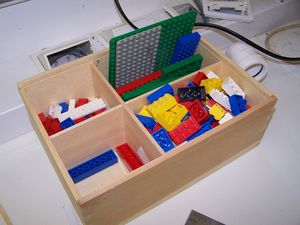
Finally, confiscate Lego from the child in your immediate circle who has most recently annoyed you.
Cores
Any long thin holes in the object you are making will become long thin pieces of silicone in the mould. These will bend under gravity and so not make an accurate hole. Much better is to use cores. Cores are removable parts of a mould that you put in before you do the casting to make holes.
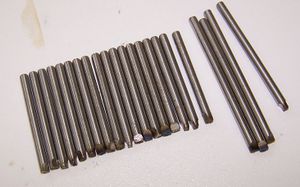
By far the majority of holes that you want will be cyliders. The easiest way to make cores for these is to use metal rods. Use silver steel - it is easy to cut and it is shiny (giving a smooth finish). Cut the cores longer that the holes they will make, and grind small flats on one end to make the core easier to grip and twist with pliers.
Layout
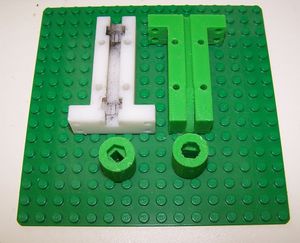
Position the objects you want to mould on a flat Lego base. You are going to build a wall round them. Make sure there is a good 5mm gap between everything and between each component and the walls. Allow more where the cores will come out, and make sure that one end of each core can touch one of the walls; the other end should be somewhere in the middle of the mould..
Walls
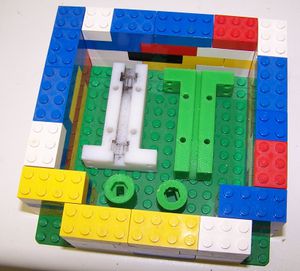
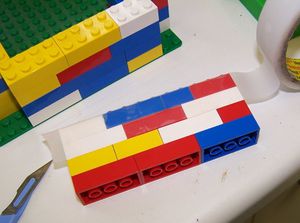
Build a wall round the parts. Make it two bricks higher than their height. You can bond the walls so that the cracks don't line up by offsetting the bricks to make the wall strong, but don't do this round the corners - you are going to have to remove and to replace each wall individually.
Tape sealing
Take off each wall and seal the cracks on the inside with tape. When you put them back, add tape down the vertical corners to seal those too. Don't bother to seal the join with the base.
Plasticine
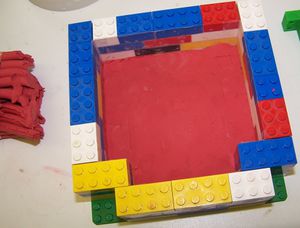
Push plasticine into the bottom of the cavity one brick deep. This will form the split line of the mould.
Make it flat where you can, but build it up into mounds if need be to accommodate the shapes of the components that you are going to make. See below for an example of this.
Setup
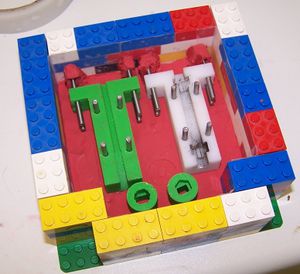
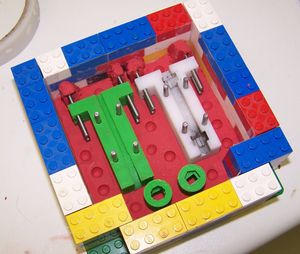
Place the components to be moulded on the plasticine base, pushing them down into it slightly to make a good seal.
Put lumps of plasticine round the ends of the cores where they touch one of the walls. This will give an indentation round the end of the core, allowing it to be grasped with long-nosed pliers.
Push any vertical cores right down into the plasticine as far as they will go.
Bumps
Make indentations into the rest of the plasticine surface with any object with a conical or spherical end. These will form bumps on one half of the mould and corresponding dents on the other half. These halves will then locate perfectly on each other, constrained by the dents and bumps.
Pouring
Work out the volume of the mould above the plasticine. Unless the components being cast are very big, don't subtract their volume from that - that will give you a little extra material to play with.
The density of the silicone is about 1g per ml (i.e. much the same as water). Weigh out the appropriate proportions of the two components and mix them very thoroughly. Be particularly careful to mix in any material in the corners of the mixing vessel.
Then slowly pour the silicone in. Pour it in one place in the middle and let it flow everywhere else under gravity.
Setting
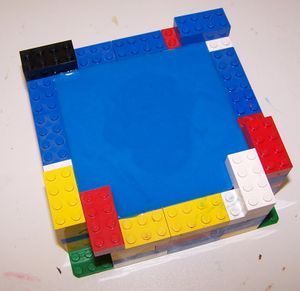
Fill the cavity right to the top. Place extra bricks across the corners to locate the walls precisely.
Leave it to set completely.
More to follow...
-- Main.AdrianBowyer - 30 Sep 2007
