Stepper Motor Driver 2.3
This page describes something which is no longer the most recent version. For the replacement version see: "Official" Electronics
Contents
- 1 Overview
- 2 Files
- 3 Configuration
- 4 Interface
- 5 Circuit Board
- 5.1 Components
- 5.2 Build Process
- 5.2.1 Apply Solder Paste
- 5.2.2 Place Components
- 5.2.2.1 C3 - .22uF Ceramic Capacitor
- 5.2.2.2 C1, C4, C6, C8, C12 - 100nF Ceramic Capacitor
- 5.2.2.3 C2 - 1nF Ceramic Capacitor
- 5.2.2.4 R3, R16 - 0.25 ohm resistors
- 5.2.2.5 R2 - 10K ohm resistor
- 5.2.2.6 R5, R7, R8, R17 - 1K ohm resistor
- 5.2.2.7 R6 - 2.2K ohm resistor
- 5.2.2.8 Red LEDs - A/D
- 5.2.2.9 Green LEDs - B/C/Power
- 5.2.2.10 IC3 - 7805 - 5V regulator
- 5.2.2.11 A3982 - Stepper Driver
- 5.2.2.12 C10, C11 - 100uF electrolytic capacitors
- 5.2.3 Hot Plate Reflow
- 5.2.4 Solder Through Hole Components
- 6 Test Your Board
- 7 Cooling
- 8 History
- 9 Previous Versions
- 10 Index
Overview
Jump to the Index / Table of Contents
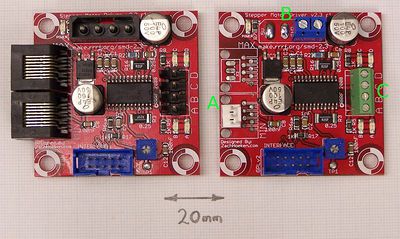
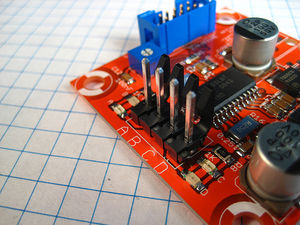
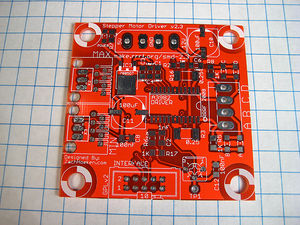
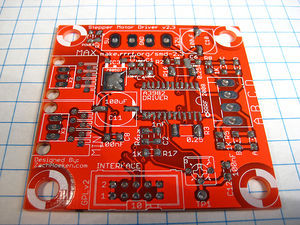
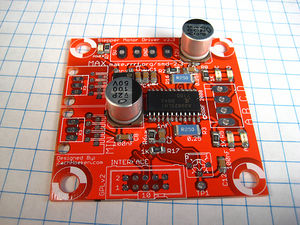
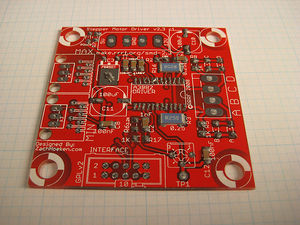
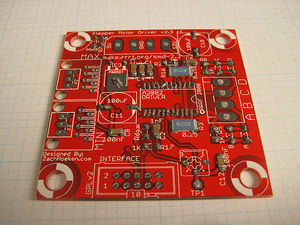
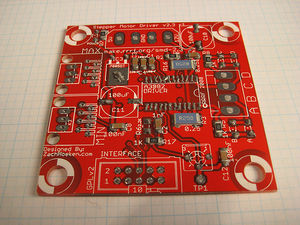
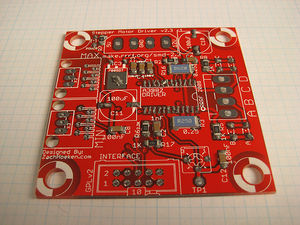
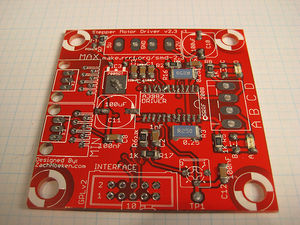
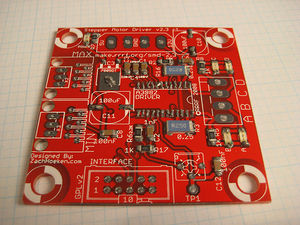
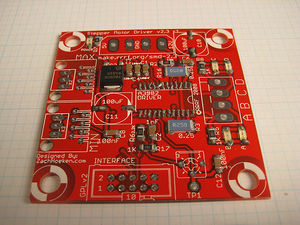
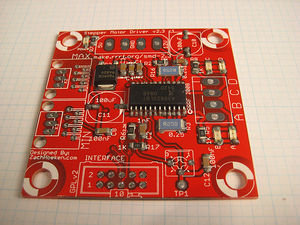
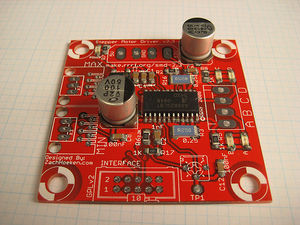
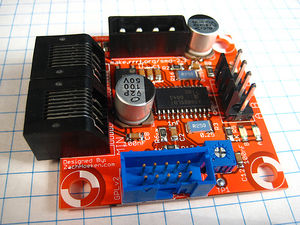
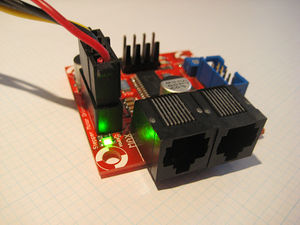
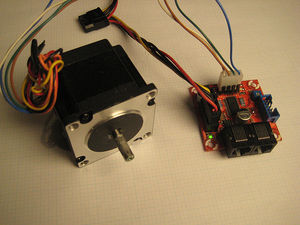
As with the RepRap Motherboard, this board is configured slightly differently for RepRap and MakerBot. The picture on the left shows the MakerBot configuration; on the right is the RepRap one. The differences are explained below.
This board allows you to control one stepper motor, as well as receive input from two limit switches. It is based around the Allegro A3982 Stepper Motor Driver with Translator. The A3982 is capable of driving up to 2A per coil. This board was designed to improve upon and replace the v1.x series of stepper drivers which are based upon the venerable L297/L298 stepper drivers. The A3982 offers a number of improvements:
- Only one chip to solder, as opposed to the two chip L297/L298 combo
- Superior DMOS technology (no heatsink required!)
- Built-in diodes and synchronous rectification (no large diode array!)
- Much cheaper and smaller than the L297/L298 (about $10 cheaper, total!)
The downside is that the board is mostly SMT, although we made a conscious design decision to stick with some of the largest and easiest to solder SMT components on the market. We used 1206 sized resistors and the A3982 itself is in a SOIC package. The board is very easy to put together, even for a beginner. Using a technique such as solder paste + hot plate, the board becomes ridiculously easy to solder. I found that it is much easier to solder SMT boards in this fashion than to solder pin after pin manually with through-hole components.
- You'll need a soldering toolkit to do most of this.
- You'll also need a SMT soldering toolkit to construct this board.
- Read our Electronics Fabrication Guide if you're new.
- More information on stepper motors used with the RepRap, see the Stepper Motor wiki page.
Get It!
Fully assembled
If you are making a RepRap and you buy the fully assembled board, you will have to desolder a couple of components from it. See below.
It is highly recommended to simply buy a fully-assembled board as it will rarely end up costing less (or at least not
enough to make it worth while).
Nah. It is ideologically more pure, or rather,
just much more fun to etch your own. --Sebastien Bailard 11:24, 22 November 2010 (UTC)
Raw Components
As of 02/03/2011 the parts listing referenced in item 2 above is not functioning. The component list can be obtained from the Mendel Assembly Data Sheet. --Jdownj 16:29, 3 February 2011 (UTC)
If you put the board together yourself you can configure it exactly as you want.
Files
You can download the release file from SourceForge that has a bunch of helpful files for this board. It contains:
- GERBER files for getting it manufactured
- PDF files of the schematic, copper layers, and silkscreen
- Eagle source files for modification
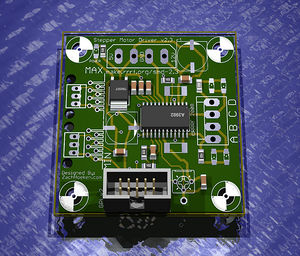
- 3D rendered image as well as POVRay scene file
- exerciser code to test your board.
If you just want to peek at the files easily, check them out on Thingiverse.
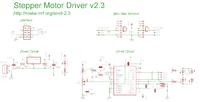
Schematic
Configuration
Current Adjustment
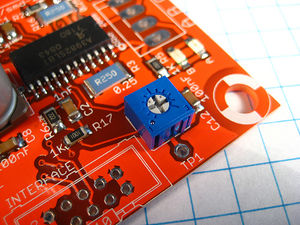
The board allows you to control the amount of current flowing through the coils by adjusting a trimpot located on the board next to the 'Interface' connector. Simply turn the trimpot one direction to get the minimum current, and the other direction to get maximum current. Generally this will be clockwise/counter clockwise, but it will be obvious which is which as you adjust the current with the motor running. Adjusting it to the lowest setting will cause the motor to stop turning. Generally, you will want to adjust this to the lowest setting you need that will still turn the motor. That will reduce power usage, and will prevent your motor from overheating.
Interface
IDC Connector
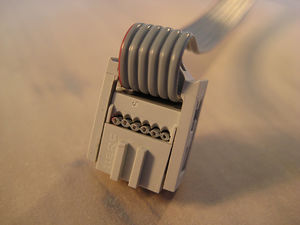
See our IDC cable construction page for info on how to make the IDC cables.
| Pin | Name | Function |
| 1 | N/C | Not Connected to anything |
| 2 | GND | Connect this to your uC to share a common ground. |
| 3 | Step | A pulse on this line will make the stepper motor advance one step in the desired direction. |
| 4 | Dir | If this pin is high, the motor will rotate forward, low it will rotate backwards. |
| 5 | !Enable | This pin allows you to turn the motor on and off. It is an inverted pin to avoid noise turning the driver on. By default it is disabled (pulled high). A high signal means off, low signal means on. |
| 6 | Min | This is the signal from the 'min' sensor. The definitions of high/low are determined by your opto endstop. |
| 7 | Max | This is the signal from the 'max' sensor. The definitions of high/low are determined by your opto endstop. |
| 8 | GND | Connect this to uC to share a common ground. |
| 9 | GND | Connect this to uC to share a common ground. |
| 10 | GND | Connect this to uC to share a common ground. |
Minimum and Maximum Connectors
Say it with me:
The Stepper Motor v2.3 design does not support ethernet!
The Stepper Motor v2.3 design does not support ethernet!
The Stepper Motor v2.3 design does not support ethernet!
What we are doing is hijacking a common and very cheap connector for our own purposes. RJ45 patch cables and jacks are ubiquitous, versatile, robust, and cheap. We've considered and rejected many other connector technologies (RJ11, 3.5mm audio cables, etc) but in the end, RJ45 is the best for our needs. If you have another source of high quality premade cables (that we have not already rejected) please bring it to our attention in the forums. Please do not complain about being forced to use these cables, as there is a simple on-board alternative (see below).
Below you will find a pin out table containing the pin-out information on a standard RJ45 patch cable.
| Pin | Color | Function |
| 4 and 5 | Blue and Blue/White | 5V supply |
| 6 | Green | Signal |
| 7 and 8 | Brown and Brown/White | Ground |
.100" Spaced Header
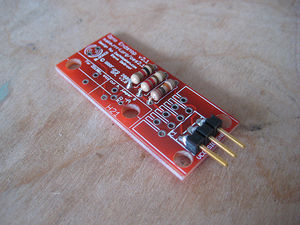
In order to maintain backwards compatibility, as well as giving the user the freedom to chose their desired connector technology, we have included a standard, .100" pitch connector footprint that you may populate as desired. The pins are clearly labeled, and you may wire it however you like. You can solder wires directly to the board, solder in right-angle headers, normal headers, or any other number of technologies. Its up to you as a user to decide. Shown here is an example of using a right-angle .100" spaced header.
Note: No, that's not the board we're talking about, but the footprint is exactly the same.
Output
The A3982 is rated for 2A per coil, so if your stepper motor drives more than that, you should adjust the chopper so that it delivers less current than that.
| Pin | Function |
| A | This is the 'positive' end of coil 1 |
| B | This is the 'negative' end of coil 1 |
| C | This is the 'positive' end of coil 2 |
| D | This is the 'negative' end of coil 2 |
We have a page with full info on wiring your stepper motor for use with this board.
Circuit Board
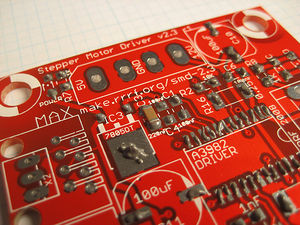
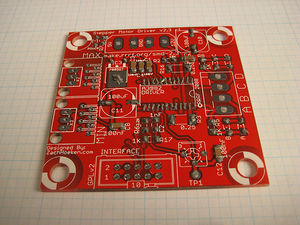
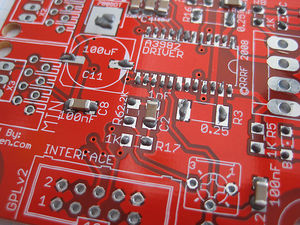
You can either buy this PCB from a supplier, or you can make your own. The image above shows the professionally manufactured PCB ready for soldering.
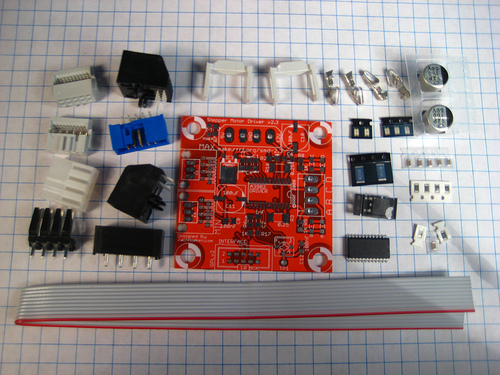
Components
Build Process
- You'll need a soldering toolkit to do most of this.
- You'll also need a SMT soldering toolkit to construct this board.
This board contains surface mount parts. Trust me when I tell you that it is really, really, really easy! The hardest part about SMT soldering is getting over your fear and staying calm. I've shown complete beginners how to do it, and they had no problems.
There are four parts to building a surface mount board using the Hotplate Reflow Technique:
- Apply solder paste to every exposed SMD pad
- Place each SMD component on its appropriate pad
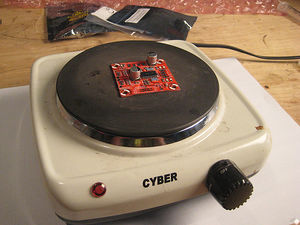
- Place populated board on a cold hotplate. Turn hotplate on. Board solders itself!
- Solder in remaining through hole components.
Apply Solder Paste
Okay, so this part is pretty easy: get your solder paste syringe and start applying solder paste to every SMD pad. I like to use a squeeze/tap method. That is, I squeeze a bit of solder paste out, then tap the place where it goes, rinse and repeat for every exposed pad. Do not put solder paste on pads with holes in them. You'll solder those in step #4.
Place Components
This is probably the trickiest part. Its easiest with tweezers and some sort of magnification. A bit of patience and you'll get it no problem. Since nothing gets soldered yet, you can easily try and try again if you mess up.
C3 - .22uF Ceramic Capacitor
This capacitors should be marked with a red or black pen to differentiate them from the other capacitors. You can also tell the difference based on height and color. It is the same color as the 100nF capacitors, but it is taller. It can be placed in any orientation.
C1, C4, C6, C8, C12 - 100nF Ceramic Capacitor
These capacitors can be placed in any orientation.
C2 - 1nF Ceramic Capacitor
This capacitor can be placed in any orientation.
R3, R16 - 0.25 ohm resistors
These resistors can be placed in any orientation.
R2 - 10K ohm resistor
This resistor can be placed in any orientation.
R5, R7, R8, R17 - 1K ohm resistor
These resistors can be placed in any orientation.
R6 - 2.2K ohm resistor
This resistor can be placed in any orientation.
Red LEDs - A/D
These LEDs need to be placed in the right orientation. The green marking on one side needs to match up with the white dot on the silkscreen.
Green LEDs - B/C/Power
These LEDs need to be placed in the right orientation. The green marking on one side needs to match up with the white dot on the silkscreen.
IC3 - 7805 - 5V regulator
The 7805 really only fits one way. Its easiest to grab it by the middle half-pin that sticks out.
A3982 - Stepper Driver
This is the guy that does the heavy lifting. It might be tricky to grab with tweezers, but you can do it. Once you have it placed, then gently nudge it into alignment (if its not already perfect).
C10, C11 - 100uF electrolytic capacitors
These must match up with the silkscreen. One edge of the capacitor has a black line on it. Match this up with the corresponding white line on the silkscreen.
Hot Plate Reflow
I prefer to start with the hotplate off. I burned a few boards one time by putting them on when it was already hot. Instead, carefully place the board on the cold hotplate, thn turn the heat up to a low temperature. Wait a few minutes for things to get cooking, and you'll see the small components begin to 'pop' as the solder goes molten. Keep an eye out for components that stick together. If that happens, simply nudge them apart with tweezers or other non-finger device. Wait until you see the largest component leads go silver (usually the big capacitors). If it starts to smell really bad, kill the power and solder the rest by hand. Sometimes the capacitors wont fully solder, so just hit the exposed pad with a soldering iron after the fact.
Once they have soldered, simply turn the hotplate off and let it cool down.
For detailed instructions on how to do hotplate reflow soldering, please see the Hotplate Reflow Technique guide.
Solder Through Hole Components
This board has a few extra non-SMT components. Now that you're a SMT pro, it will be easy. Here they are, step by step:
10K Trimpot
This has 3 leads and will only fit in one direction. Solder it into place and trim the leads.
Power Connector
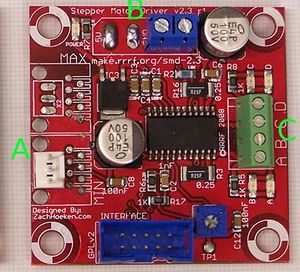
The top picture shows the RepRap configuration, the bottom the MakerBot one.
For RepRap simply fit a double 5.08mm screw connector at B. The board only needs +12v (right) and ground (towards the centre) connections.
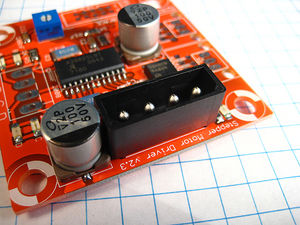
Only fit the Molex (like the inside of a PC) connector for MakerBot. The notches on the inside of the connector match up with the notches on the silkscreen. Make sure you insert it properly. It helps if you solder it flush to the board as well.
IDC Header
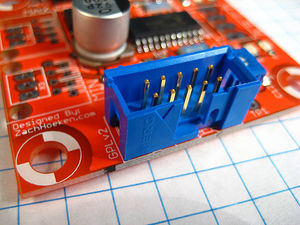
There is a notch on the part that lines up with the 'notch' on the silkscreen. It should face the outside of the board. Make sure to solder it in the proper orientation.
Stepper Header
The top picture shows the RepRap configuration, the bottom the MakerBot one.
For RepRap fit a 4-way 3.81mm screw connector at C.
This is the connector for the stepper motor. Put the 'locking ramps' towards the inside of the board. Make sure to solder it in straight.
Max and min connectors
RepRap only need the MIN connector. Solder in a 3-pin header at A as shown.
NOT FOR ETHERNET!
These are the Rj45 connectors for the MakerBot minimum / maximum switches. The connectors snap into place and stay put for easy soldering. Do them both at the same time. If you would rather use pin strip, then there are alternative holes for two 3-way lengths (see RepRap configuration above).
IDC Cable
See our IDC cable construction page for simple instructions for how to build the IDC cable.
Test Your Board
If the board is intended for a RepRap machine follow this link for the testing procedure.
The sections immediately below show how to test this board for MakerBot.
Connect Power to Board
Always turn your power supply off before plugging it in. It won't fry things most of the time... but all it takes is once to damage things.
Simply take your AT power supply and plug a power connector into the board, and turn it on. The green LED next to the connector should light up. If it doesn't, check its polarity and bust out your multimeter!
Turn your power supply off while you plug boards together!
Attach a Stepper Motor
You'll need a stepper motor to drive at this point. You'll want to make sure you've wired it up correctly.
Make sure the power to your driver board is off and insert the connector. Reset the Arduino board and turn the power on for your power supply. After a few seconds, your stepper motor should spring to life. When it does, do a little dance because you've just cleared a hurdle in making a robot that can do some amazing things.
You probably want to optimize for minimum power consumption, which stops the chip from getting too hot and cuts down on noise. Adjust the trim potentiometer power all the way anticlockwise, which basically cuts off the drive current. Now tweak it clockwise until the motor performs as desired reliably plus a tiny bit extra. There, done. If you want to get fancy, there's a test point just below the trimpot which you can measure the voltage on. If you know how to do that properly, please write up the process for the rest of us.
Attach your opto endstops
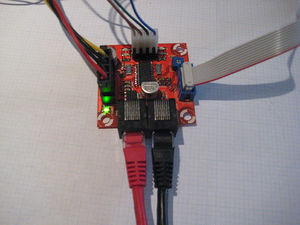
Using a short Cat5 patch cable, you just wire up the endstops to the stepper motor driver. Plug and play, baby!
Give it a test drive.
Connect Board to Sanguino
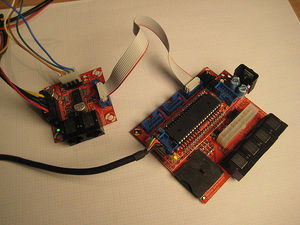
If you have a RepRap Motherboard, simply plug it into the X axis header! Otherwise hook it up as described below:
| Function | Stepper Pin | Sanguino Pin |
| STEP | 3 | 15 |
| DIR | 4 | 18 |
| ENABLE | 5 | 19 |
| MIN | 6 | 20 |
| MAX | 7 | 21 |
| GND | 2 | Ground |
Upload Firmware to Arduino
Now, feel free to turn on the power to your power supply. Next, open the Arduino software, copy the code linked below into your sketch and upload it. After the firmware has compiled and uploaded, the Sanguino will restart and the exerciser will begin shortly. You should hear a familiar tune. Proceed to celebrate. The code below is designed for the RepRap Motherboard v1.1/v1.2 and will play the same exact tune on the X, Y, and Z steppers at the same time. You can test all 3 boards at once, as well as test the X/Y/Z headers on the Motherboard.
The test firmware is located at: http://reprap.svn.sourceforge.net/viewvc/reprap/trunk/old_files/firmware/Sanguino/Sanguino3G/testers/imperial_stepper/imperial_stepper.pde
The basic way the motor exerciser works is this:
- The stepper will take some steps in the forward direction
- The stepper will take some steps in the reverse direction
- We vary the stepping frequency to play a little song.
- If you trigger the min or max endstops (depending on direction) it will abort that direction and switch directions.
Even if you don't have a stepper motor, you can easily visually verify that the stepper motor driver is working after you do this, as the LED's next to the stepper driver will both light up and will flicker. This is because the LED's are switching from on to off very rapidly. If this is happening, then congratulations: your stepper driver board is a success!
Troubleshooting
- First, check to see that you have supplied power to the board.
- If that doesn't work, check that you have the board wired up correctly to the Arduino.
- If the motor does not move at all, then check your circuit for shorts and dry joints.
- If your board checks OK and you have power lights, tweak the trim potentiometer briefly to the right. Any improvement?
- If the motor does move, but is very jerky, then you have miswired the stepper to the board. Simply reverse the polarity on one coil to make it function properly. (eg. switch A with B)
Cooling
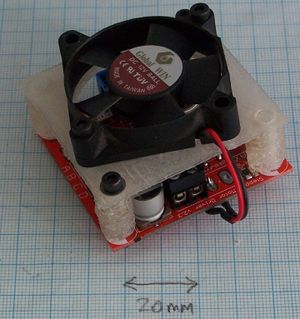
This device runs fine with most steppers. But if you run it at its highest current (near to the maximum of 2A) the driver chip will get pretty hot. There's a fan mount design on Thingiverse to allow you to attach a 12v CPU fan to this board to cool it.
History
Changelog
- Changed a few capacitor footprints to fit better.
- Made them red. ;)
- 2.3-r1: fixed a bug that prevented the max endstop from working properly.
Previous Versions
- A slight tweak to the Stepper Motor Driver v2.2
- A redesign of the Stepper Motor Driver v2.1
- Which was a complete redesign of the Stepper Motor Driver v2.0
- Which was an even more complete redesign of the old Stepper Motor Driver v1.2
