User:Drewgolterman/Projects
Contents
- 1 Projects and other Activities
- 1.1 123D Catch Scan and Print: Boot
- 1.2 Majora's Mask: Printable Necklace
- 1.3 Printed Joints for Nate Myer's DeltaBot Printer
- 1.4 Solar Panel Support for ESW (Engineers for a Sustainable World)
- 1.5 Additional Instructions for 123D Catch (To be copied and pasted to the scanning page)
- 1.6 Scanning Comparison (To be Copied to the RepRap Scanning Page)
Projects and other Activities
123D Catch Scan and Print: Boot
I wrote about how I started this project under "Fun Blog 1" on my blog page. In this blog, I described how I used the app 123D Catch to create a 3D model of a boot of mine.
After completing my work for this blog, I then continued to edit this model through Meshmixer. This is another free Autodesk program, which I downloaded from this link.
After downloading this to my computer, I saved my 3D model from Fun Blog 1 as an object file through 123D Catch. After doing this, I opened this object file in Meshmixer.
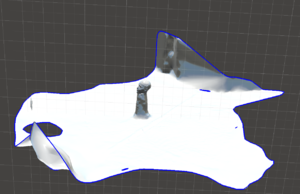
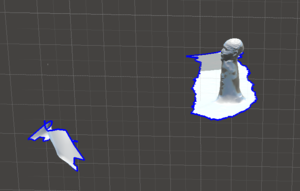
From this point, I then had to clean up the model by removing all of the surface area that can be seen in the first thumbnail picture here. Using commands in Meshmixer, I removed all of the excess surface area, closed open surfaces and made the object solid. The resulting model can be seen in the next thumbnail picture to the left.
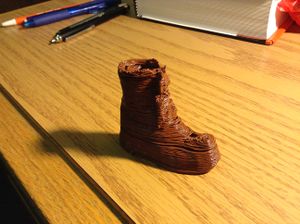
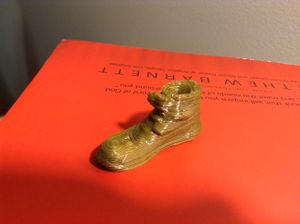
From Meshmixer, I was then able to export this object model as an STL file. And after exporting this STL file, I scaled it appropriately in ReplicatorG, sliced it in slicer and then printed it on my group's printer, Big Red. The next picture below is an image that was taken from the ReplicatorG display. The last picture is a picture of the actual print itself.
If you look at the picture of the actual print, you will see that some of the detail in the model is not shown. The reason for this is not because of failure in making the model, but in printing the model. Our printer has been experiencing some trouble with its z-axis, and I was most of the way through my print before I realized that something was wrong with the printer.
However, regardless of this, I was able to successfully create a printable file from my 3D model. In the future, I may print this file again on a different printer to show the minor detail in the model. In the end, I spent about 3 hours trying to figure out how to create a printable STL file, and then I spent another hour printing the model itself.
Updated Print Quest (3/20/2014)
Majora's Mask: Printable Necklace
For this project, I found an interesting upload on Thingiverse and decided to print it.
I found a necklace piece that is in the shape of Majora's Mask, from The Legend of Zelda: Majora's Mask. The Thingiverse article can be accessed here. And a picture of this thing is below.
The actual printed parts can be seen in the pictures below. The thing was printed as two separate pieces (front and back) and the assembled with krazy glue. I then attached them to a necklace with a zip tie. Overall, I probably spent about 45 minutes printing these and assembling them.
Printed Joints for Nate Myer's DeltaBot Printer
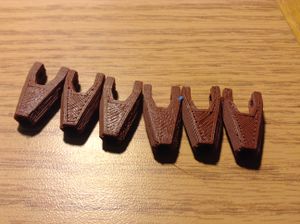
I printed these joint's for Nate's new 3D Printer. Getting the gcode files took about 10 or 15 minutes and printing them took about 45 minutes.
Solar Panel Support for ESW (Engineers for a Sustainable World)
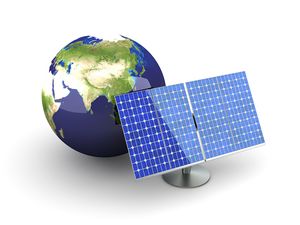
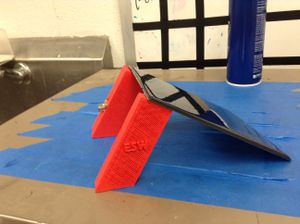
I am the project manager for the Penn State chapter of ESW. ESW is currently investing in a fundraiser to create portable solar cell-phone chargers and sell them. The Solar Panels themselves look like the picture below and they have a simple USB port attached to them for the user to charge their portable device. In order to create something that would hold the electrical components and give the solar panel and angle of about 30 to 40 degrees, I decided that I would like to 3D print a design to attach to the back of these solar panels.
Tony Armlin created the general design for this and I made some dimensional adjustments to his design. The design was meant to consists of three pieces, two pieces that would be printed and fitted together around the USB port to contain the wires. The other part would serve only as a support for the other side.
My hope was to then put these pieces up on Printrverse and then allow people to print these out as many times as they need to meet their print service requirements, because ESW would be more than willing to take as many of these as people wish to print. The final design for the support can been in the two pictures below.
The final price has not been determined yet, but they will cost approximately ten dollars. So if anyone who is viewing this page is interested in buying one of these, just shoot met an email at [email protected].
Additional Instructions for 123D Catch (To be copied and pasted to the scanning page)
123D Catch is a computer program, produced by AutoDesk that allows the user to take 20-70 pictures of a single object, upload them to an AutoDesk "cloud" and have those photo processed through an algorithm that produces a 3D model. After the model is processed, the "scene" which you took photos of can be downloaded in the form of a 3D Catch file (AutoDesk's own file type), an object file or an STL. However, if you download the file as an STL, you will have a lot of trouble modifying the surroundings of the object that you were focusing on. However, I have made a set of brief instructions to allow anyone who wishes to utilize the program.
For starters, I included an introductory video below to give you a clear idea of 123D Catch's purpose.
Now, here's the process that you must follow.
1. Create an free AutoDesk account. This can be done in this Link.
2. Obtain a device to take 20 to 70 digital photos (I personally recommend take 30 to 40 photos of most small objects though).
3. Choose an object to take photographs of.
4. Take photographs by focusing your select number of photographs around the center of the selected object. Although it is not necessary, AutoDesk's instructions recommend taking these photographs in sequential order and in small angle increments from one photograph to the next. An example of how to do this can be viewed in the following video.
5. After taking an extensive set of photographs, go to this site and Sign in under the username and password that you created in Step 1.
6. At the top of the page, select the tabe "Apps."
7. From this tab, select "Launch 123D Catch Online."
8. Click "Start New Project."
9. Click "Select Photos" and upload the photographs that you previously took with your portable device in Step 4 and follow the instructions for uploading these.
10. Select "Process Capture."
11. After hitting process capture, depending on how many photographs you took, it may take 20 to 60 minutes for 123D Catch Online to process these photographs. You will automatically be brought to a gallery, where you can continue to view the progress of your capture, but if you feel like exiting out of this page, you can do so and return to your capture by going to "My Profile" and the tab titled "Me" in the upper right hand corner (This is only visible on the website when you are signed in) and then clicking on "Projects" under your profile. An example of this set-up can been seen on my own profile page here.
12. When the analysis of your capture is complete, as stated before, you will be able to download the file as an STL, object file or 123D Catch file. I would recommend downloading this as an object file. Object files are relatively easy to edit and make printable.
13. Download a program that you are able to edit object files with. There are many that you could use, but for this example, I will use Meshmixer, which you can download for free here.
14. Although you can open an object file directly in meshmixer, you may want to scale your photoscene. To do this, you must open the 123D catch file in the computer software versions of 123D Catch, which can be downloaded here. After doing so, you can then set a dimensional scale for a known distance in your photoscene. The reference numbers that you send in 123D Catch are unitless, but when you transfer these files to another program such as meshmixer, you can set units to these numbers there. Rather than trying to describe setting reference distances here, I decided to include the follow Link 1 and Link 2 to illustrate how to do this.
15. After this, you can then export your 123D Catch file as an object file type, which can then be opened in another program such as meshmixer.
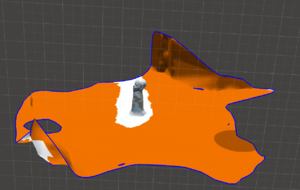
16. When in meshmixer, you can start editing your photoscene by deleting all of the extraneous surfaces, which is done by using the select button on left side bar. This will then give you several options for how to select unwanted areas. After doing so, you can then press "x" on your keyboard to delete these surfaces until you are only left with your target surfaces. This is illustrated in the pictures below.
17. After this, select the "Analysis" button on the left column and the select "Inspector." Although it may not do it in a neat way, it will seal up the open surfaces.
18. Edit the surfaces using the various tools in Meshmixer. This can be done by using options under the sculpt button and other options. Different tools can be used to do things such as smoothing surfaces and adding more realistic touches to bland surfaces. A summary of these tools can be found in the following Link. It would be excessive to go over all of these tools, but that link should serve as a good resource if you have a question about how to do something. However, the step that I will mention in particular is plane cut, because this tool is necessary to create a flat surface for you to print your model. The plane cut command can be found under the "Edit" button and it can be used in the same manner as portrayed by this video.
19. Now use the "Align" command under "Edit" to align the x, y or z axis with a certain feature (The flat surface that you created by using Plane Cut in Step 18).
20. After aligning your model, export your file as an STL file by going to "File," selecting "Export" and then selecting "STL (Binary)."
Congratulations! You successfully created a 3D STL from AutoDesk 123D Catch that is now ready to be oriented in Replicator G and sliced in Slic3r!
Scanning Comparison (To be Copied to the RepRap Scanning Page)
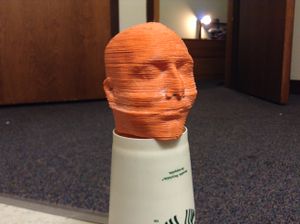
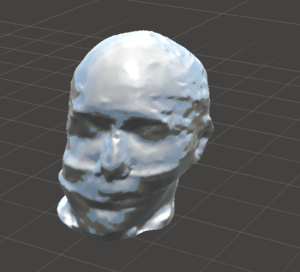
In order to compare the strengths and limitations of the different forms of 3D modeling, one object (The slanty printed head shown in the picture below) was scanned using three different methods to demonstrate how each of them works with the same object.
The first method that we used was modeling the head through AutoCAD 123D, which uses photograph synthesis to analyze photographic scenes. The photos that are used in the synthesis typically have to be taken in a way that their focus is facing the center of the object of focus. For some programs, its helps to take these photographs sequentially. Although there are several programs other than 123D Catch that analyze photographs through the same process, however for this example 123D Catch was used.


