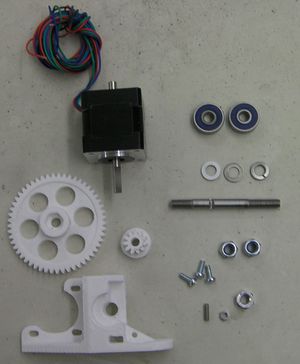
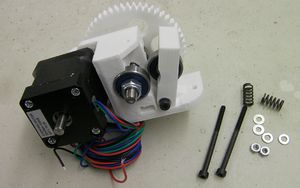
Template:RepRapPro extruder drive assembly
Contents
Tools
- 10mm (M6) spanner
- Adjustable spanner
- Allen key
- Phillips screwdriver
- Tweezers
- 2mm drill
Step 1: Motor and hobbed stud assembly
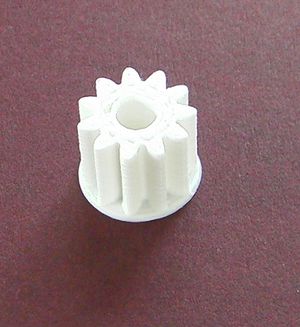
There is an alternate design to the small gear that needs a grub screw shown in the list above:。
This needs no screw and is just a push fit onto the motor's shaft.
If you are building a Mendel drop the countersunk screw through the mounting hole in angled section on the printed block under where the motor will go - head towards the motor. (Huxley does not need this screw.) You won't be able to fit the screw after you have attached the motor.
Use the 8mm M3 screws to attach the motor to the block. Put it as far from the centre as it will go in its slots. Don't do the screws up tight. The motor wires come out towards the bottom of the picture:
Push the M6 nut (plain, not one of the nylocks) into the hexagonal recess in the big gear.
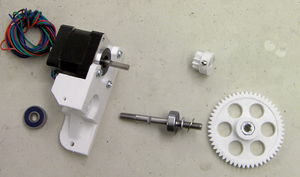
Put a bearing on the hobbed 6mm stud (note the relative positions of the short and long threads), followed by two plain M6 washers, followed by the gear with its nut. The nut should face away from the bearing.
You are going to adjust things so the gears mesh.
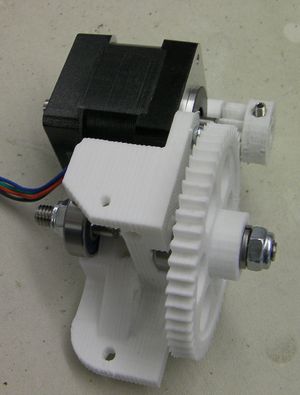
If you have the grub-screw gear, put the M3 nut into the slot in the small gear and run the M3 set screw through it. The small gear may need reaming out by hand with a 5mm bit. Some motors have a flat on the shaft that runs all the way to the motor case. If yours is one of these, put the small gear on the shaft with its hub towards the motor. Then put the bearing in its hole so the big gear meshes with the small one. If the flat stops short of the case, put the bearing and the big gear on first, then put the small gear on the other way round (as in the picture below).
If you have the push-fit small gear, push that onto the motor shaft with its flange towards the motor's body.
Take things apart and put them together again, adjusting the motor's position in its slots, until the gears mesh nicely.
When you are happy tighten all the motor screws, reassemble everything else, and tighten the small-gear set screw. Make sure that the small gear hub is not rubbing on the big gear - there should be about half a millimetre clearance between them.
Put the other bearing in on the other side of the block.
Put the split M6 washer on the side with the big gear so it bears on the gear's nut, then put M6 nylock nuts on both ends.
Tighten the nylocks, while checking the hobbing against the 2mm hole down through the block where the filament will run. The hobbing should be centred on this. Undo or do up the big gear with its nut, and the two nylocks until this is so.
Don't tighten the nylocks so far that the gears, stud, and motor can't rotate freely.
Step 2: Idler
| RP parts | Quantity | 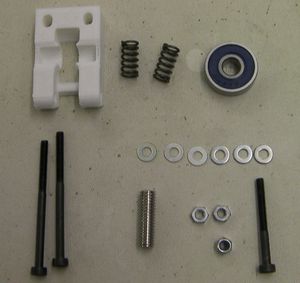
|

|
1 | |
| Hardware | Quantity | |
| M3x30mm screw | 1 | |
| 626 bearing | 1 | |
| M3x45 screws | 2 | |
| M6x20mm socket set screw | 1 | |
| M3 washers | 6 | |
| M3 full nuts | 2 | |
| M3 nylock nut | 1 | |
| Springs | 2 |
Put the bearing on the M6 set screw and drop it into the slot on the printed part. Check that it rotates freely. If it does not, use a blade to remove a little material where it is binding.
Fit the idler to the drive with the 30mm M3 screw, two washers - one each side - and the nylock nut. Don't over-tighten it - it must move freely. The photo below is wrong - you want the head of the screw on the gear side and the nut facing you in the picture. You will find that if you rotate the gear you can get the screw through the holes in it. This makes the idler much easier to remove when it is mounted on the RepRap machine.
Put the springs on the long screws. Sandwich each spring between a pair of washers.
Put the screws through as shown. If you drop the nuts into their holes with tweezers first, then hold a screwdriver blade over them while you tighten the screws this is less fiddly.
第三步: Bowden管
| RP parts | Quantity | 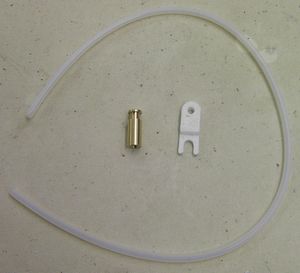 Don't confuse the PTFE tube (shown) with the shorter translucent heatshrink also supplied with the kit. |
|
1 | |
| Hardware | Quantity | |
| 开槽黄铜保持夹 | 1 | |
| PTFE 管 | 1 |
使用锋利的刀改进管两端,使其更加平整。
如果你的套件中提供的是4毫米直径的PTFE管,那么使用削铅笔的制作一个小椎体。不要切除太多,PTFE本身很软。这个小椎体使得更容易穿入。
把管子旋入黄铜保持夹,从另一端看进去(放大镜是有用的),当它到内部螺纹的低端时停止。
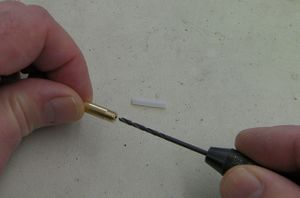
旋入管子将轻微减少它的内部直径。在黄铜末端用手轻轻旋入2mm钻孔,将使管变细。如果你有一个小的手动卡盘将更加简单。图中所示为另一个黄铜连接头,你将在下一步中安装,不过它们使用的是同样的方法。
从自由端往下推一小段距离,大约1.75毫米,以清除PTFE的切屑。
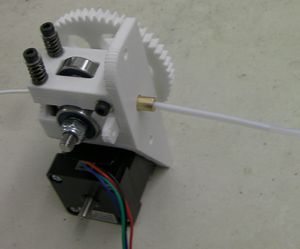
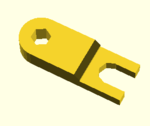
把黄铜保持架装入设备中使用打印的连接器固定。连接器的窄的一边向右,如图所示:
注意: bowden必须固定在洞的中心,如果安装的直径比挤出机的洞要小一些,在洞中铺一些胶带,然后再安装。
插入一小段1.75毫米碎屑,加压螺钉应该变得足够牢固,当碎片进入挤出机,你不能用手取出。(握住大齿轮,挡泥测试时)。用手调节仪器,碎屑应慢慢插入,管也是如此。
第四步:安装
| |
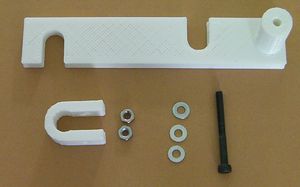
| 数量 | 物品 |
| 打印的框架 | 1 |
| 打印的U形夹 | 1 |
| M3 垫圈 | 3 |
| M3 nuts | 2 |
| M3 x 35mm 螺丝 | 1 |
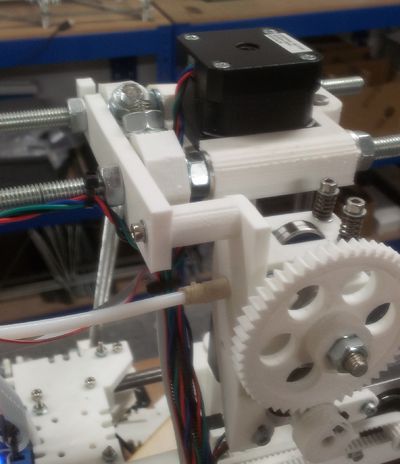
使用顶部连接棒上的螺丝安装框架,从机器前方看时,它朝向机器的左侧,在后侧有支撑活塞。
这是机器背部的试图。
使用螺母和两个垫圈安装框架。
在支架上固定U形夹为了匹配沉头螺钉(你在安装电机之前固定的)。
使用一个螺母和垫圈安装到夹子上,你可能会发现你需要用尖嘴钳握住螺丝的自由端,才能旋紧螺母。它的头部是不可行的。
最后,使用尖嘴钳,慢慢移除连接器。取出PTFE管和它里面的黄铜,你将会分别使用到这些在下一步…
