File list
This special page shows all uploaded files.
| Date | Name | Thumbnail | Size | Description | Versions |
|---|---|---|---|---|---|
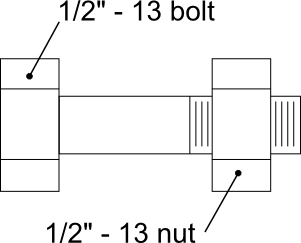
| 13:50, 9 November 2013 | Nut and bolt drawing.png (file) |  |
7 KB | 1 | |
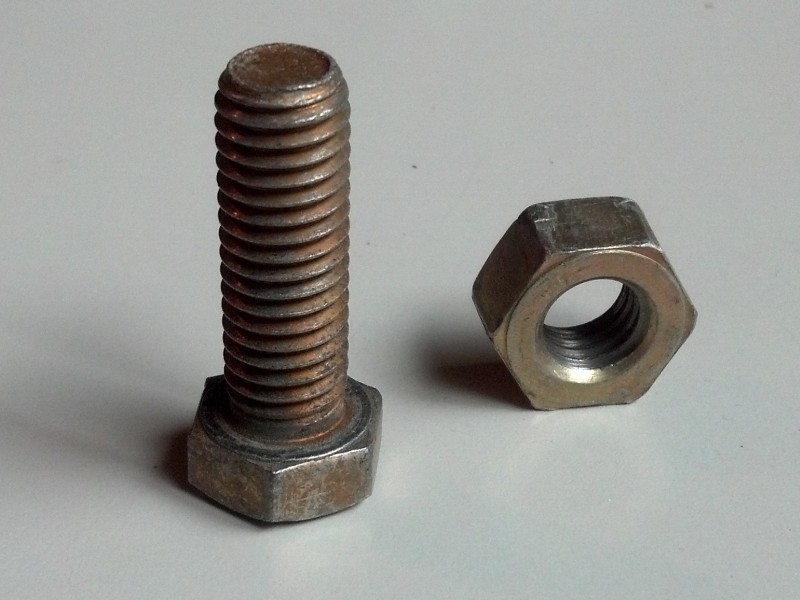
| 13:49, 9 November 2013 | Nut and bolt unassembled.jpg (file) |  |
79 KB | 1 | |
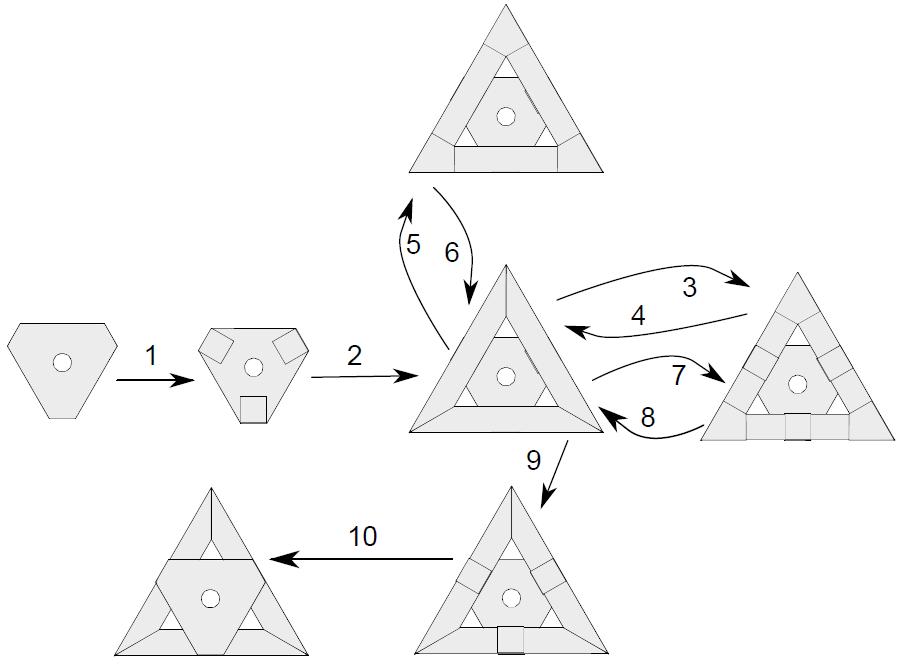
| 18:00, 21 January 2011 | PaperInstructions.JPG (file) |  |
41 KB | order of gluing operations for assembling a compliant mechanism | 1 |
| 01:26, 15 September 2013 | PiezoPlates2.jpg (file) |  |
69 KB | 1 | |
| 01:07, 15 September 2013 | Piezo Circuit.PNG (file) |  |
488 KB | 1 | |
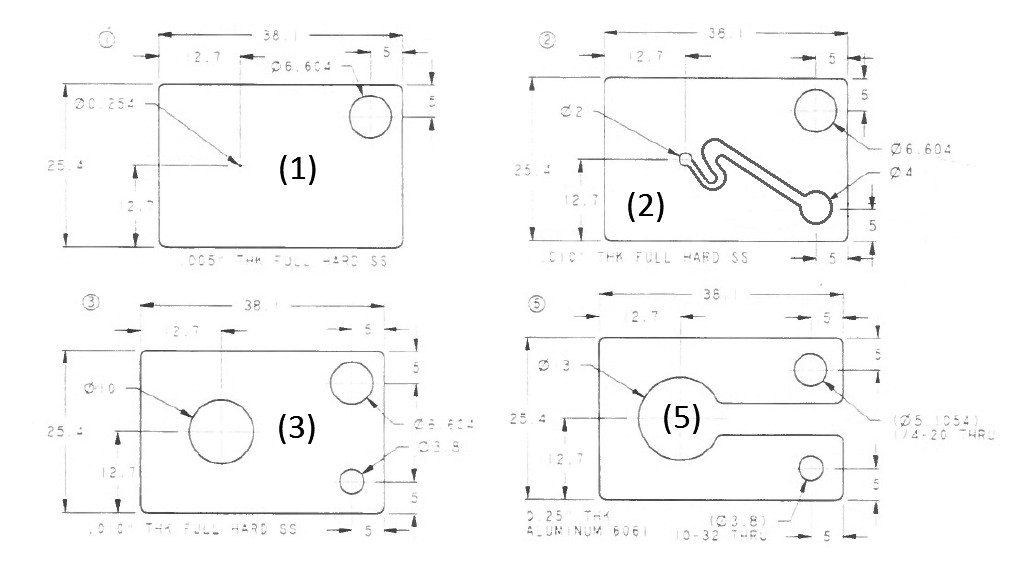
| 23:23, 14 September 2013 | Piezo Plates.pdf (file) | 282 KB | 1 | ||
| 00:24, 15 September 2013 | Piezo Testing 01.jpg (file) |  |
68 KB | 1 | |
| 14:28, 22 January 2011 | PlateAndCup.jpg (file) |  |
214 KB | 1 | |
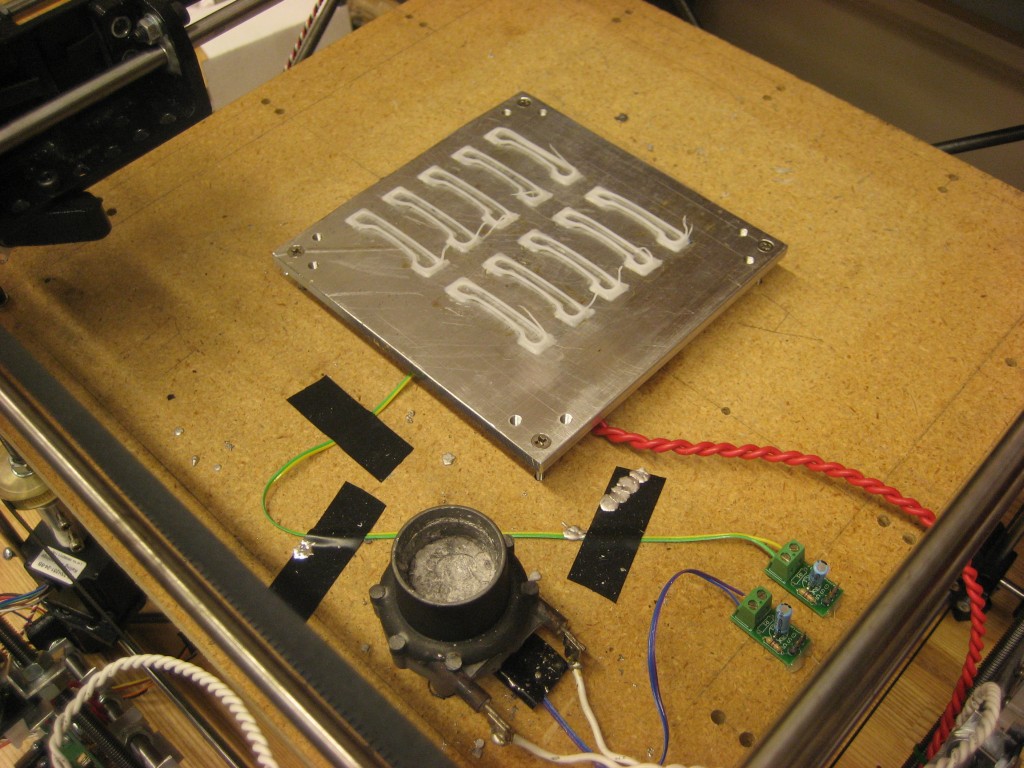
| 14:28, 22 January 2011 | PlateHeaters.jpg (file) |  |
196 KB | 1 | |
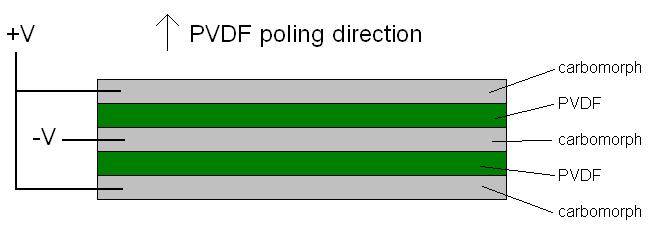
| 18:05, 10 May 2013 | Printed PVDF bimorph actuator.JPG (file) |  |
18 KB | 1 | |
| 18:12, 14 December 2014 | Prusa-i3-build-files-screencap-dec-14-2014.JPG (file) |  |
172 KB | 1 | |
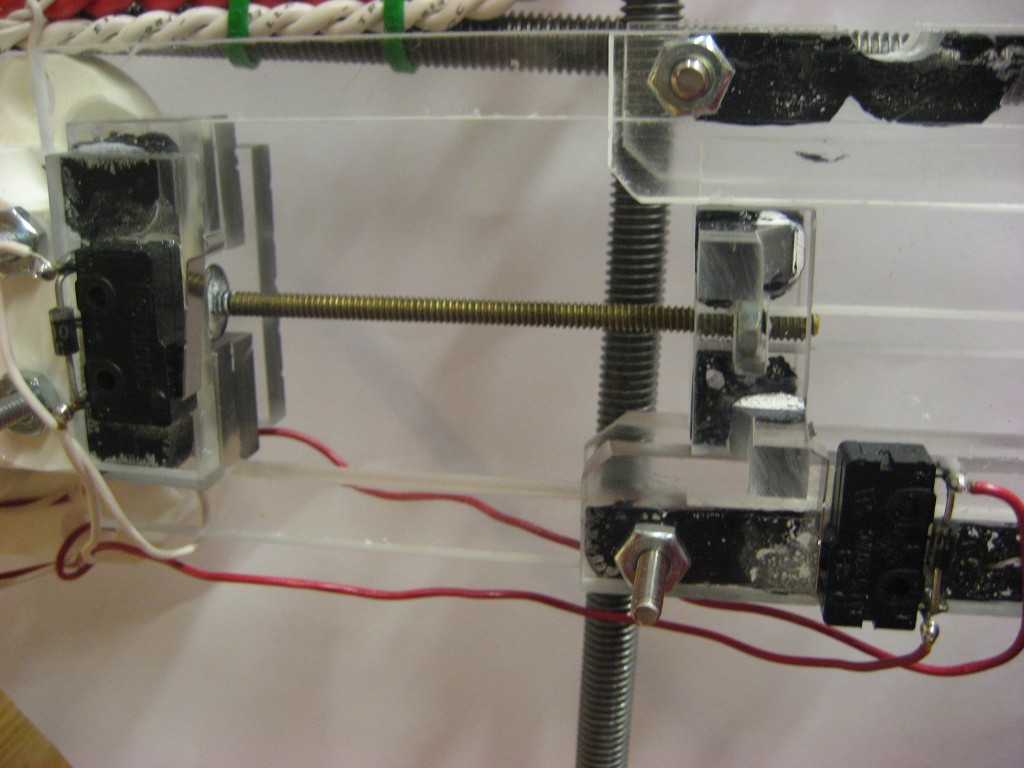
| 14:28, 22 January 2011 | PumpSwitches.jpg (file) |  |
142 KB | 1 | |
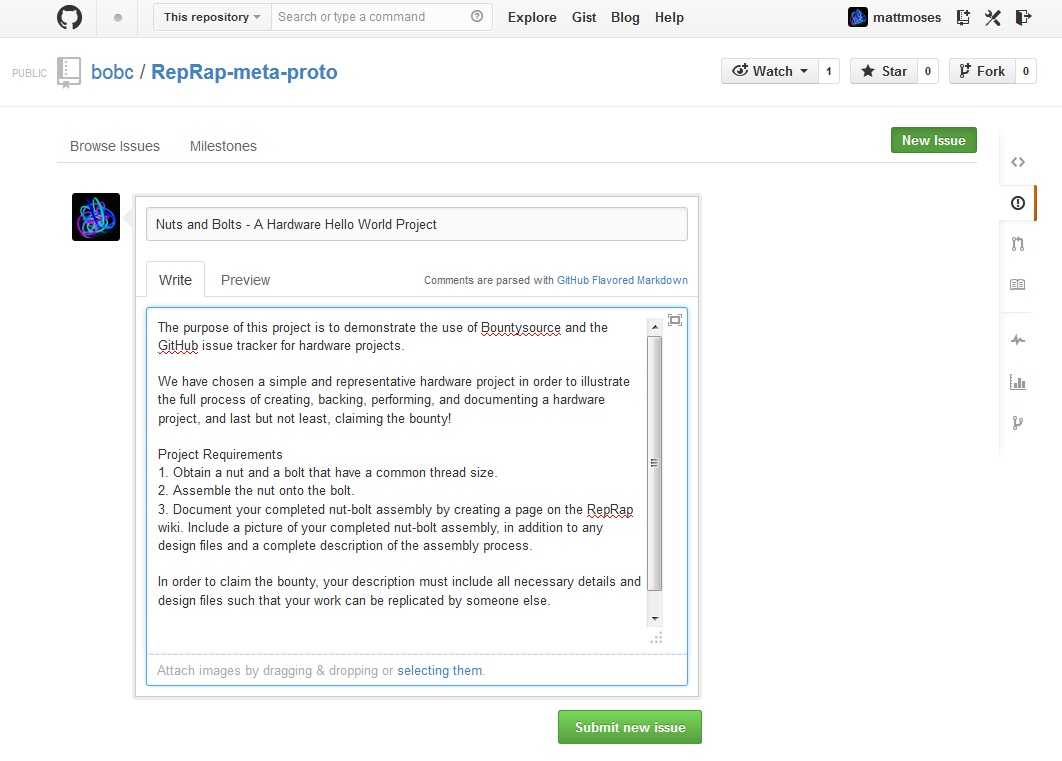
| 01:10, 10 November 2013 | ReprapBounty 01.jpg (file) |  |
159 KB | 1 | |
| 02:03, 10 November 2013 | ReprapBounty 02.jpg (file) | 27 KB | 1 | ||
| 02:06, 10 November 2013 | ReprapBounty 03.jpg (file) |  |
81 KB | 1 | |
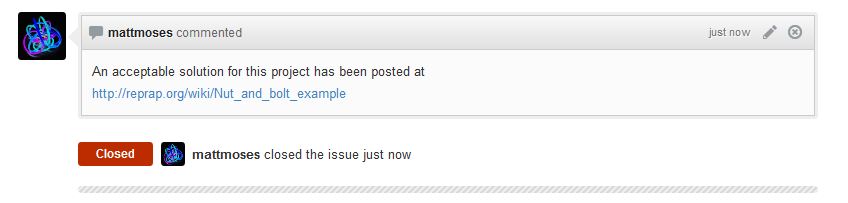
| 02:08, 10 November 2013 | ReprapBounty 06.jpg (file) |  |
97 KB | 1 | |
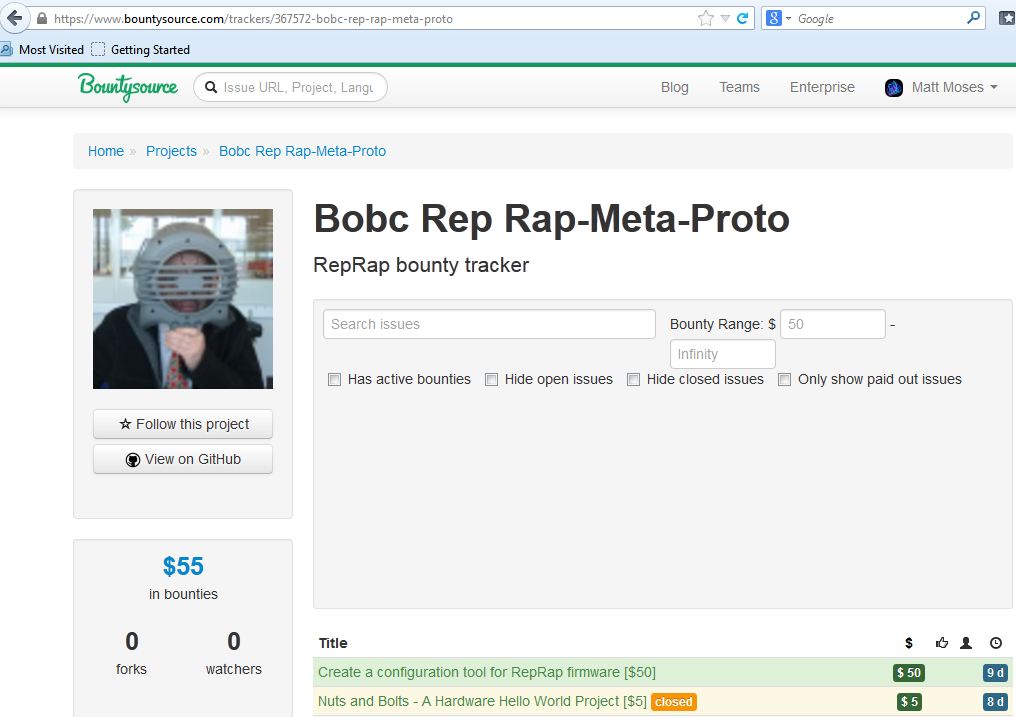
| 02:10, 10 November 2013 | ReprapBounty 07.jpg (file) |  |
88 KB | 1 | |
| 02:12, 10 November 2013 | ReprapBounty 10.jpg (file) |  |
51 KB | 1 | |
| 01:15, 10 November 2013 | ReprapBounty 11.jpg (file) |  |
133 KB | 1 | |
| 01:06, 10 November 2013 | ReprapBounty 12.jpg (file) |  |
171 KB | 1 | |
| 01:32, 10 November 2013 | ReprapBounty 13.jpg (file) |  |
51 KB | 1 | |
| 22:49, 1 August 2012 | Results01.jpg (file) |  |
210 KB | 1 | |
| 22:49, 1 August 2012 | Results02.jpg (file) |  |
303 KB | 1 | |
| 18:24, 14 December 2014 | Rostock-mini-pro-build-files-dec-14-2014.JPG (file) |  |
157 KB | 1 | |
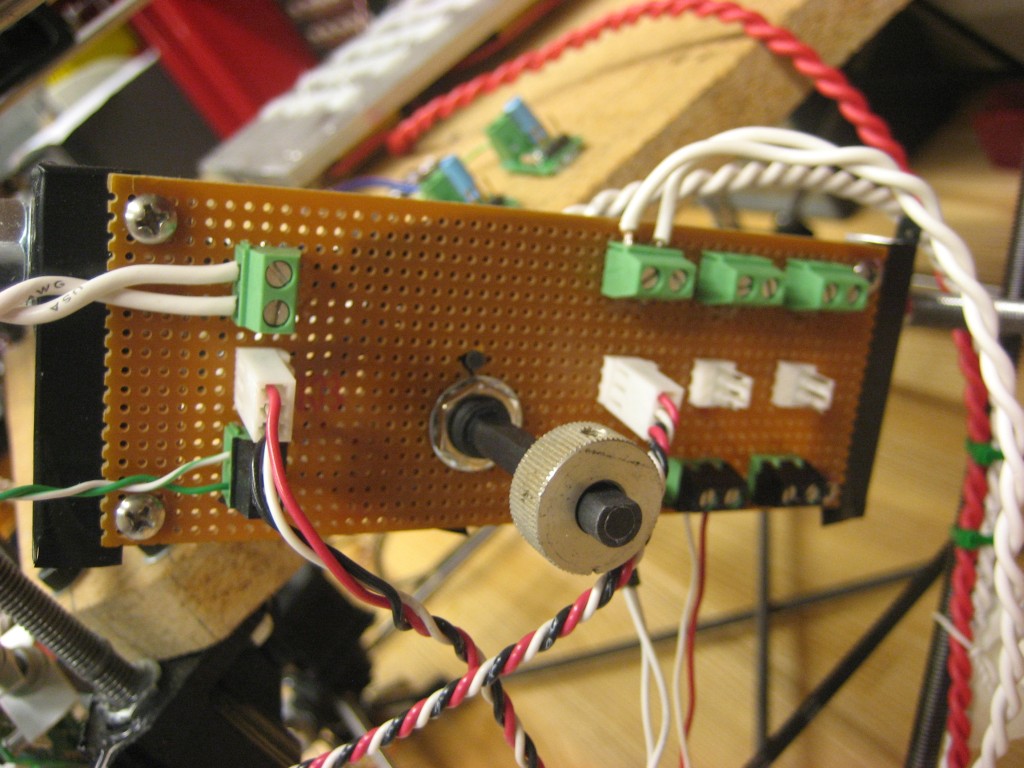
| 14:28, 22 January 2011 | Rotary switch.jpg (file) |  |
179 KB | 1 | |
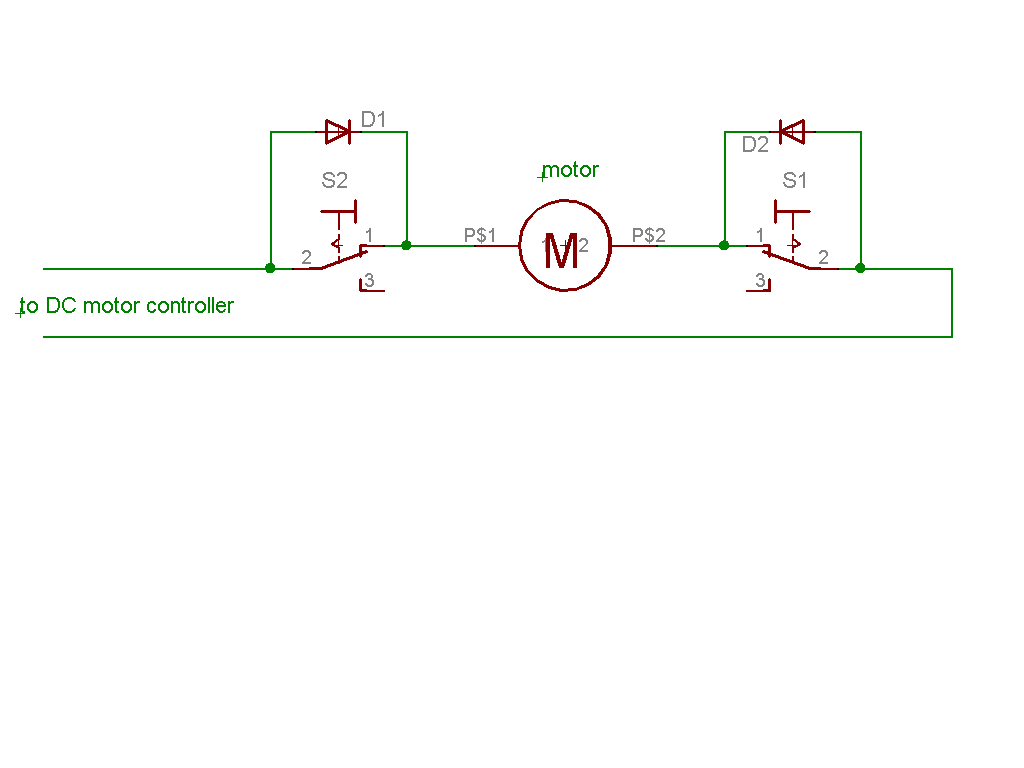
| 14:28, 22 January 2011 | Switch circuit.png (file) |  |
8 KB | 1 | |
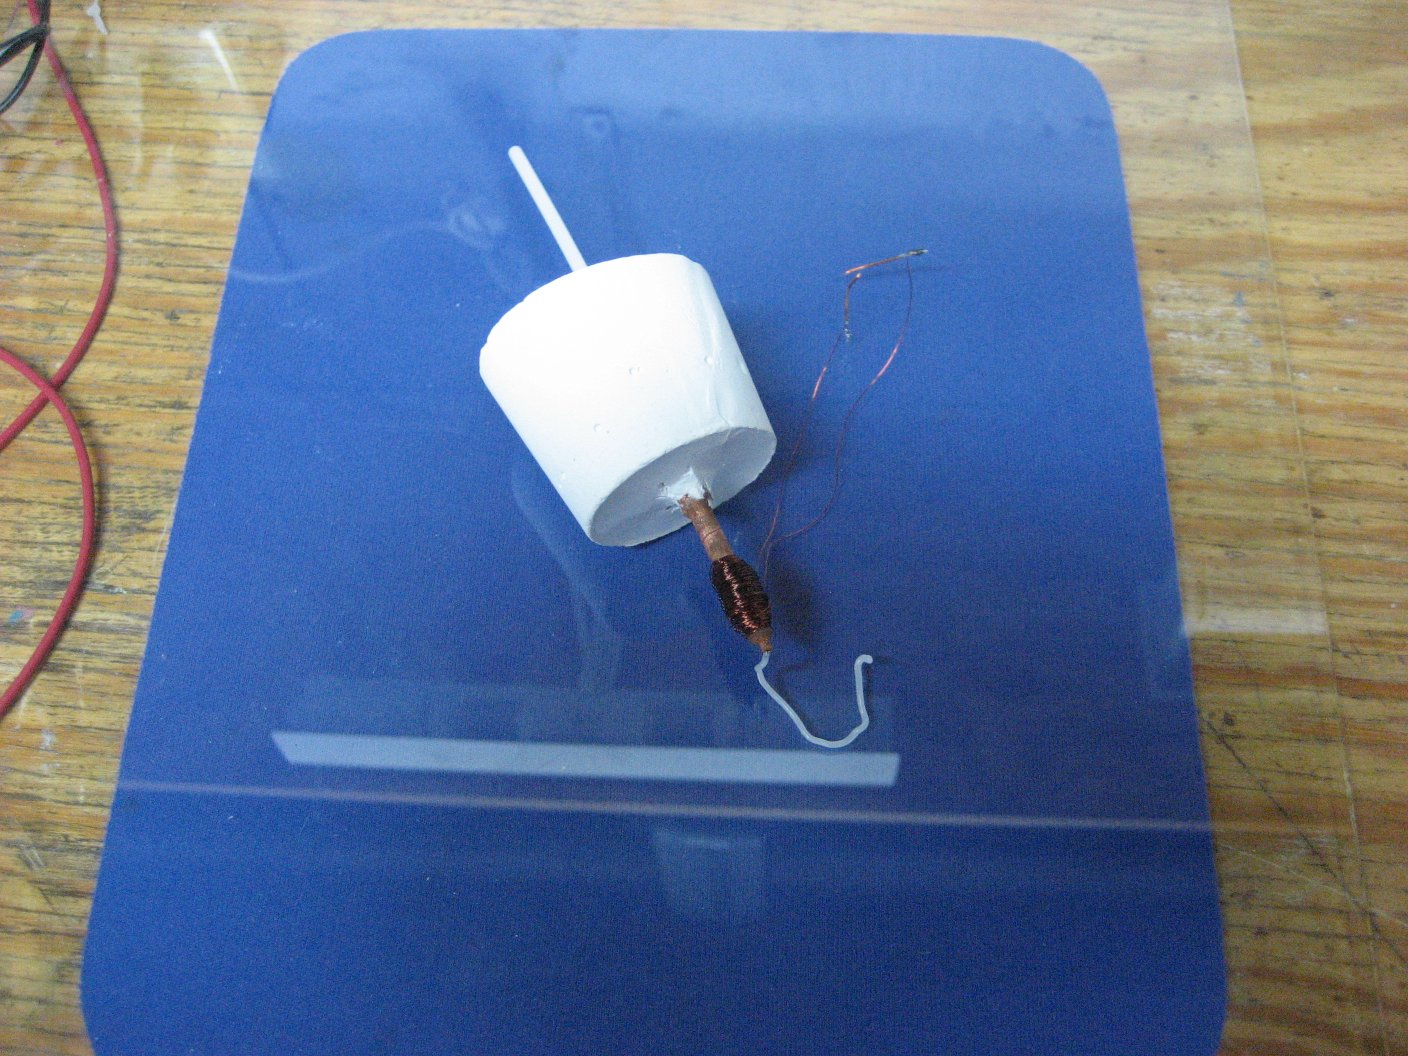
| 14:28, 22 January 2011 | SyringePump motor.jpg (file) |  |
156 KB | 1 | |
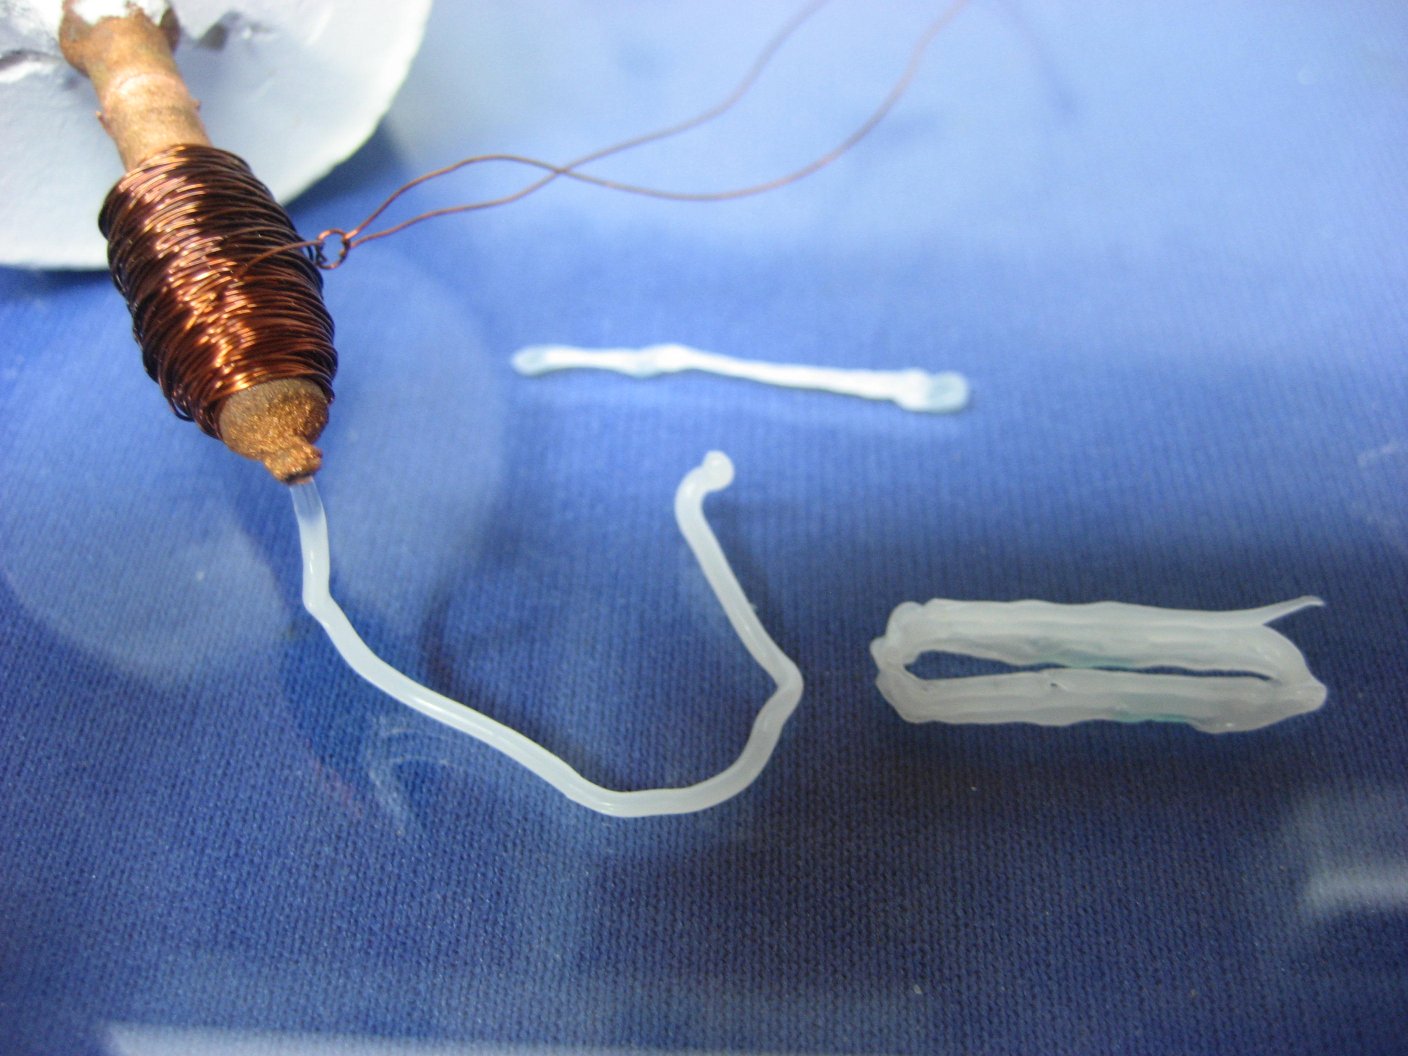
| 14:28, 22 January 2011 | SyringePump syringe.jpg (file) |  |
183 KB | 1 | |
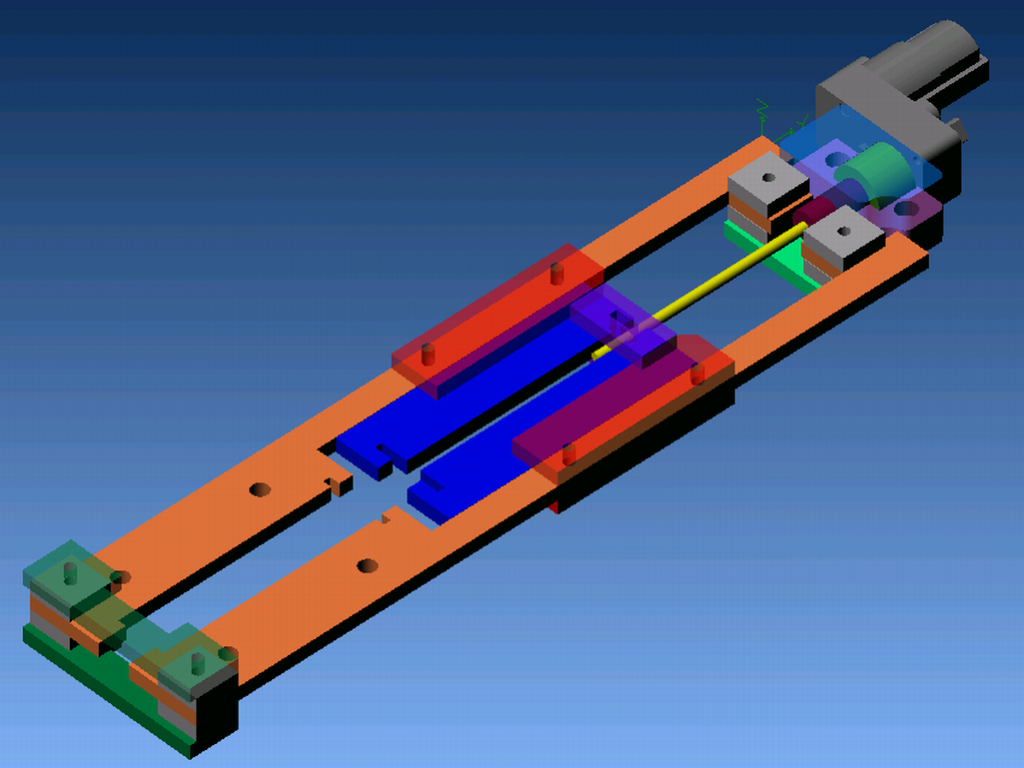
| 14:28, 22 January 2011 | Syringe pump asm.png (file) |  |
279 KB | 1 | |
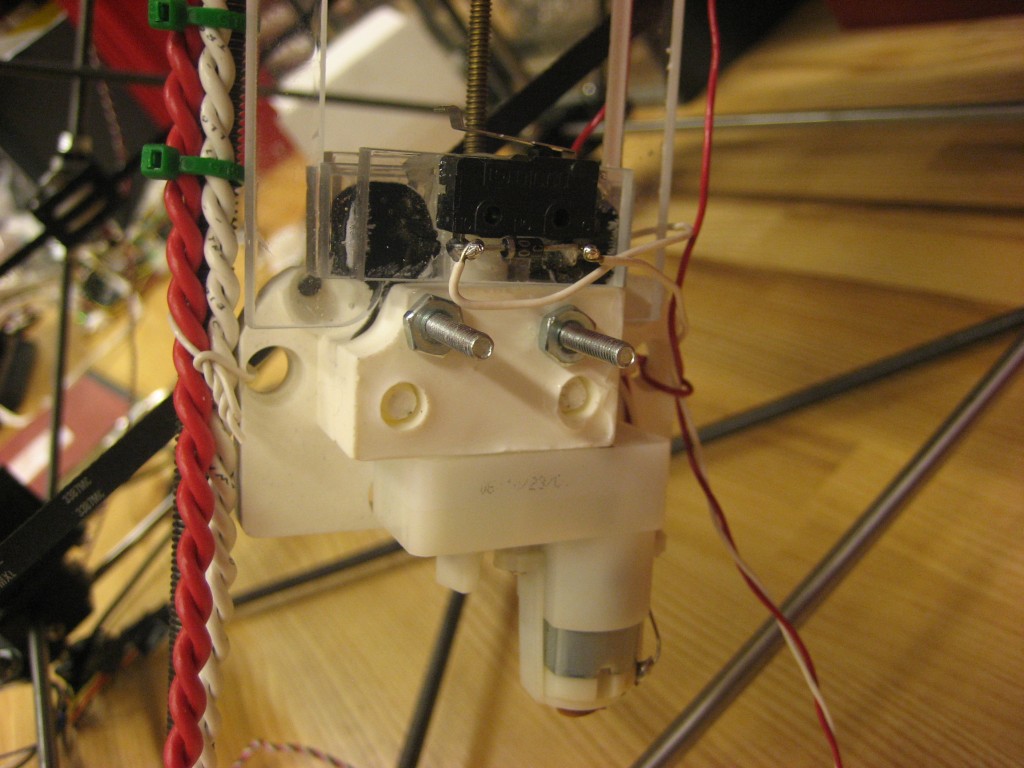
| 13:54, 3 November 2013 | Toolhead closeup.jpg (file) |  |
281 KB | 1 | |
| 00:00, 1 September 2013 | Transparency 01.png (file) | 560 KB | 1 | ||
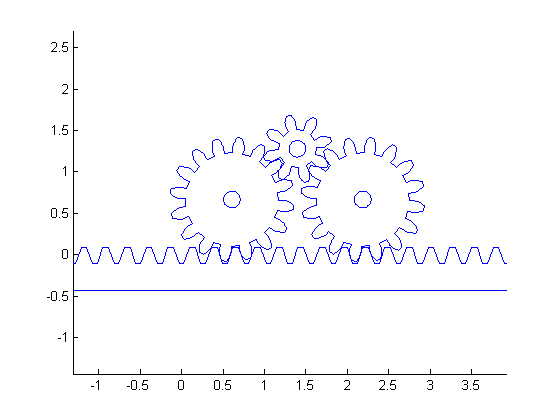
| 13:40, 18 July 2010 | TrigearsExample4.png (file) |  |
5 KB | example output of MATLAB gear center distance program | 1 |
| 16:53, 10 April 2010 | WaxVacuum3.jpg (file) |  |
74 KB | wax vacuum image | 1 |
| 01:40, 11 April 2010 | Waxuum1.jpg (file) |  |
78 KB | First attempt. This is just a single-tube needle with a heater and thermistor. The air tube is stuck in place with caulk. The lid, heater, ports, etc are held in place with JB-weld. This design did not work at all because there was not sufficient heat | 1 |
| 01:51, 11 April 2010 | Waxuum10.jpg (file) |  |
146 KB | Wax master, silicone mold, polyurethane part. | 1 |
| 01:49, 11 April 2010 | Waxuum11.jpg (file) |  |
138 KB | Closeup of case at beginning of test. The wax inside is molten so the interior is visible. Near the top of the case interior, note the slanted cut in the drain tube, where the thinner vent tube passes out and outside. Molten wax exits from the slanted | 1 |
| 01:49, 11 April 2010 | Waxuum12.jpg (file) |  |
158 KB | Later in the machining process. Note more wax has been collected. | 1 |
| 01:50, 11 April 2010 | Waxuum13.jpg (file) |  |
162 KB | The finished wax master. The part is just a little do-nothing brick - it is not really a functional item. | 1 |
| 01:42, 11 April 2010 | Waxuum3.jpg (file) |  |
90 KB | Second attempt. Vent and drain tubes run in parallel, with a sort of notch at the tip to allow molten wax to be replaced with air from the vent, then moved up the drain tube into the case. Push-to-connect fitting (visible behind case) is used to connect | 1 |
| 01:45, 11 April 2010 | Waxuum5.jpg (file) |  |
81 KB | Push-to-connect fitting visible on back. | 1 |
| 01:43, 11 April 2010 | Waxuum6.jpg (file) |  |
113 KB | Third attempt. This one worked well enough to test. Solidified wax forms a film on the inside of the case. This design uses a nested drain and vent. The cutting tip exits to the left in the picture. The vent exits to the right. An eight-ohm heater i | 1 |
| 01:47, 11 April 2010 | Waxuum8.jpg (file) |  |
178 KB | A view of the test setup. Of course, this tool is meant to be installed on an automatic XYZ table (like RepRap or MakerBot) but for a quick test it was installed on the little manual Sherline. The waxuum was simply clamped to the vertical stage of the m | 1 |
| 01:46, 11 April 2010 | Waxuum9.jpg (file) |  |
82 KB | Closeup view of nested drain and vent tubes at the cutting tip. | 1 |
| 16:54, 10 April 2010 | Waxuum case parts.zip (file) | 80 KB | waxuum case parts | 1 | |
| 19:21, 9 November 2013 | WikiHowTo 01.JPG (file) |  |
108 KB | 1 | |
| 19:22, 9 November 2013 | WikiHowTo 02.JPG (file) |  |
97 KB | 1 | |
| 19:22, 9 November 2013 | WikiHowTo 03.JPG (file) |  |
170 KB | 1 | |
| 19:22, 9 November 2013 | WikiHowTo 04.JPG (file) |  |
116 KB | 1 | |
| 19:22, 9 November 2013 | WikiHowTo 05.JPG (file) |  |
153 KB | 1 | |
| 19:22, 9 November 2013 | WikiHowTo 06.JPG (file) |  |
196 KB | 1 |