Scratchbuilt Piezo Printhead
This is a description of a simple DIY Piezo print head.
or to be more precise early attempts.
This page is a development stub. Please enhance this page by adding information, cad files, nice big images, and well structured data!
Release status: unknown
| Description | Piezo, ultrasonic
|
| License | unknown
|
| Author | |
| Contributors | |
| Based-on | |
| Categories | |
| CAD Models | |
| External Link |
Reason for doing this... Powder bed 3D printers mainly use bubblejet print heads, whilst a great deal of effort has gone into binders, powders,and the electronics to drive these print heads by the open hardware community they tend to be expensive and very intolerant of the fluids they can handle, this inevitably excludes many materials for binders, if the binder is strong enough the resulting part will have strength regardless of the powder used, A commercial print head has the obvious advantage of high speed and high definition, but a single nozzle head could act much like the reprap and use the same Gcode with some modifications perhaps,an arduino to control frequency, ramping etc, the possibility of wax parts is also feasible, waxes come in various types from children's crayons to specialized hard waxes,another possibility may be to jet a suitable solvent onto a powder polymer thereby fusing the powder.
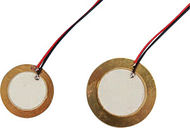
Bimorphs... The last time I looked at piezo materials they were to expensive for the tinkerer to play with, after some searching,bimorphs, or buzzers seemed like the only affordable source of piezo actuators, whilst they have a low frequency compared to normal ultrasonics at the audible range of around 2Kh to 4Kh, this should be ample for pumping or jetting or spraying fluids, cigarette lighter spark units were extracted as a possible source but bimorphs were chosen as a starting point.
Some info on piezo electric ... [1]
                           [2]
                           [3]
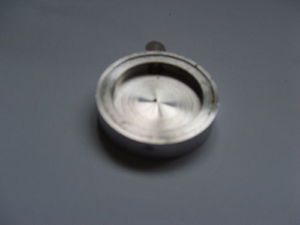
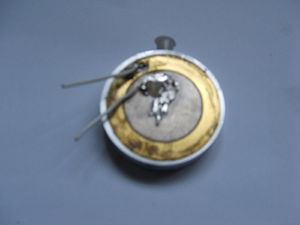
First attempt A pocket was machined out of some 40mm dia alluminium to accept the bimorph, also to act as a reservoir for the fluid, a hole on the circumference for fluid feed and a small hole in the centre of the alluminium to act as a nozzle, the smallest drill to hand was approx .5mm, the hole was swagged or closed with a ball bearing to reduce the size. The bimorph was glued in with the wired side facing out, a bicycle buzzer stripped down for the drive circuit was attached and water inserted, first results were disappointing with no sign of fluid emitting,the water was changed to white spirit but still no response, I realized that the fluid may be simply oscillating within the chamber, an adapter to allow a syringe was added to create more weight of fluid to the input side, this had the desired effect and the white spirit emitted from the small hole, a process of more swagging then trial resulted in a good spray, the cycle buzzer had selectable tones and gave different spray characteristics with different tones, white spirit was removed and Vodka added, this also worked well and was less unpleasant to work with (Hic).
Video of printhead working here
Drive electronics
((Photo here))
The drive electronics are very simple, a pulse generator feeding into a miniature step up transformer then to the bimorph, the pulse generator in the cycle buzzer was a surface mount device covered with potting fluid, this gave the different sound effects, but for better trials it was decided, due to the initial success, to build a drive unit to give variable frequency and amplitude to see the effect of these on the spray output.
Mist maker observations...
Some years ago when ultrasonic mist makers came out it was decided to acquire one to tinker with, they must be submerged in fluid to work due to a sensor which inhibits operation when dry, there seems to be a focal point of energy about 15 to 20 mm above the transducer surface, the first observation was the pain inflicted on the finger at this focal point, indicating the intense energy produced, a plastic ruler held at the focal point melted at a spot, by moving the ruler slowly a line could be drawn, despite the fact that it was below the water surface, a sample part made by SLA was tried, the reaction was violent if held to long in one spot, but formed a discoloured line when moved faster, silicone rubber also was tried, and as it is clearer it could be observed that the energy formed a cavity below the surface which expanded if held stationary, or again if moved slowly produced a line, if held stationary the cavity grew to the surface and popped at it broke the surface, silicone rubber has a melting point around 700 deg C (check this) indicating the amount of energy produced. The mistmaker was part of an overall concept to create a mist from photo resin to be the basis of a recoater system within a vacuum chamber and use elecron beam energy to cure the resin.


