Rostock MAX
Release status: working
Contents
Introduction
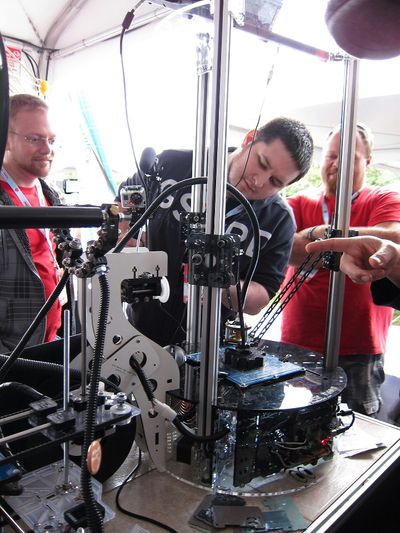
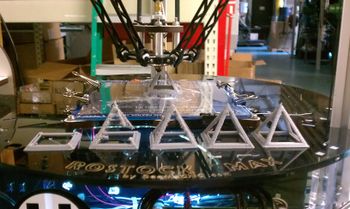
Rostock MAX is based upon Johann's origional Rostock Delta Printer Prototype. It features T-Slot extrusion for the linear motion ( cheapskate ) and laser cut acrylic OR plywood framework. The lower wrap piece around the bottom hides the electronics, but it's removeable to show off all the acrylic/plywood and electronics if you want.
Photos
250px

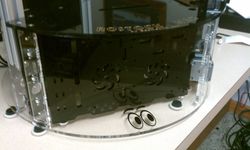
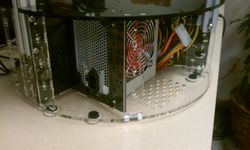
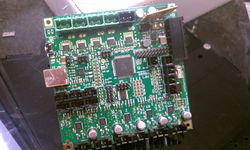 250px Concept for triple hot-end
250px
250px
250px
250px
Videos
Bill of Materials
The following BOM is for completing a Rostock MAX. You may substitute many of the hardware pieces for metric equivalents if you have easier access to them, we tried to make sure that it would accept both where possible.
| Rostock MAX B.O.M.} | |||||
|---|---|---|---|---|---|
| Quantity | Description | Notes | |||
| Reference | STL's of ALL PARTS | File:10-11-12 ROSTOCK MAX RELEASE BY PARTDADDY SEEMECNC.zip These are .stl files of all parts for reference if needed | |||
| Qty. 1 Set | DWG of only LASER PARTS | File:DWG 10-11-12 ROSTOCK MAX LASERFILES BY PARTDADDY SEEMECNC.zip These parts are may have modifications as time goes on, but they are a good baseline | |||
| Qty. 3 | 32" long 1" T Slot | Have found that 20mm Misumi and 80/20 1" or 80/20 metric work equally as well | |||
| Qty. 24 | 608ZZ Ball Bearings | Standard 608 Skate Bearings | |||
| Qty. 16 | M3-.5 x 10mm L Pan Head Phillips | nema motor mounting screws | |||
| Qty. 6 | M3-.5 x 6mm L Pan head Phillips | For attaching the motor pulleys | |||
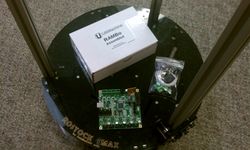
| Qty. 1 | Electronics Control | RAMPS, RAMBo, Sanguino etc... At the moment, printrboard doesn't have enough memory to support delta firmwares | |||
| Qty. 4 | Nema 17 Size Stepper Motors | 42BYG811 or 42BYG804 or similar, 3 for the vertical axes and one for the extruder | |||
| Qty. 1 | Optional Heated Bed | This is a must have for ABS. You can use a Phebe, Prusa PCB, or fab your own. Laser files have mount for Phebe from SeeMeCNC | |||
| Qty. 1 | Hotend | Laser files have the mounts etc... for use with SeeMeCNC's own hotend | |||
| Qty. 1 | Extruder | Laser files have the mounts etc.. for use with SeeMeCNC's "Steve's Extruder" setup for bowden drive | |||
| Qty. 1 | ATX PSU | The mounts are on the laser files for a standard ATX PC power supply, If using a heated bed, use at least 400w | |||
| Qty. 3 | 15 Tooth Motor Pulley | GT2 2mm pitch timing belt pulley, origional uses 40 tooth, you can use anything from 15 on up | |||
| Qty. 3 | GT2 2mm pitch x 1905mm | open-ended is fine, and neoprene works fine | |||
| Qty. 12 | CNC Machined U-joints | from SeeMeCNC | |||
| Qty. 18 | Idler Bearing Spacers | from SeeMeCNC | |||
| Qty. 12 | Cheapskate Eccentric tensioner Cams | from SeeMeCNC | |||
| Qty. 18 | Cheapskate Fixed Bearing Spacer | from SeeMeCNC | Qty. 6 | 2-56 X 5/8" Screws | For Endstops |
| Qty. 6 | 2-56 Nuts | For Endstops | |||
| Qty. 100 | 6-32 Nylon Locknuts | ||||
| Qty. 65 | 6-32 X 1" Flat Head screws | ||||
| Qty. 6 | 6-32 X 5/8" Socket Head Cap Screws (SHCS) | ||||
| Qty. 21 | 6-32 X 2" SHCS | from SeeMeCNC | |||
| Qty. 9 | 6-32 X 1 3/4" SHCS | ||||
| Qty. 25 | 1/4-20 T Slot nuts | For sliding in the t slot channels | |||
| Qty. 25 | 1/4-20 X 1/2" Button Head Screws | For t slot nuts | |||
| Qty. 6 | 10-32 X 5/8" Pan Head Screws | NYLON for mounting feet | |||
| Qty. 6 | 10-32 Nylon finish nuts | For mounting feet | |||
| Qty. 6 | Rubber Feet | You can use any kind of rubbery foot on the bottom, we use our rubber feet | |||
| Qty. 26 | #4 SAE Flat Washer | ||||
| Qty. 12 | #4 X 1/4" Sheet Metal Screw (SMS) | ||||
| Qty. 12 | #4 X 3/8" SMS | ||||
| Qty. 27 | 4-40 Blind T-Nuts | These are the kind that press in from the back side and have barbs that keep them from turning | |||
| Qty. 4 | 4-40 X 1 1/4" Pan Head Screws | ||||
| Qty. 12 | 4-40 X 3/4" Pan Head Screws | ||||
| Qty. 12 | 4-40 X 1/2" Pan Head Screws | ||||
| Qty. 4 | 6-32 X 1/2" Nylon Pan Head | For mounting the ATX PS | |||
| Qty. 50 | #6 SAE Flat Washer | ||||
| Qty. 30 | Acetal Bearing slip-on covers | These are the tapered acetal pieces that slip over a 608 to ride on the t slot extrusion | |||
| Qty. 6 | 1/8" dia. X 3 1/8" L axle/dowel | These are the axles that hold the U-joints to the carriages/platform | |||
| Qty. 3 | 3/8" OD X 9/64 ID X 1" aluminum bushing | These are used to space the hotend plate up off the platform for more Z travel | |||
| Qty. 2ft | 2mm ID X 4mm OD Teflon Tubing | This is the material for the Bowden Tube | |||
| Qty. 2 | 4mm PTC fittings | These connect the bowden tube from the extruder to the hotend | |||
| Qty. 6 | Parallel Delta Arms | From SeeMeCNC | |||
| Qty. 6 | Folding Belt Clamps | These can be printed or purchased from SeeMeCNC | |||
| Qty. 3 | Carriage U-Joint Mounts | These are in the .stl files, can be purchased from SeeMeCNC | |||
| Qty. 1 | Platform | You can use the origional Johann platform, or the injection molded SeeMeCNC Platform halves (2 halves from SeeMe) | |||
| Qty. 20 | 1/8" ID X 1/4" OD Spacers | These are used as standoffs under the heated bed mount and electronics (SeeMeCNC supplies acetal spacers) | |||
| Qty. 1 | Switch for PSU | You can use a switch between the green wire and a ground wire on a PS to turn it on/off | |||
| Qty. 1 | 1/8" Stickralon(tm) Polycarbonate Build plate | Stickralon is a polycarbonate material found by SeeMeCNC to be awesome as use for a build surface! | |||
| Qty. 4-6 | Small Binder Clips | Also called bulldog clips, used to hold the build plate on | |||
| Qty. 12 | small zip ties | for fastening wiring and making it cleaner | |||
| Qty. 2 | Spool Axles | For supporting the filament spool on the extruder mount (lasercut or printed) | |||
| Qty. 1 | Hot-End Spacer | 1/2" ID X 3/4" OD X 1/4" thick wood/aluminum spacer for the hotend where it mounts to the upper part of the platform | |||
| Qty. 1 | 1/8" PVC or flexible material for bottom wrap | 6 1/8" wide by 48" long, can be PVC signboard, plywood, polycarb, anyting flexible enough to wrap around and enclose the electronics if you want to | |||
| Qty. 4 | 10-32 X 1/2" Nylon Thumb Screws | Used to hold the decorative PVC warp on the base of the machine | |||
