RUG/Pennsylvania/State College/Base Plate
Machining Extruder Base Plate
Although our end goal in the RepRap world is to have everything printed, there are still some things that have to be machined. This page will walk you through the base plate machining process step by step. If you are a professional when it comes to machining, then you can just download the base plate specifications at the end of this article.
Before running any of the machines in the lab make sure you are following all the safety procedures. If you are unsure about anything or have questions, be sure to ask for help.
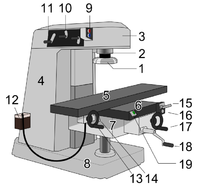
For machining the base plate you will be using a vertical milling machine.
We will be using a machine vice to hold the part so mount one to the table(5) if need be.

1. You will need to turn your aluminum stock down making at least two sides parallel. Milling all 6-sides will give it a nice look.
2. Clamp the part in the vice using the parallel sides, use parallel shims to bring the part to the top of the vice and then zero the mill.
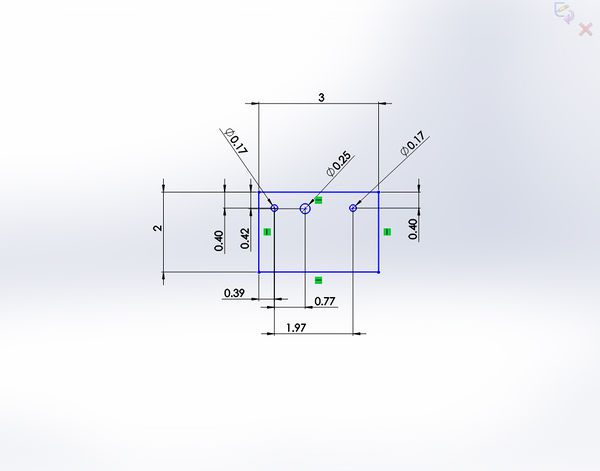
3. Drill set holes in the appropriate places using the dimensions on this page. Note the middle hole is offset from the other two.
4. Drill holes using drill bit. (The two outer holes may be bigger if needed)
5. Tap the middle hole. 24 Threads per inch, I found Tap H works the best.
6. Add a slot for wire if want/needed.
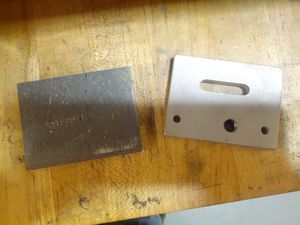
When machining the plate, all the dimensions have a high tolerance. This means that the measurements don't have to be perfect except for the three drill holes. You must make sure all the drill holes are all separated by the exact amount according to their x and y axis. A picture of the before and after base plates can be seen below.

