PonokoCornerAssembly
Making the Ponoko RepRap Lower Corner Assemblies
The easiest approach to assembling the main RepRap frame is to assemble the Lower Corner Assemblies and Z Motor Assembly first, and then slide them on the the bars. We'll start with the three Lower Corner Assemblies.
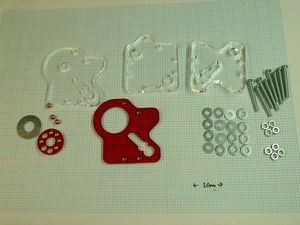
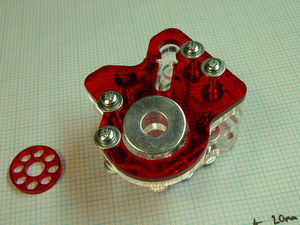
Start by finding the components and fastenings as shown. As well as the lasercut parts you will need for each Corner:
- 8 off M3 25mm machine screws
- 8 off M3 nuts
- 16 off M3 washers
either:
- 8 off 4.5mm (0.177") ball bearings
- 1 off M8 washer,
or:
- 1 off 608 ZZ Ball bearing race.
The 608 ZZ bearing can be used instead of the washer and lasercut bearing race, should 4.5mm (.177") BBs be banned by a Nanny State near you.
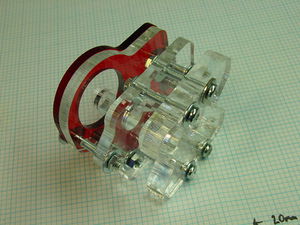
Put the washers on 4 of the screws, and insert them through the 3mm lasercut part, the matching 5mm part, and the squared-off 5mm part as shown. Put washers and nuts on but do not do them up all the way:
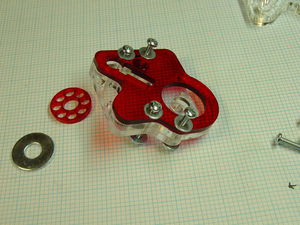
Put washers on the remaining 4 screws, and use them to attach the 8mm lasercut part from the other side. Long-nosed pliers are handy for manipulating the washers and nuts on the inside face.
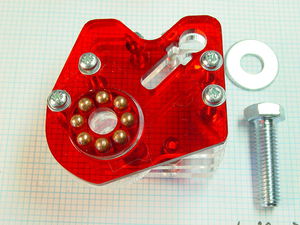
Put a large M8 washer into the hole in the assembly.
Pop the circular lasercut race on top of it and put the BBs into the eight holes.
Note that there are two variations in the cutting patterns. The larger one is in fact quicker to cut and is slightly stronger.
Alternatively, put in a 608 ZZ ball bearing race, wrapping with tape if necessary to form a snug fit.
It is helpful to pop a washer and M8 bolt on top to stop the BBs falling out.
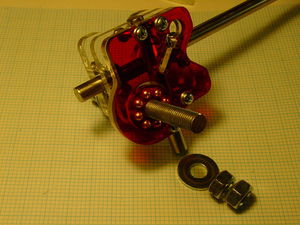
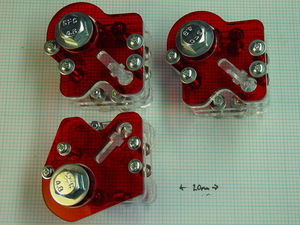
Make two more assemblies just like this, but a mirror image of the first one. You should end up with a set of components looking like this:
There are in fact four Lower Corner Assemblies, but the last one is a bit different because it has a motor attached. So next we'll show you how to make the Z Motor Assembly.
-- Main.VikOlliver - 15 Nov 2008
