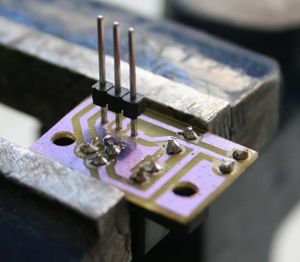
Opto Endstop v1.0
Contents
Opto End-Stop
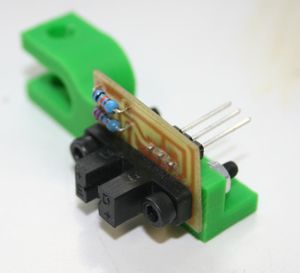
Darwin's Cartesian axes all need a datum (also known as home position or end-stop) to reference their movements. At the start of each build each axis needs to back up until the datum point is reached. For Darwin, we use one opto-switch for each axis to define its position. This page tells you how to wire one up to a bracket used in Darwin's design (below).
Preparation
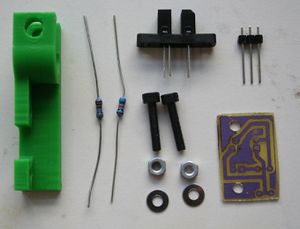
You will need to buy in some parts and make up a PCB...
Bill of materials
You will need *3* assemblies for Darwin.
Electrical:
| Component | Value | Quantity per SA | Total Qty | Description | RS/Farnell# |
| R1 | 220 Ohms | 1 | 3 | Resistor | |
| R2 | 10K Ohms | 1 | 3 | Resistor | |
| H1 | H21LOI | 1 | 3 | Optoswitch | Farnell 102-1134 |
| K1 | 3 pin | 1 | 3 | PCB transition connector |
Mechanical:
| Part type | ||||||||||
| *Sub-Assembly (S.A.)* | *S.A. qty* | *Part* | *Qty per S.A.* | *Total qty* | *Fastener* | *Rod/Studding* | *Other* | *RS/Farnell No.* | *Moulded* | *RP* |
| Opto end-stop | M3 x 15 cap | 6 | ||||||||
| M3 washer | 6 | |||||||||
| M3 nut | 6 | |||||||||
| M5 x 20 cap | 3 | |||||||||
| M5 washer | 3 | |||||||||
| M5 nut | 3 | |||||||||
| Optoswitch bracket | 3 | 1 |
PCB manufacture
All the KiCad circuit and PCB files are in Subversion at svn/reprap/electronics/Opto_endstop
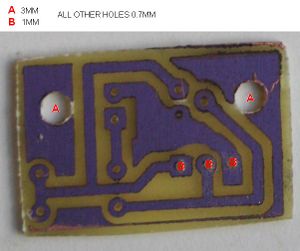
Export a PDF of the PCB component sides (because they are small, the layout included 6 copies - it's useful to have some spares in case you loose or crack any of the boards). Use the PDF to make your own PCBs.
Drill hole diameters as defined below:
Assembly
You'll need a soldering toolkit to do most of this. Read our Electronics Fabrication Guide if you're new.
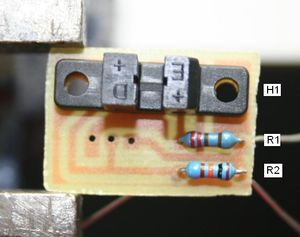
Insert H1, R1 and R2 on the component side, and solder.
Flip over, trim, and insert K1 onto the copper side. You will need to slide the plastic housing up the connector to give you room to solder.
Bolt the PCB onto the bracket using the M3 caps, washers on the bracket side.
You can now clamp the assembly to a Ø 8 mm bar by passing the M5 cap through the end of the bracket.
-- Main.EdSells - 01 May 2007
