Metamaquina 3D/Instruções de montagem/Eixo Z
Components
- 2x coupling set
- 2x Z axis steppers
- 2x clear plastic tube
- 8x M3 10mm screw
- 8x M3 20mm screw
- 16x M3 washer
- 8x M3 nut
- 4x M8 nut
- 2x 210mm threaded rod
- 2x 350mm stainless steel round bar

Instructions
Take the clear plastic tubing and cut it into two equal pieces. Holding this with pliers gently warm them with a hair dryer (or heat gun, or in hot water). Once they are warm, slide them down the shafts of the two Z axis steppers until the free end of the shaft is level with the end of the sleeve.

Temporarily remove the Z motor mounts from the top of each side of the frame, place these upside down on the Z axis steppers, attach to the steppers with M3 10mm screws and M3 washers. Re attach the Z motor mount assemblies to the frame. (Alternatively, it is possible to complete this step without removing the Z motor mounts, by placing the stepper motors on top of the Z motor mounts and screwing the M3 10mm screws with M3 washers up into the stepper motor)


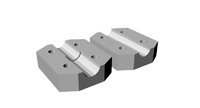
Take the two different sides of the couplers and assemble the with M3 20mm screws, M3 washers and M3nuts, test assemble and screw all the way together so that the M3 nuts become fully trapped in the nut shaped holes. Then disassemble. Take the 210mm lengths of threaded rod and trap this inside the coupling as shown in the photo. Tighten just enough so that the rod is held in place. Add a M8 nut as shown in the photo.

