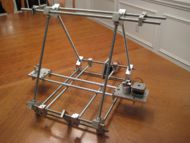
Metal Mendel
Release status: unknown
| Description | efforts towards a metal Mendel RepStrap
|
| License | |
| Author | |
| Contributors | |
| Based-on | |
| Categories | |
| CAD Models | |
| External Link |
Contents
Working Notes
Project Lead(s): swighton et. al.
Follow ups: thenoviceoof
Wiki-maintainers and helpers:
Photos and Drawings
Links can be put in captions.
Note
Metal/Mendel is cross-fertile with Eiffel and is probably part RBS. It's one big whirling gyre of intercompatible design concepts. Forum thread: http://dev.forums.reprap.org/read.php?4,29852,29852
Files
Drawings
The files in Mendel_Drawings.zip are a bunch of pdfs. We need to render the pdfs as .png type image files (using image magick or pdftk?) and embed them in a series of pages. E.g. x_axis_belt_clamp.pdf is a pdf in the zip, we need x_axis_belt_clamp.png, and then either have Mendel/Drawings be one long image dump or have it be a list of pages like: Mendel/x_axis_belt_clamp
Version 1 Errata
- Corner bracket depth is 0.8 inches
- x-axis belt clamp holes are tapped 2-56 and drilled for clearance of 2-56 screws
- x-axis carriage bottom width is 2.362" wide
- y-axis pulley block is 5/16" thick (not critical)
Units!
Inches
Note that swighton's original drawings are in Inches, with the occasional metric drill size.
Metric
We will want a translation into metric for people using metric tooling.
Tooling
You'll want a drill press, band saw, and lathe at minimum. Having a mill and cold saw are also nice.
Specific drill numbers are not marked on the swighton's drawings (for those imperial unit users keeping up), so you'll have to reverse engineer them. Some are easy, like .375, while some aren't, and you'll have to guess.
Process
The process is depends pretty heavily on having access to a machine shop and a bunch of metal: if you are using swighton's drawings, then you can probably get by with a bandsaw, drill press, and a lathe: having a mill and a coldsaw are also nice.
To create a part, first, you take a hunk of aluminum of the thickness that you want. If you don't have some of the desired thickness, then you'll have to take a coldsaw or bandsaw and cut your hunk down into the thickness you need. To get a good, flat piece, then you might want to go over it with a fly something: sorry, I forgot the name of the thing. You might also want to square out the piece with a mill.
After getting a nice, square, flat piece, then you usually will drill all the holes, and tap the holes that need to be tapped. More esoteric pieces will require use of the lathe, or more milling.
Notes
Swighton's got a pretty good writeup, so he'll probably just copy it here.

