FTIStrap
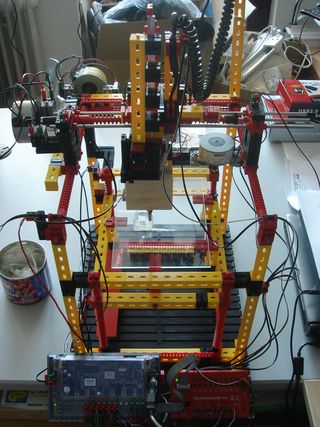
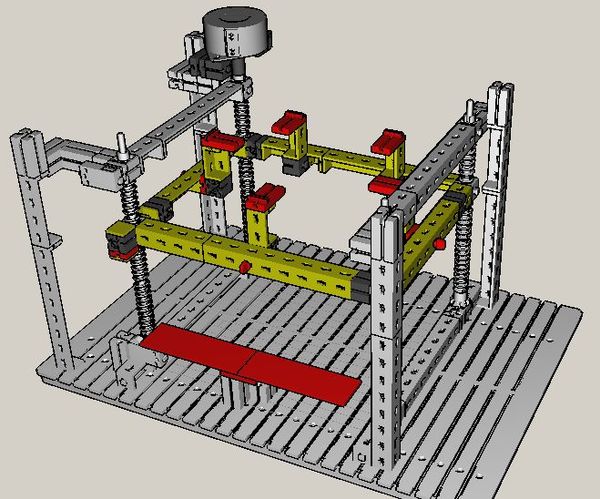
This page describes the "FTIStrap", a RepStrap [1,2] which is almost completely built from FischerTechnik [3] parts. Constructing an FTIStrap neither needs any special expertise nor any special tools and can usually be completed within a single working day. All parts can either be ordered online or found in many stores in your neighbourhood. After printing the parts for a RepRap the FTIStrap may even be disassembled again and its parts used for other projects.
(please note: because of relatively strict time limits, I plan to document the FTIStrap piece by piece finishing around end of november)
Contents
- 1 Introduction
- 2 Part List
- 3 Extruder Construction
- 4 FTIStrap Assembly
- 5 Cabling
- 6 Driver Software
- 7 Initial Startup of the FTIStrap
- 8 Operation Manual
- 9 Tips and Tricks
- 10 Material Recycling
- 11 Software Downloads
- 12 Modifications and Extensions
- 13 Future Plans
- 14 Configuration File Format
- 15 References
Introduction
The FTIStrap is a "RepStrap" which almost completely consists of FischerTechnik parts. Stepper motors are used as actuators, the interior of a hot-melt gun forms the extruder and a (removable) glass plate acts as the base to print on. A FischerTechnik "Robo Interface" together with an extension module (both running in "online mode") control the steppers and scan the end stops - they can be connected to an IBM-compatible PC running Windows or Linux or an Apple Macintosh running MacOS X. The FTIStrap is completely "host-controlled" - a small application running on the host can be used to either manually operate the machine or load and interpret a file containing the "G codes" for a RepStrap.
The FTIStrap's main "advantages" are
- it almost completely consists of FischerTechnik parts - including the four steppers and any electronics - and everything can be ordered online [4]
- the few remaining parts (hot-melt gun, balsa wood, sand paper, fan, glass plate) can also either be bought online or found in various shops in your neighbourhood
- no special tools are required to build the FTIStrap - although a hacksaw is recommended to cut the balsa wood which covers the hot-melt gun
- no soldering is required - all the electronics you need is already available from FischerTechnik
- when all parts are available, the whole FTIStrap can be easily assembled within a single working day
- as soon as you no longer need the FTIStrap (because you used it to build your own RepRap), it can be disassembled again and its parts used for other projects
The current printing characteristics are
- position accuracy: approx. 0.1 mm in all directions (i.e., approx 256 lpi)
- material thickness in xy direction (i.e. line width): approx 1.0 mm
- material layer thickness (z direction): approx 0.5 mm
The hot-melt gun which is currently used needs cylindrical hot-glue sticks with a diameter of 7mm. The gun melts them at a temperature of approx. 230° celsius which is hold by a thermistor within the gun. The rigidity of the printed objects depends on the thickness of their walls (in relation to their size, of course): one of the first printed test objects, which accidentially got thicker than foreseen, turned out to be really rigid.
Part List
Most of the list of FischerTechnik parts has been automatically generated by the "fischertechnik designer" [5] which was used to model the FTIStrap and document its building phases.
You will need the following parts (please excuse the german part names, I will try to provide translations as soon as possible. The part numbers should help you identifying the proper parts)
- 1 x 35602 (Grundplatte 390x270)
- 16 x 36294 (Winkelträger 120, gelb)
- 14 x 36297 (Winkelträger 60, gelb)
- 19 x 36299 (Winkelträger 30, gelb)
- 6 x 35053 (Winkelträger 15, gelb)
- 5 x 35076 (Statikstein, gelb)
- 9 x 32850 (Riegelstein 15x15)
- 5 x 36323 (S-Riegel 4 rot)
- 36 x 32064 (Baustein 15 mit Bohrung)
- 12 x 32879 (Baustein 30 schwarz)
- 30 x 32881 (Baustein 15 schwarz)
- 10 x 32882 (Baustein 15 mit zwei Zapfen)
- 4 x 31011 (Winkelstein 30 Grad)
- 3 x 37328 (Baustein 5 mit 2 Zapfen)
- 26 x 37237 (Baustein 5)
- 15 x 35049 (Baustein 15x30x5 mit Nut und Zapfen)
- 14 x 37468 (Baustein 7.5)
- 26 x 31982 (Federnocken)
- 1 x 31061 (Verbindungsstück 30)
- 8 x 31060 (Verbindungsstück 15)
- 19 x 38236 (Bauplatte 15x15, gelb)
- 2 x 38251 (Bauplatte 30x90, rot)
- 2 x 38428 (Bauplatte 15x30x5 mit 3 Nuten)
- 1 x 31034 (Metallachse 30)
- 2 x 37384 (Metallachse 80)
- 2 x 31031 (Metallachse 110)
- 4 x 35697 (Metallachse 200)
- 29 x 37679 (Klemmbuchse 5)
- 9 x 35112 (Ritzel Z10, M1.5)
- 8 x 31915 (Zangenmutter)
- 6 x 35113 (Spannzange)
- 11 x 37858 (Klemmbare Schnecke m=1.5)
- 32 x 37926 (Schneckenteil m=1.5)
- 9 x 37925 (Schneckenmutter m=1.5)
- 2 x 35695 (Zahnrad Z15)
- 2 x 32649 (Rastkettenglied Beutel)
- 1 x 37636 (Rollenlager)
- 5 x 32085 (Rollenbock)
- 4 x 31436 (Gelenkwürfel-Klaue)
- 4 x 36819 (Lagerhülse)
- 6 x 37783 (Mini-Taster)
- 30 x 31336 (Flachstecker, grün)
- 30 x 31337 (Flachstecker, rot)
- 4 x 32311 Stepper Motors
- 4 x 75045 (Teilebeutel für Schrittmotor)
- 1 x 93293 Robo Interface
- 1 x 93294 Robo IO-Extension
- 1 x 79015 (Hinweise zum Schrittmotor) just for your information, not really necessary
It seems as if some of the axes the author used for constructing the FTIstrap are no longer available - you will have to get them from other sources. The following axes are needed:
- 4 x axes 300mm (4mm diameter)
- 3 x axes 250mm (4mm diameter)
It should not be too difficult to cut metal rods of an appropriate diameter to the proper length. Steel rods would be the best choice, but brass might be easier to cut.
Besides the FischerTechnik parts, you will also need
- a Proxxon hot-melt gun (Proxxon no. 28192, or a similar one if you don't mind modifying the extruder casing and its feeder)
- a strip of balsa wood (10mm thick)
- some heat-resistant glue (the author used "Uhu hart" for that purpose)
- a little bit of (rough) sand paper (to cover the cylindrical drives of the hot-glue feeder)
- a glass plate (17.2x12.5 cm*cm, taken from a "frame-less picture frame" which usually costs less than 1€)
- a cheap fan (12x12 cm*cm, 12V)
- some cable straps
- some silicon oil (to reduce friction along the plastic thread rods)
- if need be: a USB-to-Serial converter and/or a serial cable
- if need be: a 12V power adapter for the FischerTechnik interfaces and/or the fan (if you do not want to buy the FischerTechnik PowerBlock)
and, of course, you will need
- hot glue sticks (e.g., Proxxon no. 28194, or similar - depending on your actual hot-melt gun)
The tools you should have:
- a small screw driver (for the Fischertechnik steppers - you may order them together with the other parts)
- a sharp knife (to carve the balsa wood into shape)
- a frame saw (to cut the balsa wood - if need be, you may use the knife for that purpose, but a saw usually gives better results)
Extruder Construction
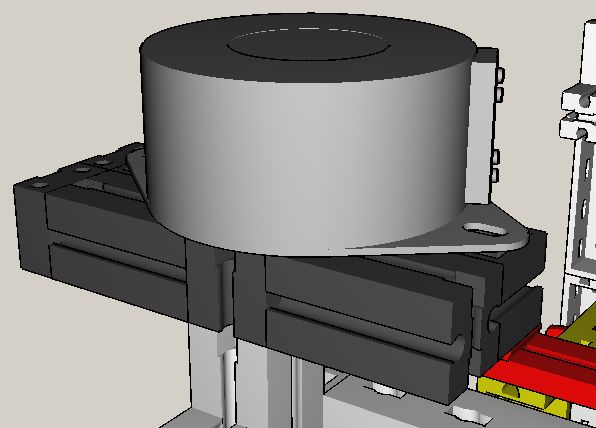
The extruder consists of nothing but (the interior of) a conventional hot-melt gun which was enclosed by layers of balsa wood and fixed within two FischerTechnik parts (part no. 36297 or similar)
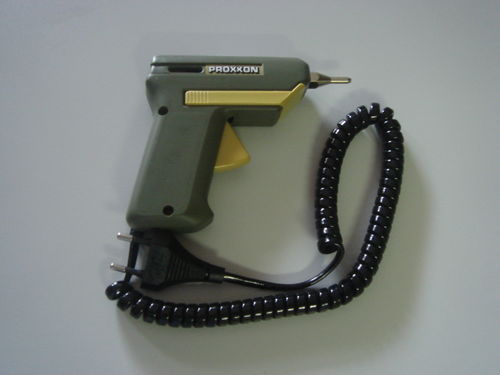
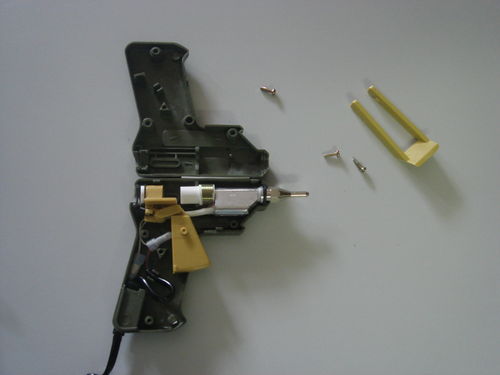
This is the Proxxon hot-melt gun (Proxxon no. 28192) which was actually used - if you prefer another one, you may have to modify the balsa wood casing (and probably the feeder as well).
If you open the casing, you will see its inner parts
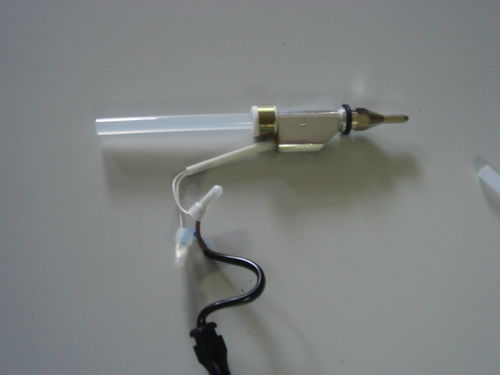
Just take the heater element and remove everything else. Important: do NOT cut-off the silicon guide for the hot-glue sticks (as the author did on this picture) it is really important for the proper functioning of the gun! The author's first gun turned out to be completely useless and he had to buy a second one to continue! The feeder is now by far strong enough to shift the sticks through the guide into the heater element.
(tbd)
FTIStrap Assembly
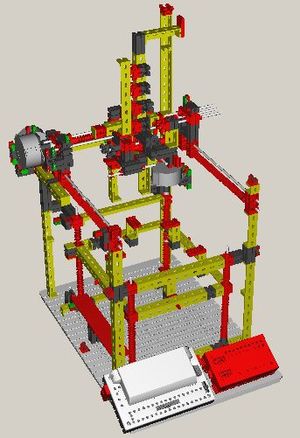
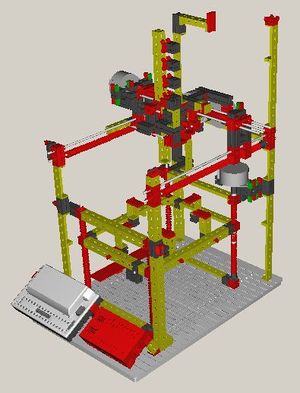
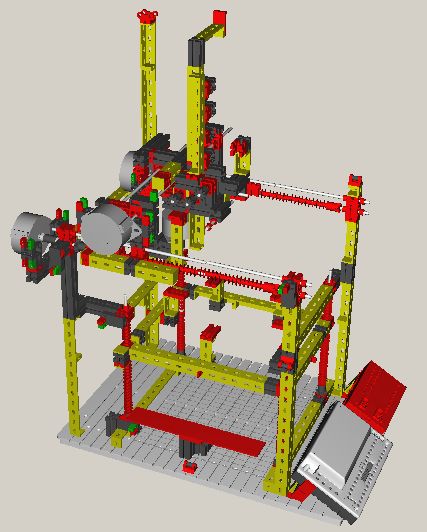
The author has used the "fischertechnik designer" [5] to create a model of the FTIStrap. This model was the basis for the following assembly instructions. These instructions will hopefully help you constructing your own copy of the FTIStrap - if anything remains unclear, don't hesitate to ask the author for clarification.
Phase 1
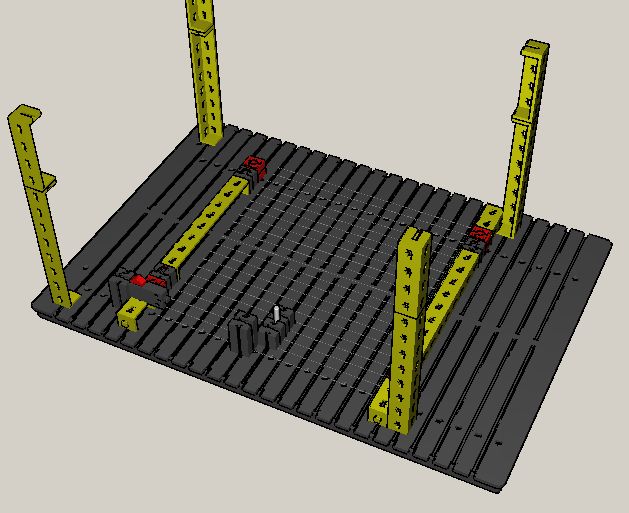
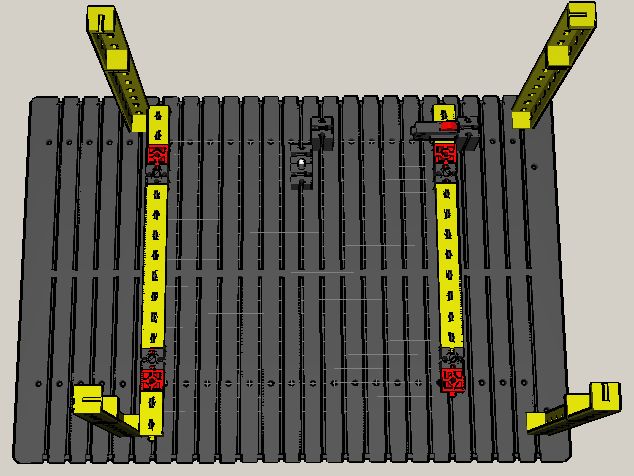
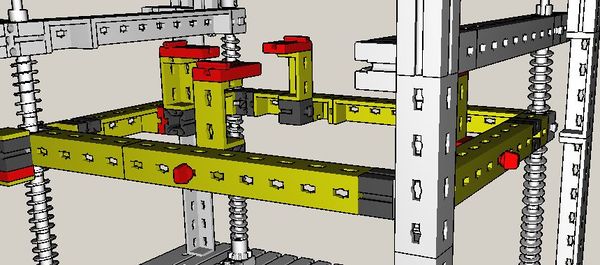
Let's start with the first parts of the outer frame and the base of the z axis lifter.
The part in the middle of the base plate (the one with the metal rod) will later be used to tighten the chain for the z axis lifter. The parts can be moved along the slot in the base plate, the second brick is just used to increase the friction and keep the brick with the axis in place.
The following is a third view of the first build phase.
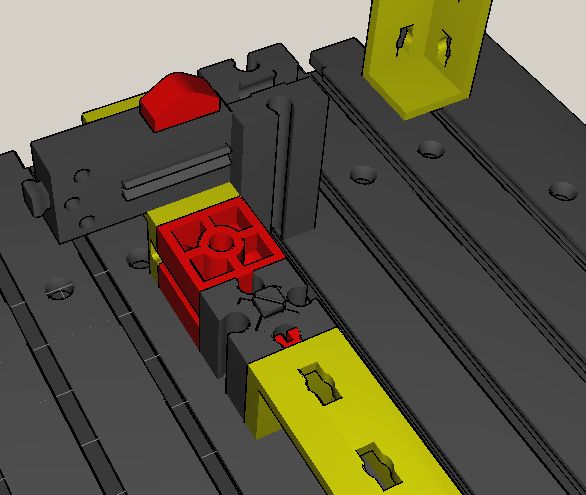
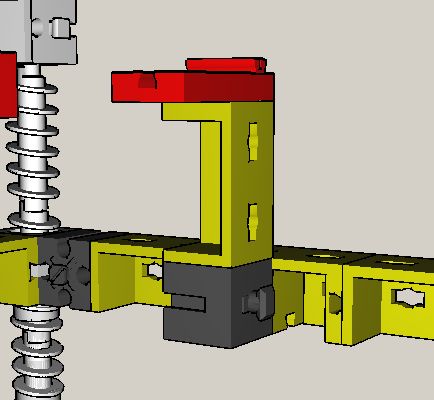
The following detail view will help you assembling the region around the switch (and the other corners, which look very similar). The switch will later act as the lower z axis end stop.
Phase 2
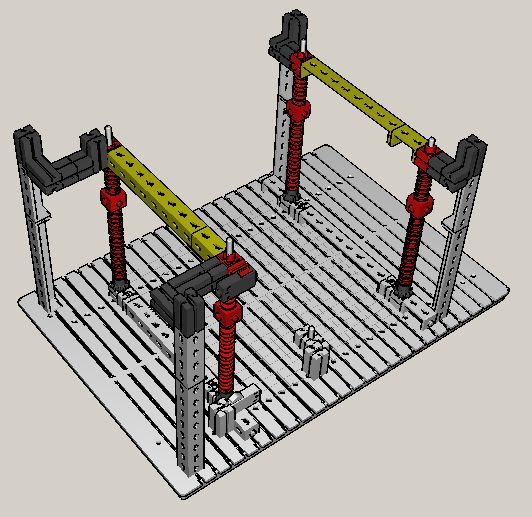
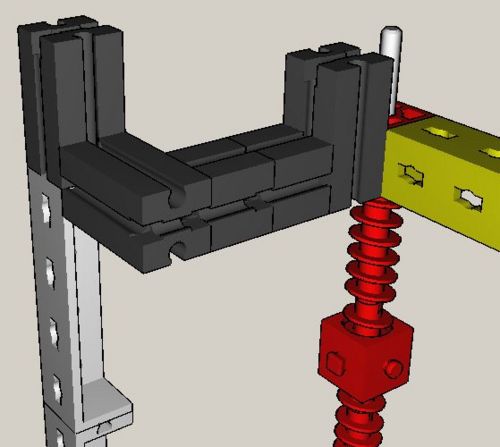
The second phase completes the frame for the z axis lifter: the rods (200 mm long) stick loosely in the lower holed bricks (part no. 36), initially held by their weight, later tightened by upper holed bricks.
The topmost element of every worm gear is a "normal" worm element (part no. 37858), all elements are fixed in place by the upper holed bricks and a clamping bush (above the brick).
The black bricks are used to fix the rods in x/y-direction
Do not forget to screw in the worm nuts before you mount the upper holed bricks.
As soon as the second phase has been completed, you should span a chain around the black gears at the bottom of every rod - and around the small rod in the middle of the plate. Do it in a way which allows you to tighten the chain by moving the bricks with the rod along the slot in the base late. Do not tighten the chain too much: it should still run smoothly.
Phase 3
During the third phase, z axis lift and z stepper are assembled.
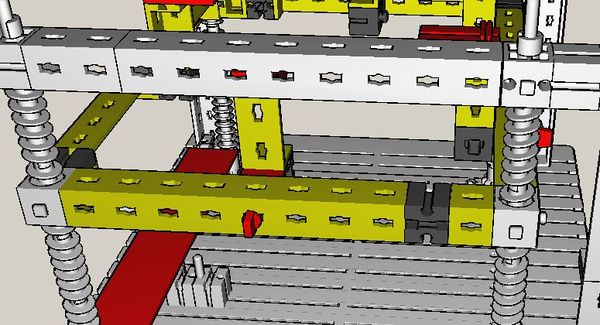
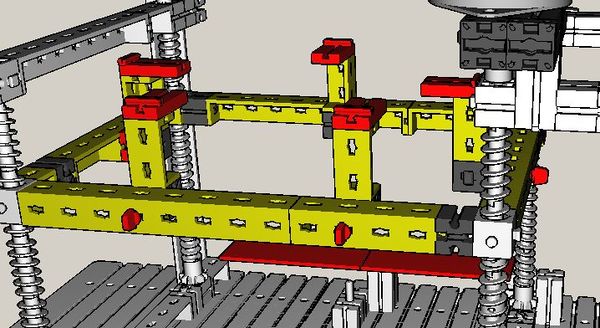
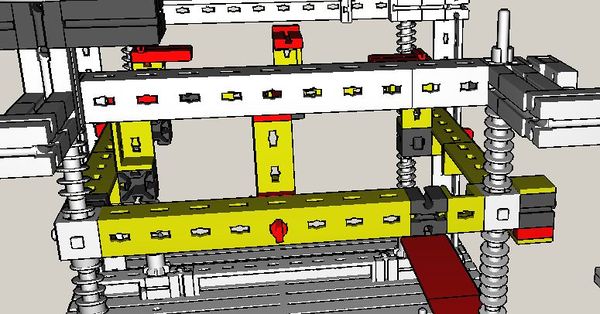
Detail views from every side illustrate how to construct the z axis lift.
The glass plate which forms the basis for the hot glue printouts is loosely placed on-top of five elements which are mounted around the z lift frame - the following detail view shows how to assemble them.
The following image shows the stamps which press the z axis end stops. Shown is a suggestion by the author - depending on your actual construction you might have to vary the assembly slightly.
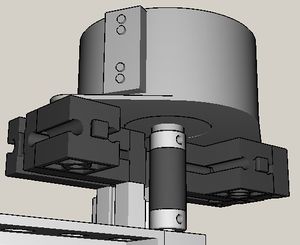
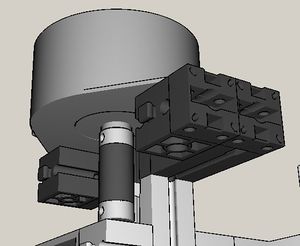
It is time to mount the z axis stepper, the following two images show you how.
You should now also assemble the cover which protects the chain from drops of hot glue (the origin of the FTIStrap is in the corner with the z axis end stops).
Phase 4
Phase 5
Phase 6
Phase 7
Phase 8
Phase 9
Phase 10
Phase 11
Phase 12
Phase 13
(tbd)
Cabling
(tbd)
Driver Software
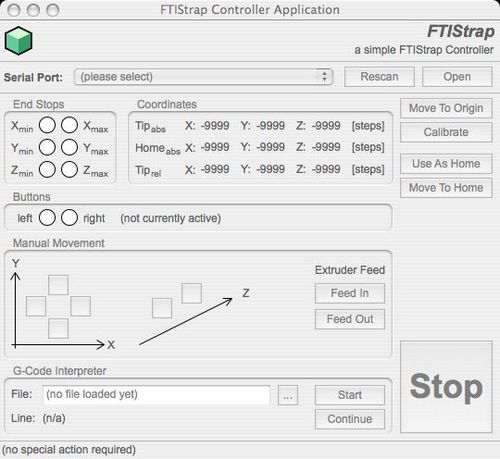
The "FTIStrap Controller Application" provides everything you need. It can be used
- to test and calibrate your set-up
- to move the FTIStrap manually
- to load and evaluate G-Code files
It won't get an award for its user interface but should still be intuitively usable
(tbd)
Initial Startup of the FTIStrap
If you have not done so, start the "FTIStrap Controller Application" - it will be used to test and calibrate your set-up.
Check the End Stops
First of all, you should check the proper operation of your end stops - this includes a test of (a part of) your cabling and the proper communication between your PC and the FischerTechnik interface.
(tbd)
Check the Steppers
Now, you are ready to test the proper operation of any steppers - this includes a test of the remaining part of your cabling.
But before, make sure, that none of the end stops is touched by any part of your machine - it is important that the steppers can run free for a few centimeters, at least. Also, do not "load" the feeder with hot-glue sticks yet.
(tbd)
Move into the Origin
Let the driver now move the system into the "origin" (i.e., the smallest possible x-y-z coordinate) Do not forget to place the glass-plate at its foreseen position in the FTIStrap before.
(tbd)
Check easy Movement along all Axes
Using Fischertechnik parts for constructing a 3D printer is not really a professional approach. Thus, it is very likely, that your thread rods are not exactly parallel. Additionally, the plastic parts suffer from more friction than metallic parts would.
For that reason, you should first check for easy movement along all axes and, if need be, align all rods and reduce friction by means of a little bit of silicon oil.
(tbd)
Calibrate the System
and save the current configuration
Check the Hot-Melt Gun (and the Fan)
It is now time to heat up the hot-melt gun and fill it with glue for the first time.
Thus, energize the heating element and wait a few minutes. In the mean time, you may slide a first glue stick into the feeder and - using the Controller Application - move it down until it reaches the silicon guide.
As soon as the heater has reached its target temperature, move the stick down fast for another two centimetres and then slowly further. Watch the casing while doing so and stop as soon as the casing seems to bend away due to the pressure of the feeder - in that case, just wait until the casing bends back and continue. Sooner or later you should see the first drop of hot glue being pressed through the gun's nozzle.
Now, the heater element has been successfully filled with hot-glue.
You should now also check the fan - just to be sure it works.
Check the Base Alignment
It is very likely, that your glass plate is no exactly parallel to the x-y axes. This is checked by printing a large (but thin) grid over the whole glass plate. From the results of that print you get information about where to lift the plate (e.g. by means of one or several layers of adhesive tape) and whether glass plate and rods are straight enough (or whether they bend because the extruder and its feeder are too heavy)
(tbd)
You are now ready to start your first print.
Operation Manual
(tbd)
Tips and Tricks
Quite often, people using hot-glue for printing complain that they were unable to remove their objects from the base plate they printed on - the author never had these problems. The possible reason for successful printing might be:
- a glass-plate is used as the base to print on
- just before printing this glass-plate is wiped with a "multi-purpose anti-static" cleaning cloth which is usally used to clean computer monitors, mobile phones and other devices
- after printing, the object may then be vertically detached from the plate (perpendicular to the base layer) - detach with a bit of care, but it usually gets off easily
(tbd)
Material Recycling
3D printers may also have some nice ecological side-effects: you may use them to "repair" broken devices - and you may reuse the material of failed prints and printed parts which are no longer needed.
The author is currently experimenting with an approach to cast his own hot-glue sticks - more to come soon...
(tbd)
Software Downloads
The "FTIStrap Controller Application" has been developed with REALbasic on an Apple Macintosh running MacOS X - but it may also be compiled for Windows XP/Vista and Linux x86.
(tbd)
Modifications and Extensions
The current design is far from being perfect and was often motivated by the parts the author had at home while constructing the system. However, one of the most important advantages of using FischerTechnik was (and is) the ease with which new variants can be built and tested - sometimes, it takes only minutes to realize an idea and see how it works.
For that reason, the FTIStrap is the ideal platform for testing alternatives. Among the supposable modifications and extensions are:
- enhancing the stability of the whole construction
- the integration of different extruders
- provisions for two (or even more) extruders
- any kind of approach to handle overhangs
Additionally, it is quite straightforward to
- control the heating element and/or the fan by the host
Enhancing the Stability of the Construction
Currently, the FTIStrap is built from plastic parts only - an approach which works reasonably well (especially, as the driver software takes care of many shortcomings such as friction and vibrations).
On the other hand, FischerTechnik also offers aluminium bricks which are more rigid than other parts (not only because of the material but also because they combine several connected bricks into a single, longer one). If you just replace plastic components by aluminium bricks (where possible) you will enhance the stability of the construction and reduce vibrations during the print.
As a consequence, you might be able to speed up printing (by modifiying the relevant parameters) or apply other modifications (see below) which require an enhanced stability.
Integration of different Extruders
At the moment, the design of the FTIStrap does not foresee an exchange of the extruder - extruder, feeder and y-axis slider are tightly connected to each other. The installation of another extruder would first require the disassembly of the current one - and then you might even have to modify the slider before mounting a new extruder.
On the other hand, it should not be too difficult to modify the design such that the extruder could be replaced without too much effort. Just take care that the modified construction does not become too heavy for the x-axis thread rods or you will have to modify them as well (e.g., by integration of aluminium bricks instead of plastic parts, see above)
It might be an interesting challenge to integrate the "standard" RepRap extruders into the FTIStrap frame - these are far more advanced than a simple "hot-melt gun". Or to integrate one of the syringe-based extruders preferred by the Fab@Home project. Just keep an eye on the overall weight of your construction when you try to use a different extruder.
Provisions for two or more Extruders
Mainly because of the size of the FischerTechnik base plate, the effective printing space of an FTIStrap is smaller than that of a RepRap (or of many other RepStraps). It would therefore be rather difficult to integrate more than a single extruder without reducing the printing space even further.
Overhang Handling
Without additional provisions, an extruder-based 3D printer is unable to print arbitrary overhangs - additionally, all printed objects have to start either on the base plate or (unlikely) on another object. The "Darwin" RepRap design tries to overcome this deficiency by means of another extruder which prints an (easily removable) "filler" to support any parts printed on top of it.
A potential alternative might be the "padding" of unprinted areas with some kind of powder before proceeding to the next layer, where the powder could then act as a support for the new print-out.
Future Plans
As usual, the author's activities suffer from his very limited time. For that reason, it is rather unlikely that it will be before 2009 that the FTIStrap takes the next step - the handling of overhangs (in any way). Currently, the author prefers the padding of unprinted areas with powder, but it is completely unclear if such an approach can be successful with hot-glue as print material.
Configuration File Format
The FTIStrap Driver saves several settings (and the results of a calibration run) in a "configuration file" which can be (manually or automatically) loaded prior to the first print after starting the driver. Currently, however, the file contains more information than can be entered through the Controller Application. Thus, it might be necessary to edit the file manually - here is its format:
(tbd)
References
- [1] RepRap - "Wealth without money..."
- (see http://www.reprap.org)
- [2] RepStrap - A Bootstrap RepRap machine
- (see http://www.reprap.org/bin/view/Main/RepStrap)
- [3] fischertechnik - Bausteine fürs Leben
- (see http://www.fischertechnik.de)
- [4] Knobloch GmbH - Wenn es um fischertechnik, Lehrmittel, Computer und Elektronik geht
- (see http://www.knobloch-gmbh.de/)
- [5] fischertechnik designer
- (see http://www.fischertechnik-designer.de/)
(tbd)
