CrashProbe
Quick and dirty skeleton instructions.... this should be moved to a better place in the future.
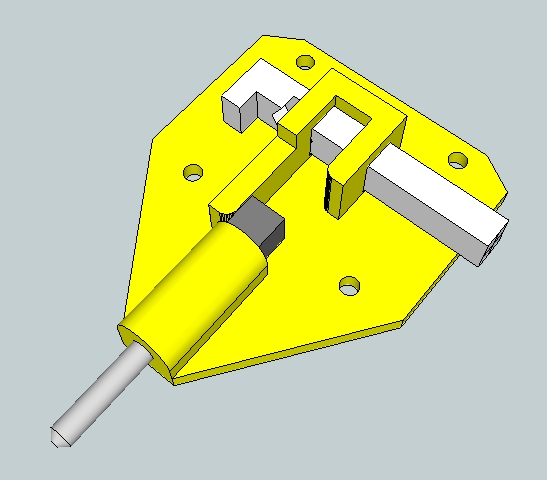
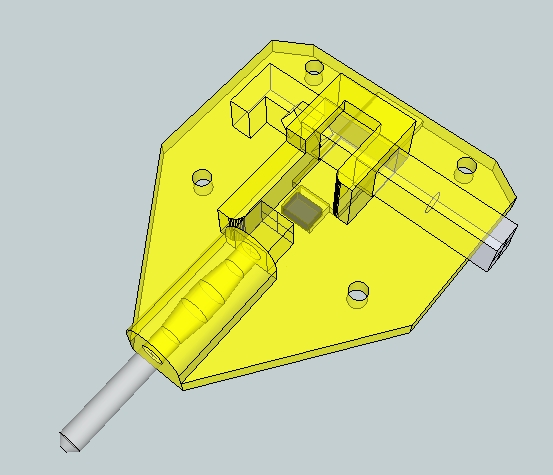
This is an experimental Z height probe using a hall effect sensor wired to a spare analog input port. Sliding the retract bar drops the probe below the nozzle tip. Before a print, G29 will probe the bed at 3 points and set the Z height based on the average of those points and the probe height offset(5mm). After probing, when the nozzle approaches normal print height the magnet will automatically pull the probe up into it's storage position.
Sketchup file:File:HuxleyHallProbe.skp
After printing run a 1/8" drill through the bore hole. The center of the bore has been enlarged to reduce friction so you will just need to clean up the top and bottom bearing surfaces until the bare shaft drops through smoothly. Also make sure that the two walls that the magnet slides on are smooth.
A one time calibration is needed to learn the hall sensor reading when the nozzle is exactly 5mm above the print surface. This allows for probing without the nozzle contacting the heat bed and also allows for the probe to auto-retract.
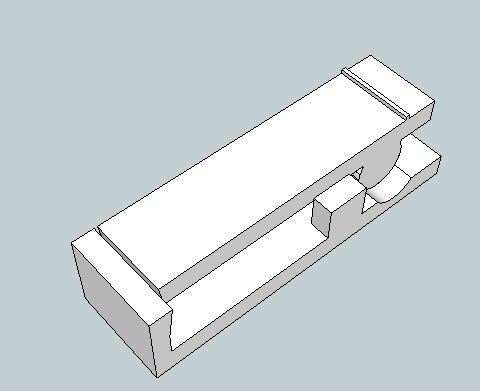
I use a modified version of: http://www.thingiverse.com/thing:36563 It includes a small shelf for the probe to contact that is exactly 5mm below the nozzle.
The shaft is a simple steel 3.17x30.8 RC motor shaft available here: http://rctimer.com/index.php?gOo=goods_details.dwt&goodsid=552&productname=
This shaft has free shipping but will need to be cut to 30.8: http://rctimer.com/index.php?gOo=goods_details.dwt&goodsid=190&productname=
A cube magnet was chosen to aid alignment and solve some other issues. Unfortunately I could only find a source for bulk magnets: http://dx.com/p/ysdx-630-5mm-neodymium-magnet-cube-diy-puzzle-set-silver-125-pcs-175535 The other square magnets at DX are not a perfect cube and may or may not work depending on magnetic field alignment.
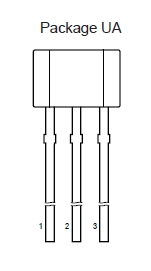
The hall sensor is an Allegro A1302. This is the same sensor used on the hall-o and some other end stops. Available from digikey and other electronic suppliers: http://www.digikey.com/product-detail/en/A1302KUA-T/620-1022-ND/1006597
Pin 1 = 5V Pin 2 = Ground Pin 3 = Analog Output
Hot glue the hall sensor into the probe mount with the beveled face towards the magnet.
Magnet alignment:
Take two magnets and allow them to snap squarely together. Make sure they are square, if one is rotated 90 degrees then they will be attracted with an offset. Carefully pull the magnets apart and mark the face that was attracted to the 2nd magnet. Place that side on top of the probe pin. Use G31 to read the sensor when it is fully dropped. If it is in the 2500 range, reverse it 180 degrees. G31 should read lower when dropped and higher when sitting at the retract bar. Future firmware will allow pole reversal to be calibrated.
Calibration:
In short, we need to obtain the hall reading when the nozzle is a know distance above the bed.
First, check that the magnetic poles are correct as mentioned above.
Because the Z end stop is no longer going to be used, you may need to temporarily change the Z height value to allow Z to be moved manually downward. Use something like "G92 Z50 F200".
Carefully lower the clean nozzle onto the see-saw calibrator. The dropped probe should be in contact with the raised table on the see-saw base. Lower the nozzle down until the see-saw is level then use "G31" to obtain the hall reading. Put that value in configuration.h "define Z_PROBE_STOP_POINT".
Now raise Z back up and use G30 to test the probe. The current code will move the probe down a little bit past the calibrated height, then slowly rise to the calibrated height and then lift off the bed an additional 5mm. Depending on the host firmware, you may have to use M114 to load the new Z height into the UI.
Use:
Make sure that the Z height is high enough so the dropped probe doesn't contact the bed during X and Y homing. Slide the retaining bar over to drop the probe then slide it back in place for automatic retraction. In your start G-Code, change "G28" to "G28 X0 Y0 ;Home X and Y ONLY". We will not be homing on Z anymore. Add "G29 ;3 Point bed Probe" at the appropriate point in your initialization sequence. You may want to also add "G1 Z.5 F200 ;Force probe retraction".
Firmware:
Code was added to repetier to read the hall sensor in the same loop as the temp sensors. Two external Z_Probe files were added that contain the bulk of the probing code.
Note: I am not a programmer. If you can make it better, please fork it. https://github.com/Crash1/Repetier-Firmware


