A4988 vs DRV8825 Chinese Stepper Driver Boards
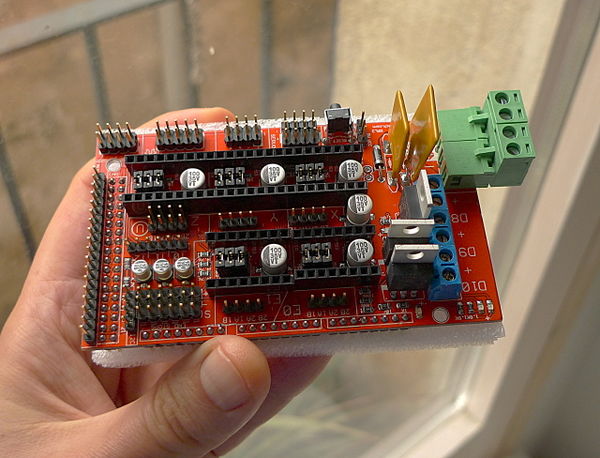
The Arduino Mega 2560 + RAMPS 1.4 combination is presently (December 2014) widely available and just as widely used to control 3D printers, either in the form of original components or more often than not, as inexpensive "Made in China" clones. Similarly, inexpensive "Pololu-style" stepper driver boards that plug directly onto RAMPS boards (usually four or five stepper driver boards are used) are available from China with two different stepper driver ICs, namely the Allegro A4988 and the Texas Instruments DRV8825.
How inexpensive can these stepper driver boards get? Well, right now a set of five Made in China A4988 stepper driver boards goes for around $6.80, whereas a similar set of five Made in China DRV8825 stepper driver boards is available for around $10.
This situation begs for the question: is it worth getting DRV8825 stepper driver boards instead of the more popular A4988 boards or not? Which one is the better choice for my 3D printer? Which one is more reliable / less unreliable? Can I mix A4988 boards with DRV8825 boards? Are there any caveats to using either driver board that I should be aware of?
This page is an attempt to provide sufficient information to make a rational choice and answer these and other related questions, if possible.
Contents
A4988 stepper driver board
I am pretty confident that the Allegro A4988 is an utterly tested and proven solution to drive stepper motors in RepRap 3D printers, and this fact should not be ignored. As long as the following three conditions are met, these Made in China Allegro A4988 stepper driver boards seem to be more or less bullet-proof:
- The stepper driver boards should not be inserted backwards in their respective slots on the controller board (Doh!).
- The stepper cables should not be disconnected from the boards while powered on.
- Proper airflow (i.e. active cooling or in other words, a fan) should be provided.
Incredibly enough that last condition is often not met, as many 3D printer kits seem to dispense with the use of a fan blowing some cool air over the controller and stepper driver boards and depend solely on convection / radiation. It is up to the users/builders to later add a fan on their own... or suffer the consequences!
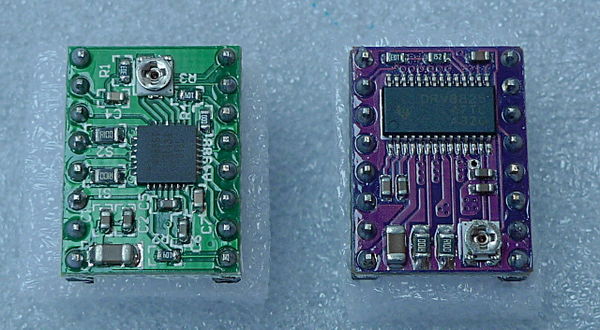
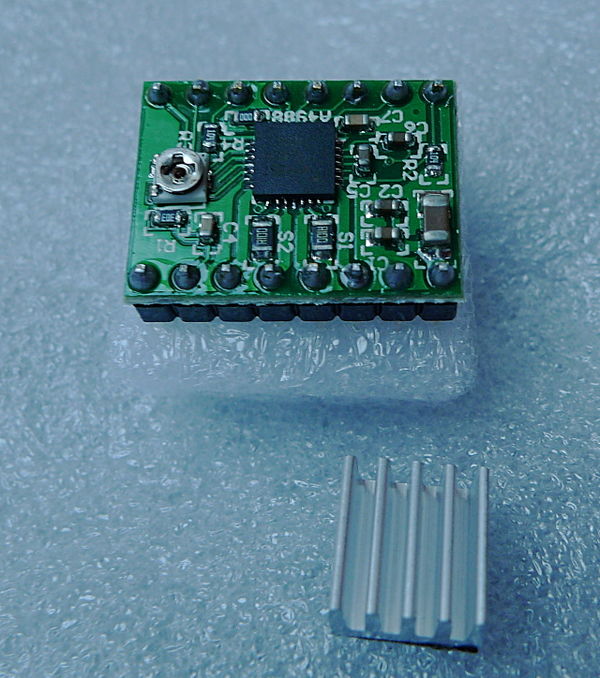
Not the highest quality PCB and soldering I have ever seen, for sure, but... it works!
A4988 orientation
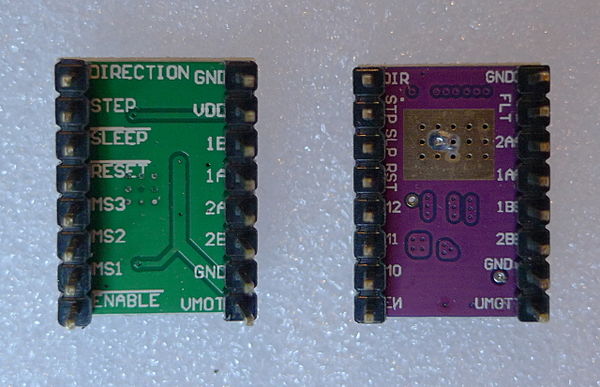
IMPORTANT! As mentioned above, inserting an A4988 stepper driver the wrong way around will kill it and possibly damage the RAMPS board as soon as power is applied, so pay attention to the correct orientation of the stepper driver boards when inserting them in their sockets on the controller board. The trimpot must point to the side nearest to the LCD connectors.
DRV8825 stepper driver board
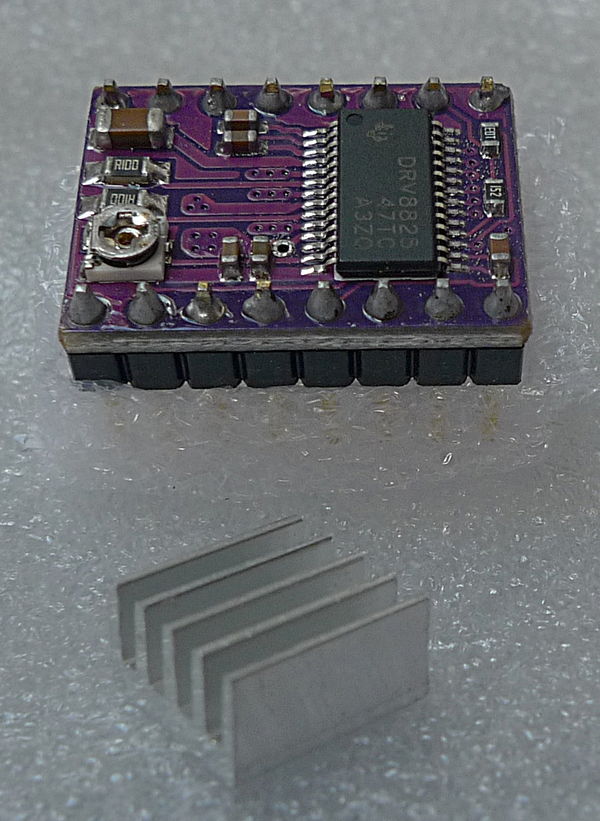
And this is the new contender, a stepper driver board based on the Texas Instruments DRV8825:
DRV8825 orientation
IMPORTANT! As shown in some of the pictures above, the DRV8825 stepper driver boards have the trimpot on the other edge of the PCB compared to the A4988 boards, so pay attention to the correct orientation of the stepper driver boards when inserting them in their sockets on the controller board. The trimpot must point to the side nearest to the Arduino's USB connector.
Trimpot adjustment
By default these Made in China DRV8825 stepper driver boards seem to come with a default Vref set to ~1.6V which - if the formula provided below is correct - is way too high and could even damage the stepper. The first thing to do when using these DRV8825 drivers is to turn the trimpot clockwise and decrease Vref to around 0.5V (1A current), then do the fine-adjustment.
Mixing A4988 and DRV8825 stepper drivers
Yes, you can! (tested and it works fine)
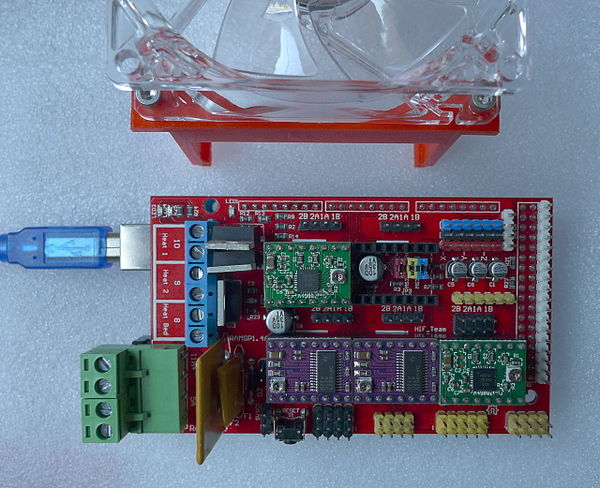
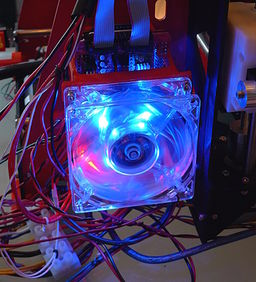
Actually I went ahead and tested this mix on my reference P3Steel. As shown above, I used DRV8825 stepper drivers for the X and Y axis and A4988 stepper drivers for the Z axis and the extruder. I already had small heatsinks on the A4988 drivers (not shown above, I`ll take a picture later) so I just left them there, on the other hand I did not install heatsinks on the DRV8825 drivers. A 12V 80mm fan provides active cooling for the stepper drivers and RAMPS 1.4 MOSFETs. The DRV8825 stepper drivers are set to 1/32 microstepping whereas the A4988 stepper drivers are set to 1/16 microstepping. As for the current settings, I have two completely different steppers for the X and Y axis, but basically I am using all the steppers in this printer at 70% of their nominal max. currents and they all work fine and barely get warm to the touch.
After recompiling Marlin with double the original number of steps/mm for the X and Y axis and flashing it to the Arduino Mega 2560, I printed a couple of calibration parts.
Frankly I was pleasantly surprised by how smooth the X and Y axis movements have become with 1/32 microstepping. I guess I had a nasty resonance with the Y-axis stepper and the way its A4988 driver was configured, but now the resonance is completely gone, and the printer prints with much less noise an vibration than before. Unless some unforeseen problems come up in the next few hours of printing, I am probably never going back to the previous configuration.
Comparison table
The following table compares Made in China A4988 Stepper driver boards vs DRV8825 ones, for RepRap use:
| A4988 | DRV8825 | |
|---|---|---|
| Availability | very widely available | widely available |
| Approx. price | $6.80 / 5 pieces | $10 / 5 pieces |
| Max. theoretical current | 2A | 2.5A |
| Max. microsteps | 16 | 32 |
| PCB color | Green / Red | Purple |
| Stepper current adjust. trimpot | Yes, near Dir pin | Yes, near En pin |
| Typical Rs value | 0.1 Ohm | 0.1 Ohm |
| Vref formula (*) | I_TripMax= Vref/(8*Rs) | I_TripMax= Vref/(5*Rs) |
| Thermal Overload Protection (**) | Yes | Yes |
| PCB layers | 2 | 4 |
| Small heatsink included (***) | Almost always | Sometimes not |
| Active cooling required? | Recommended | Recommended |
| IC packaging | 5x5mm 28-lead QFN | 9.7x6.4mm 28HTSSOP |
Note that some important technical characteristics from the respective datasheets of the ICs are not directly comparable. For example, the DRV8825 is fully specified in terms of thermal characteristics, the A4988 is not. Another important characteristic that unfortunately is not directly comparable is RDSon, which is specified at different current levels in the respective IC datasheets.
(*) Adjusting the stepper driver current
See these instructions: Pololu_stepper_driver_board#Tuning_motor_current.
(**) Temperature Overload Protection
It is very important to keep the stepper driver ICs below a certain temperature during printing, since both ICs feature thermal overload protection that when triggered (typically when the die reaches a temperature of around 150~160 C), shuts down the output stages i.e. halts all commands to the affected stepper and in doing so, ruins the part being printed.
(***) Heatsinks
It is not yet determined how much of a real impact the small aluminum heatsinks shown in the pictures above have on cooling the ICs, as both stepper driver ICs depend much more on proper PCB layout and solder pad contact (as well as proper airflow) for heat dissipation, rather than on dissipation through the top of the IC package. This is because both stepper driver ICs have an exposed metal pad under the chip that contacts the PCB and this is the "path of least resistance" for heat dissipation. The secondary path for heat dissipation is through the package leads and in this aspect the DRV8825 provides for possibly slightly better power dissipation compared to the leadless A4988. It is my understanding that dissipation through the top of the ICs is almost irrelevant here.
Datasheets
Use Cases
(add your own here)
