User:Kvk5287
Karol Kolc RepRap Wiki
Info, Blogs, Projects, more!
Contents
About Me
| RepRap User: Karol Kolc | ||
|---|---|---|

|
||
| University | Penn State | |
| Class of | 2016 | |
| Major | Aerospace Engineering | |
| Partner | Devin O'Donnell | |
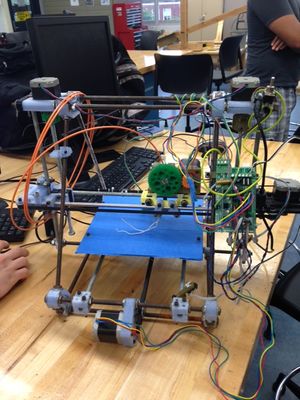
| Printer | Clear Printer | |
Introduction
During Fall 2014 I am taking the course of EDSGN 497J which is the open source 3-D printing course. Follow me on my blog where I update status on the printer that my team is working on and interesting facts about additive manufacturing and related material.
BLOGS
Blog #1
Class has finally started and work has begun on our printers. We have been assigned the clear printer to be working on for the remainder of the semester. We hope that in the 15 class weeks we will become sucessfull in turning the printer into a working reality. Looking upon the wiki website, it turns out that our printer was actually running for a time in 2011 before it was deemed to be too damaged. This gave us some sign of relief that the printer at one point in its lifetime was actually running and operating. I am happy to say that our group has the capability and skills to make this into a fantastic group project. There is still soo much to learn!
Blog #2
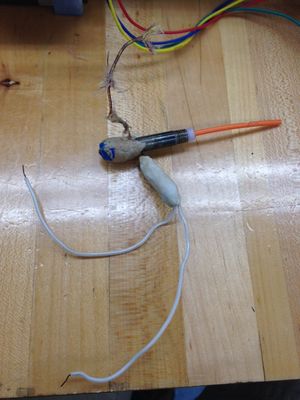
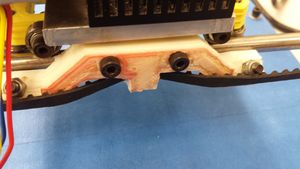
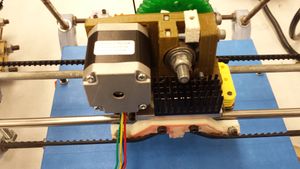
Upon inspection of our printer we have found many different types of problems that need to be fixed in order to get the printer to completion. Among these problems was a chipped off extruder belt arm and a damaged filament nozzle. As of right now, these are the only two things that need to be replaced in the printer before we can truly see if the circuits and wiring actually runs. Disassembling the nozzle we have found corrupt and frail wiring that will need to be replaced and re soldered. Devin will do this part while I find a way to replace the small arm piece to the printer. Upon discussion with the TA, Ian, we will make a decision whether or not to replace the nozzle or try and fix it. However, in the meantime, here is a picture of the nozzle, it is in rough shape.
Blog #3
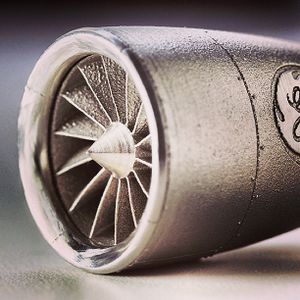
As an aerospace engineering student myself, I find it fascinating what can be done to improve the aerospace industry especially in the manufacturing. One of the newest technologies of additive manufacturing can help achieve ways to produce advanced aerospace components by 3D printing. Companies such as GE are taking in huge investments on this new type of technology to limit costs, production control procedures and of course general usability to print materials that are stronger, lighter and cheaper. Having an ideal mindset to make these new components made of new experimental materials that can not only improve aircraft but also change the lifespan of different models. The companies that are running the forefront now will be the primary technology epicenters for the upcoming future where additive manufacturing will become more readily available through cost and testing of different processes. In my prediction, in a short span of 10 years, many components of aircraft especially in cabin components will be 3D printed to make ease in assembly and production.Blog #4
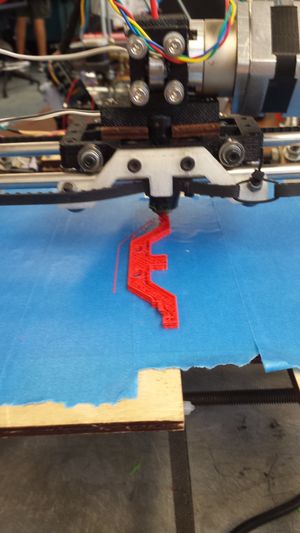
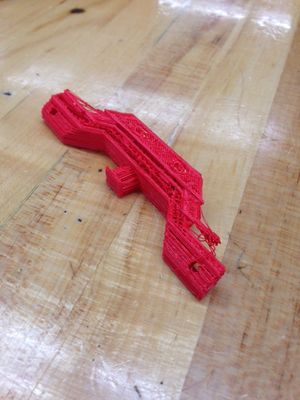
This week we have finally gone out of our comfort zones and actually came for 2-3 hours on a Friday afternoon to get the ball rolling and get the arm piece replaced. From the wiki, we have downloaded the needed STL files to be a perfect fit for our printer and have uploaded to one of the working arduino computers. From there we then setup the gcode needed to run the print. We initially have problems finding the software to convert the files into the printer interface but then were successful to get the print started. The print alone took about one hour and the rest of our time was tinkering and setting up the printer/software. We have finally got a hand of the printer technologies and it was a sight to see a first test print of the arm finally go! These printers take awhile to setup but are worth it in the end!
Blog #5
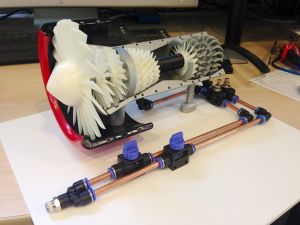
Once again, the jet engine design has caught my attention. This week I have given a presentation of the jet engine technologies that the aerospace industry is using and the designs of people working on real engines that are 3d printed from their homes! This would be an extremely difficult but rewarding project to actually print the jet engine parts, fit them all together and turn the engine on! The jet engine would be powered by compressed air that would lead it into the compressor and turbines to make it spin. Upon looking at the design, the tolerances for this print would have to be tight because if not, the high pressure of the air would actually tear the engine apart! Regardless of the problems that arise from this, the aerospace applications have once again shown me that there is too many cool and interesting aspects with this technology.
Blog #6
Well, here we are back to the test part we created. We initially had high hopes that atleast the test part that we printed would be almost functional, but we were wrong and there is still too much to learn. The printing at first started out very well but towards the end of the print cycle, the printer was not configured enough to get a precise measurement for the top layer and the part became deformed. Looking back at our experience, we had learned much about how the printers run and operate and we got a fantastic learning experience. From previous consultation with the TA, it will now go back and reprint the part but this time with advanced settings and squaring the printer, which is just adjusting the parts to make a tight tolerance. After the squaring, it are sure that the printer will cooperate this time around to print the part!
Blog #7
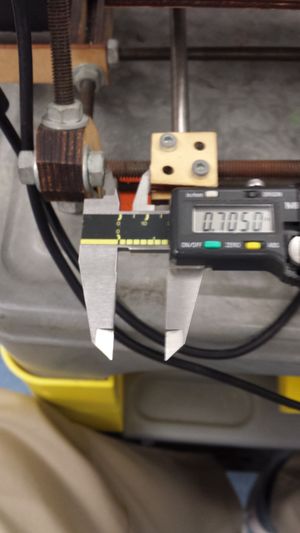
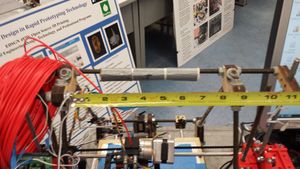
Well, we are back to squaring the printers. Squaring is an essential process because since plastic and wood pieces on the printer often times get deformed an loosened. This is a small hassle to do,but once done properly the printer can operate more efficiently and cooperate with better prints. In order to square a printer, one needs to use calipers and measurement tape to set both sides, left/right and front/back of the printer to same dimensions. By dimensions, it meant the parts on the external connecting rods that hold the printer in place. These parts need to be adjusted to a same or close value of the space between them. This requires measuring the distances and then unscrewing and realigning the components into a tight fit. This was a easy process to do and required just some time to complete. Now since the working printer is squared off, we can then continue onto the print for our arm piece. We are optimistic that it will work this time around!
Blog #8
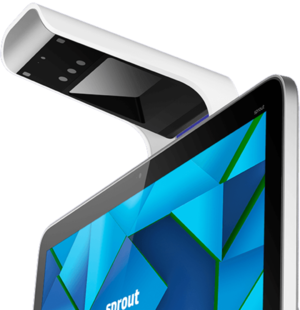
Something very interesting has been just recently released by HP this past month. It is called the HP sprout computer and this will be the biggest revolutionary change in computer interface and 3d printing. The HP sprout is a typical desktop computer however there many distinct features that make it much more different. First, there are two screens, one primary and another for the workshop. The workshop screen is actually projected onto a touchscreen mat on the table. This is optimal because you can see one screen while you work on another. This layout was given primary to designers so they can work on a project on one viewpoint and then switch over to another. BUT, the most important aspect of this computer is that it has a built in 3d scanner! This scanner is so revolutionary that it will be revolutionize the way we 3d print and import objects into computers. The scanner is a accurate device that you actually can put any random object on the mat and it will complete a 3d model or CAD file of the exact object. This a breakthrough in technology because now we can scan objects and get an accurate model without spending time building a CAD file!
Blog #9
Well, we went back to the drawing board and got a new arm piece printed for our printer. We learned our mistakes and this time we gave in to a accurate rendering and printed model of the arm. The ways we improved the print was to square off the working class printer and scale the STL model to optimal settings so the printer interface can actually properly print the top layers of the model. The print came out after much better with a improved tolerance level and no deformation in the top layer. Because of this, we now have a usable arm piece for our printer. That being done, it was finally time to attach the arm piece to the extruder belt and test out the tensions. Using a ziptie and complete tension, the arm piece has been finally installed. Now, all there is left is to test all the components and hopefully start getting to print and using our own printer. This is an exciting time because now, our printer hopefully has all the working components to work!
Blog #10
After testing all the control surfaces with the belt attached to the new arm peice with printed out, it was determined that a few defective parts needed to be replaced. The first being the extruder motor that needed to be swapped out with a brand new one. The old motor wouldn't get any input from the arduino board. After this motor has been replaced the control surfaces has been re checked one more time and seemed to be working optimally. The last thing on our checklist was then to replace the faulty power cable connecting the arduino, after much debate about whether or not to solder the remaining ports to make it more usable, we then just finally decided to replace it with a more reliable cable. Now that the control surfaces are all checked out, we can finally try and optimize the printer for a test print.
Blog #11
Last time we went through the printer, we replaced components and checked over the control surfaces to see if they respond by the board computer. Now it is time to soon do a test print and get the printer to optimized for tight tolerance printing. In order to do this we have to square off our own printer. The squaring process as described earlier in the blog if a crucial and important step to get optimal prints. Without a printer being squared, the print can come out to be deformed or even worse damaged by the extruder nozzle. Under careful squaring of the printer, we have gotten the measurements as close as possible to both sides of the printer. Now that the final step was to square of the printer, we can finally get into printing!
Article Blog #1
One of the most interesting things that I have seen with 3d printing is that no matter what the applications are, it is always much more convenient and cheaper than standard manufacturing. With this type of new technologies, printing materials to army clothes and armor can make it much more comfortable for solider to move around on the battlefield and of course day to day functions and activities. However what is truly remarkable is that there can be a mixture of different types of materials built right into the fabric to make it a more reliable system of clothing. I can also see more more practical applications of this for example fixing damaged armor of soldiers. This however would require some type of material research to actual built a strong material that can withstand any damage in the battlefield. As of right now with the current technology this would be hard to do but maybe one day in the near future this can be possible. Regardless of the many applications that the army is using for 3d printing, the technology is being tested and developed slowly year after year to a strong progression!
Link found here:link
Article Blog #2
Yet another interesting aerospace application that the world of 3d printing is getting itself into. With additive manufacturing methods used in flight configurations this proves that even in the conditions of spaceflight, 3d printing has proven another forefront. The most interesting thing here is that the combinations of the printed pieces are being used to minimize the parts that are used to assemble this camera. This is one of the strong points of 3d printing, using rebuilt configurations possible to assemble a complex object as simply as possible. This is due to the nature of the printers allowing it to print many different types of materials in one piece. This makes the design much more simpler and elegant. This is not just one of Nasa's examples of 3d printing, earlier last year they used different structure designs to fix parts for the international space station. This would reduce space for cargo parts that are being sent to the space station every few months and rather just rely on making fixes to damaged materials. This saves time, effort and cost to makes fixes this way. NASA has come a long way to test different 3d printing technologies and materials and leading the forefront to a positive future.
Link found here:link
Article Blog #3
Paste extrude technology is causing a very big idea to immerse in the 3d printing community. There is much research going on right now to get into different types of materials within 3d printing. One of the most interesting is using paste technology exactly like in the article. Paste technology is different because you can 3d print with mixed material in a easier environment. You can get into cooking, wall fills and much more. One of the examples is that you can 3d print cakes and other baked goodies within 3d printing. This would be much more effective for decorations that would be very hard to do by hand. Out of this can come out crazy designs, food structures and other interesting food products. The best thing that this is that you would only have to program the design into the printer and let it run into completion. No hassles and no hard to reach places/designs. The other applications of this is to make wall designs for construction and many other types of structures. If you can think of something elaborate to do, then it can be possible with a 3d printer. The guys from the kick-starter have a great team and ideal to make it a reality.
Link found here:link
Article Blog #4
Link found here:link
