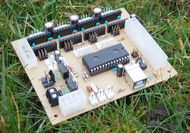
Gen7 Board-ARM 2.0
|
English • العربية • български • català • čeština • Deutsch • Ελληνικά • español • فارسی • français • hrvatski • magyar • italiano • română • 日本語 • 한국어 • lietuvių • Nederlands • norsk • polski • português • русский • Türkçe • українська • 中文(中国大陆) • 中文(台灣) • עברית • azərbaycanca • |
Gen7 Board 1.2 | Gen7 Board 1.1 | Gen7 Board 1.0
Release status: experimental
| Description | Generation 7 Electronics based on an 32-bit ARM Cortex-M0
|
| License | |
| Author | |
| Contributors | |
| Based-on | [[]]
|
| Categories | |
| CAD Models | |
| External Link | (none)
|
Page creation in progress. Status: first circuitry design & board done.
Prepare your Arduino IDE
For a convenient and open source way to get an environment for compiling the firmware, Arduino IDE is a good choice. It apparently uses the gcc-arm toolchain, which in turn is supported directly by ARM its self.
- Download and unpack or install the Arduino IDE. You need v1.5.1 or later, which supports ARM CPUs.
- If you had used previous versions of the Arduino IDE, you have to set the older preferences files aside:
mv $HOME/.arduino $HOME/.arduino-avr
- Fire up the IDE.
- It'll ask you for a directory to store sketches in. Do not select an older sketchbook folder, create and choose a new one, e.g. "sketchbook-arm".
... and lots more to do. Like finding a tool capable of uploading the firmware using LPC1114's built-in bootloader.
Connecting to the Bootloader Manually
This is described on p408ff of the LPC1114 User Manual:
- Connect PIO0_1 to GND. On the Gen7-ARM, this is also the Z axis Step signal, so you can use the Pololu's header's pin for this.
- Press and release the Reset button.
- Have a serial terminal connected, at any baud rate. 9600 baud works fine, also 115200 baud.
- In the serial terminal, enter a question mark ( '?' ).
- The LPC1114 should answer with "Synchronized" in clear text.
