TobyBorlandOriginal
Contents
Assembly of a Toby Borland Original PlyRap
Introduction
These are the build instructions for a plywood Version 1.0 Darwin RepRap. This is a duplicate of the one exhibited at the Science Museum (London, England) in conjunction with SMARTlab. Toby was originally working to fairly tight deadlines and the documentation lagged the actual build. This document is aimed at contributing to that documentation and complements the CAD files which can be found at Sourceforge in the CVS repository. As this documentation is written after the fact and I am in many ways catching up to the detailed work that went before, any errors and mistakes are likely to be mine. Feedback and observations are welcome.
Construction Hints and Tips
Working with Plywood
Plywood whilst being an engineered material shares a whole bundle of features with the wood it was made from. Key features to note, then work with and around are :-
- Dimensional stability Wood in general is a fairly dynamic thing in that it changes under the influence of the environment it finds itself in. Most notable is that it absorbs water and will shrink when dried and expand when wet. Even boards marked as for exterior use do the same. The main difference between interior and exterior boards is the glue used. The actual ply's are the same wood and react the same to the presence of water. Keep you parts somewhere dry until assembly is complete and when finished paint or varnish them to seal the surfaces.
- Dimensional Precision Plywood is manufactured to within a nominal dimensional specification plus or minus a specified amount of error. This is of course then also affected by the observations above. Expect that the parts whilst being designed to the correct sizes and tolerance will be different when cut out of actual material because of this. Be prepared to file, sand and cut your way to success.
- Gluing Use a water based wood glue, avoid impact adhesives as you don't get enough time with them to manipulate the alignment of components before they are grabbed permanently by the adhesive. You can use standard PVA glue quite successfully and it is sometimes possible to separate incorrectly PVA glued items by soaking in water. Be very mindful of the above notes re dimensional stability though. Soaking should really be a last desperate resort.
- Filling Holes and voids can be filled with any number of over the counter fillers from DIY stores. A favorite carpenters trick is to mix fine saw dust with wood glue and use this as it is both cheap and matches the colour of the wood being used.
- Wood Grain Whilst Plywood has its plys layered with the grain running at 90 degrees per layer for strength be aware that when cutting, sharp tools will attempt to follow the grain of the layer you are cutting through. Despite your best attempts otherwise, take great care with your fingers, you will need them for the rest of the assembly work. Similarly when filing, sanding and sawing the surface ply's will rip along the grain and look a bit of a dog. This can be avoided with care. Scoring the surface ply with a sharp blade can reduce the surface ripping along the grain.
The components in this design are made mostly from the same thickness of plywood. This means that where a component needs to be of a greater thickness several pieces of the plywood are glued together to achieve this. This technique is known as lamination and can create parts with great strength if a few simple rules also common to gluing wood are followed.
- Trial Assembly Assume that none of your pieces will fit instantly and perfectly together. Assemble each component dry, that is without any glue. Sand. file and cut your way until all the pieces for that particular component fit correctly together. Only when you are happy contemplate gluing them together.
- Applying Glue Don't go wild with the glue any excess just squeezes out when you clamp your work up and needs cleaning off. Apply a thin regular film to each surface to be glued. Leave no voids or dry patches. Think of it as spreading butter frugally across a piece of cold toast. When clamped up wipe off any excess with a damp rag. Any you can;t get to can be cut away with a sharp knife after it has dried.
- Clamping Glued wooden pieces and especially laminations are at their strongest when they have been clamped together for the duration of the time it takes the glue to set. Check you glue bottle for the instructions as to how long this is. You can use anything that will clamp up including a vice, nuts and bolts or dedicated clamps. If you are short of clamps and need to get on with the job clamp the pieces for at least the first hour or so.
- Work in Stages Freshly glued laminations and pieces tend to slip until the glue has sufficiently dried, this is great for adjusting alignment. It is a pain though when you want to clamp up the work. Avoid clamping at angles to the glued joint, always clamp across the join at about 90 degrees. Do your gluing in stages and allow one stage to dry before progressing onto the next. arrange your stages so that it is only necessary to clamp in the one orientation per stage. You can glue as many laminations as you have clamps big enough for in a given stage providing you can keep the pieces aligned. Use pins, nuts and bolts as clamps and to keep pieces aligned as the glue dries.
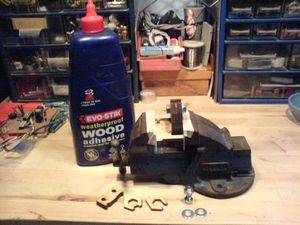
The picture below shows a stage that has been glued with my usual wood working glue and is clamped in a vice with soft jaws taped over the vice jaws so they don't mark the soft surface of the ply wood. I have put a nut and bolt through the laminations to keep them aligned and to keep them clamped when I release the part from the vice after the first hour. While that part continues to dry I can be getting on with the next one. Use washers with the nut and bolt to spread the clamping force and avoid marking the surface of the pieces.
- Clamped Stage:
It is worthy of note that laminating thin plywood to make thicker pieces if glued correctly will create components with greater strength than working with thicker plywood. This is due to the way plywood is constructed. The outer layers are made from "Best" wood that has a better look and greater strength than the core wood which is a lower grade filler. thicker plywood has more filler. Where as thin plywood laminations contain more "Best" wood and consequently have a greater assembled strength.
A word to the wise, I originally intended to set off and hand cut a set of components to do this build. Toby managed to talk me out of it. Having studied the components and completed the first set of Bed Corner Brackets I now fully realize Toby's advice was sound. His design was specifically made up for laser cutting and many of the components are cut with a precision that is not possible with other tooling. The Kerf (the bit that is lost during cutting due to tool width, usually as sawdust) is so very fine with a Laser cut. Add to this the facts that the Laser burn heat seals the edges and the lack of mechanical distress to the cut edges and you can see how work this fine with a material like plywood is only really possible using laser cut pieces.
Separating the Pieces
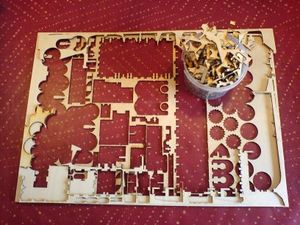
The pieces arrive still in their sheet form and need to be separated out. As noted above plywood needs a bit of the delicate touch on pieces that are this fine. Particularly if you have kept your costs down by only ordering just enough of the parts that you need. Here's some tips to help make it work out.
Put a couple of hours aside to seperate out all of the pieces. Do them all in one go. It can be tedious work but once you have got into a pattern of working it will soon be done.
The laser often has not cut completely through the ply wood. This is for a variety of reasons. In most cases this is only the last ply that is just hanging on.
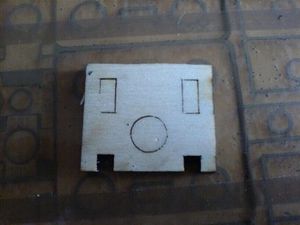
Press such parts out gently by hand from the Back
- Back:
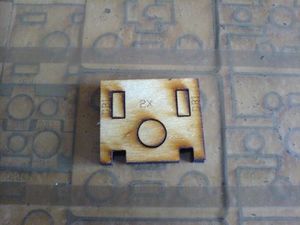
To the front
- Front:
Press on the waste piece, if any ripping along the grain happens then it will be the waste pieces that are messy and you can ignore them.
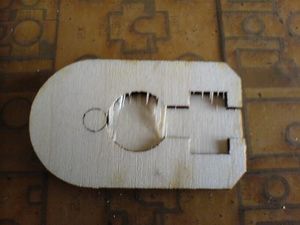
To avoid the ripping score along the kerf lines before pressing.
- Score First:
Keep all the bits until you have completely finished making the components up. I am still finding bits that I should have kept amongst the waste and conversely waste in amongst the good bits. If when you have assembled all your components you have something left and it can not possibly be part of a finished component than it must be waste and can be thrown away. Some of those long thin stick like waste bits are also great for use as disposable glue spreaders.
- Finished Waste:
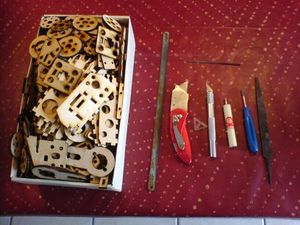
Note the tools shown in the picture below. These were all the tools that I needed to separate the pieces and do any initial obvious tidying up. The needle file was used to tidy up the teeth on the drive belt pulleys as these are very fine.
- Finished Good:
Assembling the Jigsaw Pieces into Components
Before
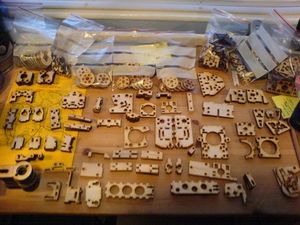
The jigsaw laid out. Before starting check that you have all the pieces by laying them out somewhere where they won't get disturbed. This will also help you easily locate the parts you need for each component as you come to assemble it.
- The pieces laid out:
Resealable plastic bags are great for keeping the more numerous components together and organizing things.
Bed Corner Bracket
After
Acknowledgments
- Toby Borland for the original PlyRap exhibited at the Science Museum (London, England), Laser Cutting, Build Photos and ongoing input.
- Vik Oliver for ongoing work on simplifying and attempting to create a reduced cost PlyRap.
- Everyone at forums.reprap.org for their contribution to this ongoing development
-- Main.AndyKirby - 10 Jul 2008
