HackerBot Build Manual
Contents
- 1 Before You Begin
- 2 Downloads
- 3 Assembly Instructions
- 3.1 Aluminum Frame
- 3.2 XY systems
- 3.3 Head
- 3.4 Z system
- 3.5 Door
- 3.6 Assembling Print area
- 3.7 Assembling Base
- 3.8 Electronics
- 3.9 Extruder
- 3.10 Panels
- 3.11 Accessories
Before You Begin
If you are here probably you are going to build an Hackerbot by yourself.
Tools needed to build ground up the Hackerbot:
- Drills
- Bandsaw
- Lathe
- Grinder
- Caliper (small one and big one 500mm)
- Drills, taps, reamers
- Solder gun
- Multimeter
- Crimp tools
and a some goods:
(NOT UPDATED RIGHT NOW) Complete bill of materials for HackerBot v 1.3: HackerBot BOM
Downloads
HackerBot project design files are on GitHub:
- Stable release v 1.3 GitHub
- Developer edge branch edge branch
If you have question, doubts, applause just drop a mail at info @ oshw.it
Assembly Instructions
Before assembling a HackerBot, make sure you have all the parts necessary.
Every assembly / build step is documented with a photo and a short but clear description.
Follow all the steps and ask if in doubt.
And please take care of all the safety precautions when assembling, machining, whatever.
Remember: nothing is more important than safety
Aluminum Frame
Base structure
| qty | part name | description/notes |
| 4 | Aluminum profile 30x30 450mm | |
| 8 | Internal bracket (Bosch 3842535577) | |
| 11 | Plexy support |
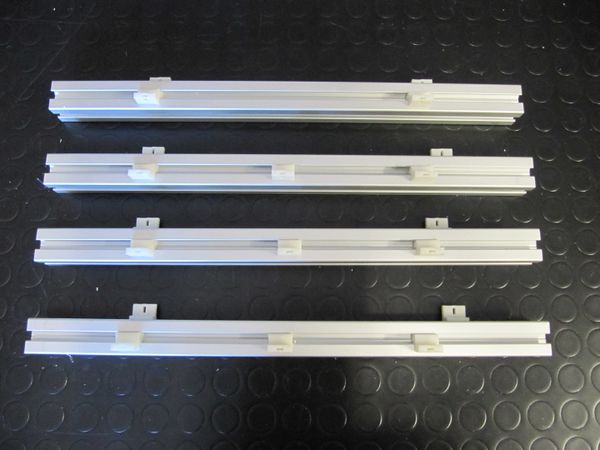
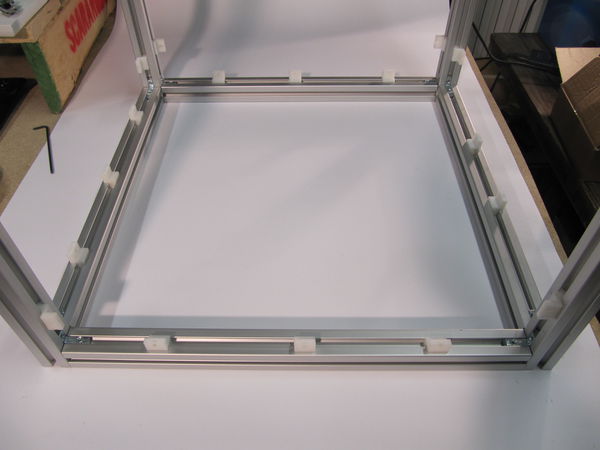
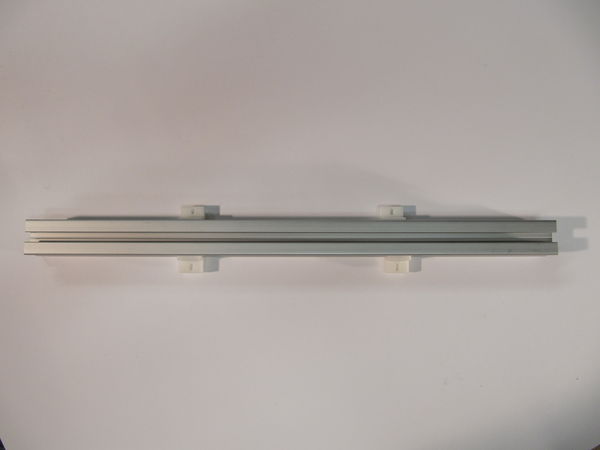
Step 1: base with supports
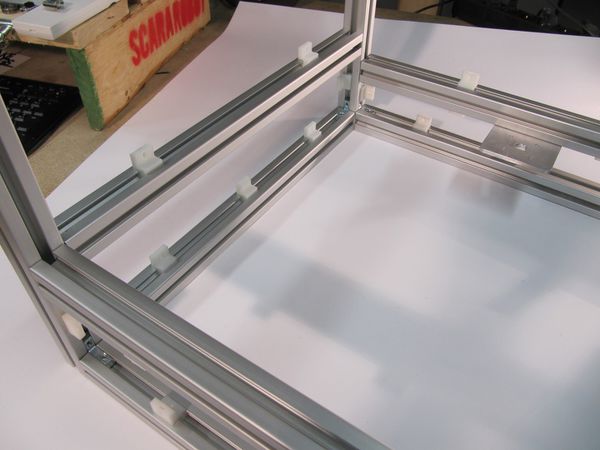
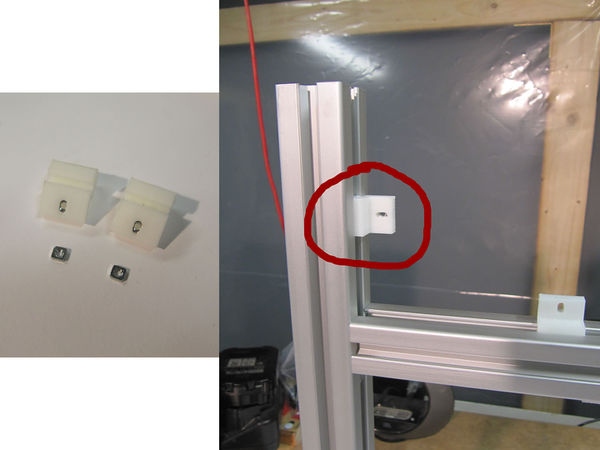
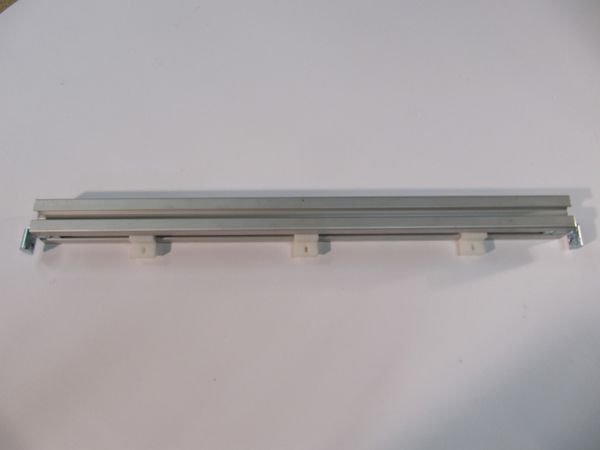
Take the four 30x30 structure profile of length 450mm. Insert the plexiglass support (3d printed) in the profile grooves in the following manner:
- three supports on three profiles
- two supports on the last one profile
Step 2: base with internal brackets
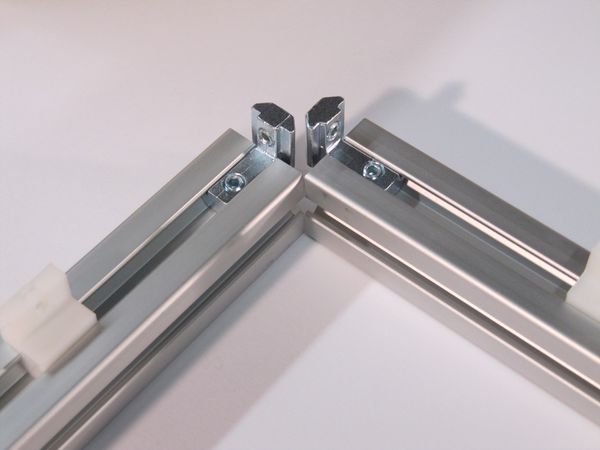
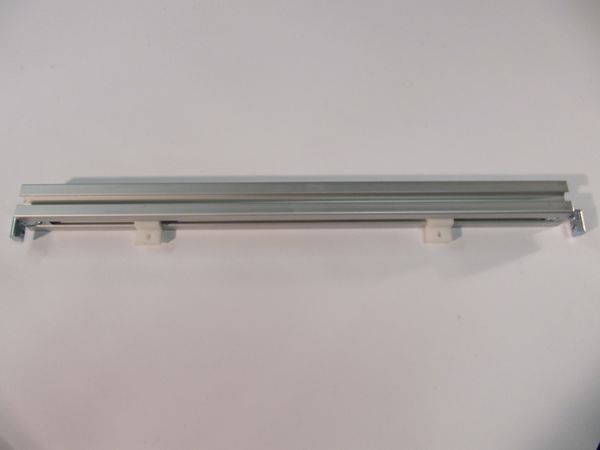
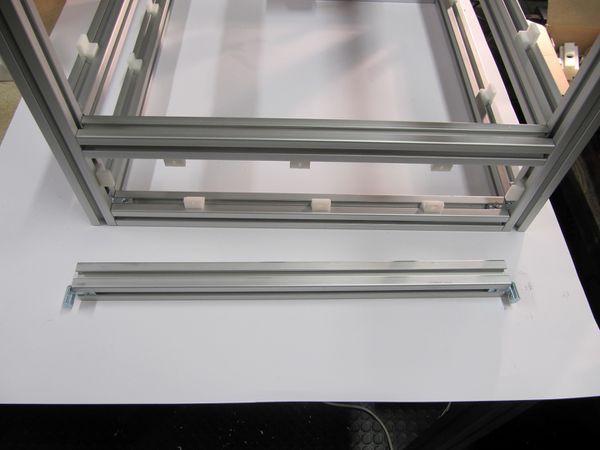
Create a square with profiles and add the internal brackets, one each end of profile
Check out the correct placement of Internal Bracket:
Columns
| qty | part name | description/notes |
| 4 | Aluminum profile 30x30 600mm | |
| 8 | Plexy support 3mm |
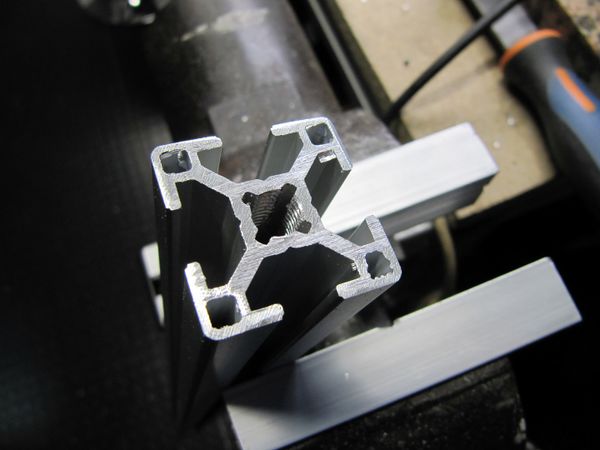
Step 3: tap M8 vertical strut
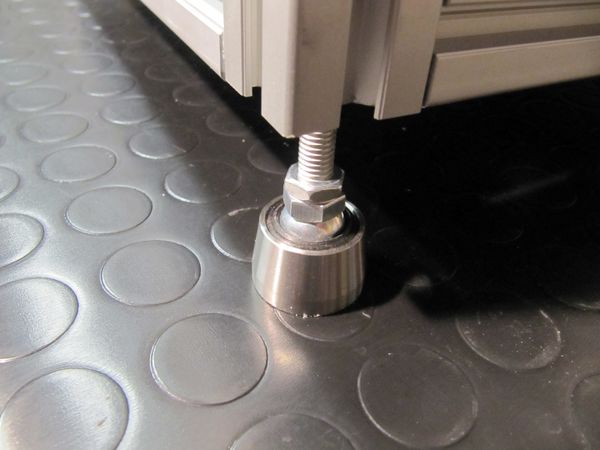
Tap M8 one side of 600mm vertical profile. Taps are for printer rubber feet
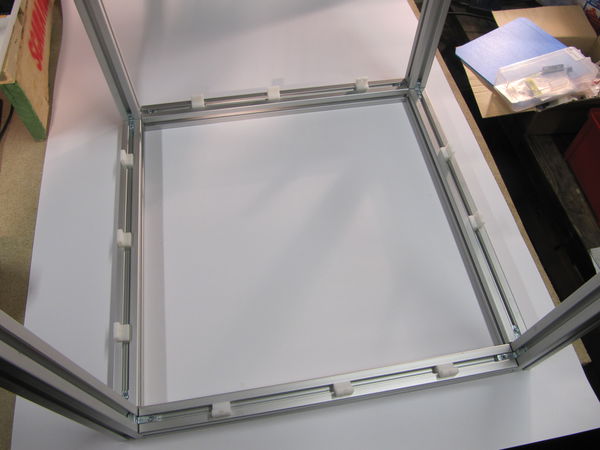
Step 4: tighten base with column
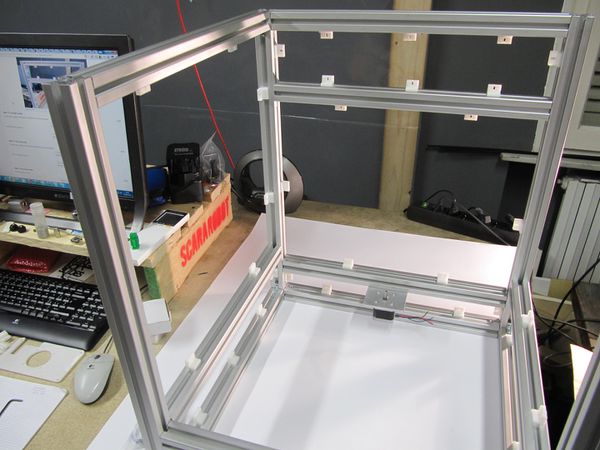
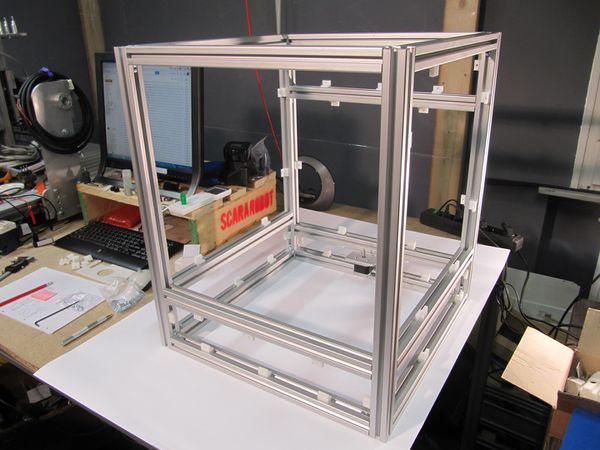
Link the base with the vertical profiles. Check that dimension are equal with a caliper and tighten the screws.
Step 5: insert supports in the column
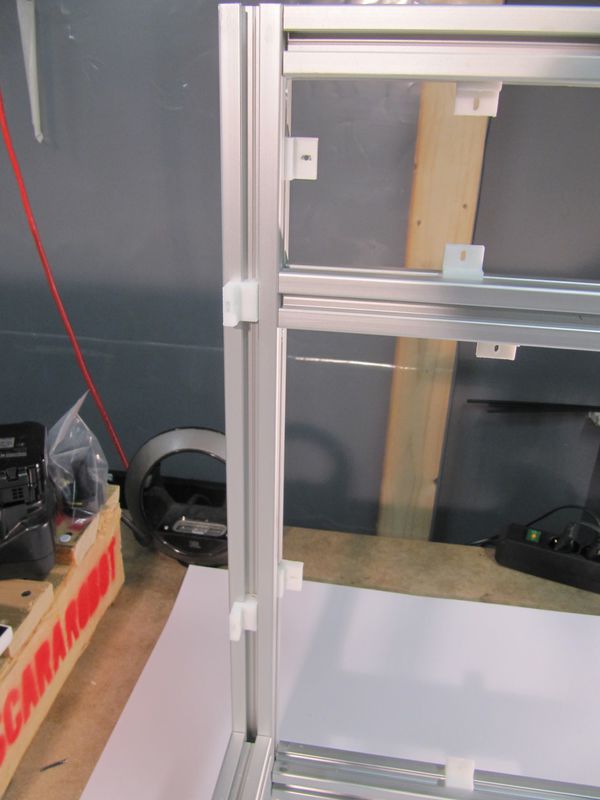
Insert two plexiglass support in one column. The supports are only on internal face
Repeat for every column.
check the photo:
check out: total 8 plexyglass supports.
Mid plane profiles
| qty | part name | description/notes |
| 4 | Aluminum profile 30x30 450mm | |
| 23 | Plexy support 3mm | |
| 8 | Internal bracket | Bosch 3842535577 |
| 1 | Z stepper plate | File:Z-stepper plate.PDF |
| 2 | M6 T-head bolt | Bosch 3842523921 |
| 2 | T-nut | Bosch 3842523925 |
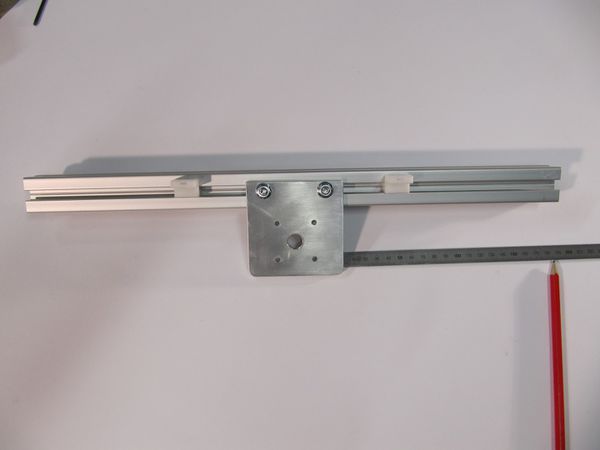
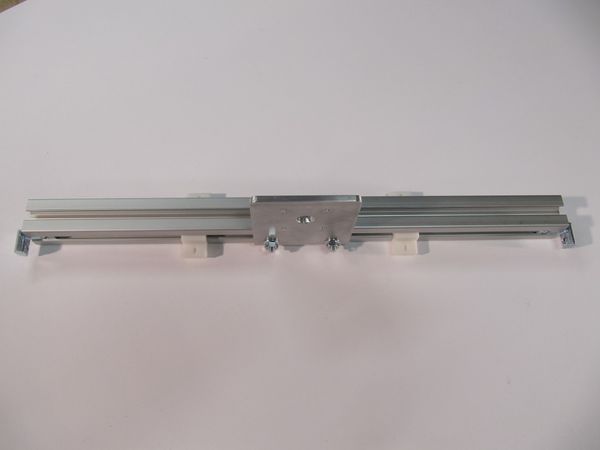
Step 6: lower Z profile / Z motor mount
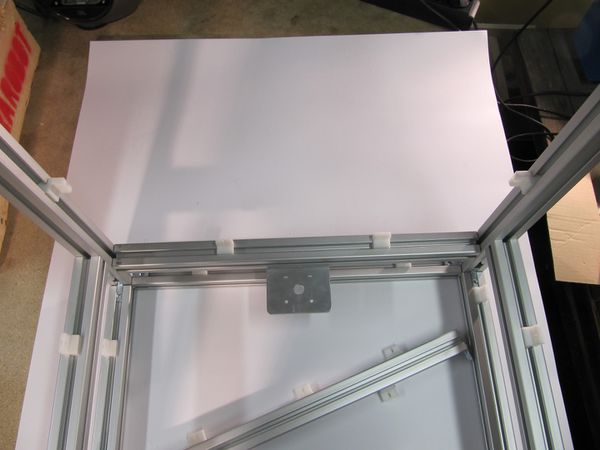
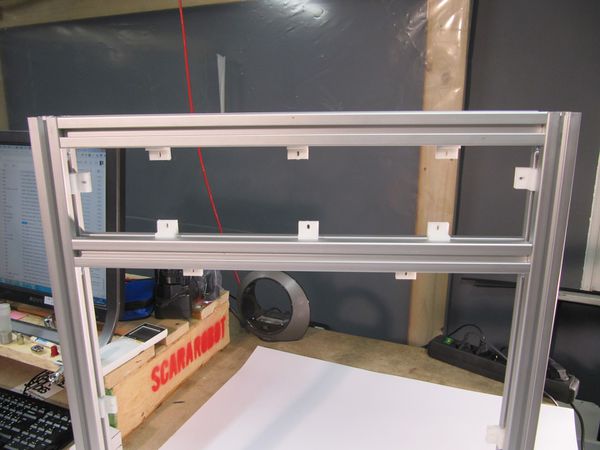
Put two plexiglass supports on the upper side and two and lower side:
Mount the Z stepper plate in the mid of the profile:
Using two M6 T-head bolt and two T-Nut.
TIP: measure 185mm from the edge of the profile.
Place two internal bracket at the end of the profile:
Place the profile in the struct with a distance of 46 mm from the base profile:
---
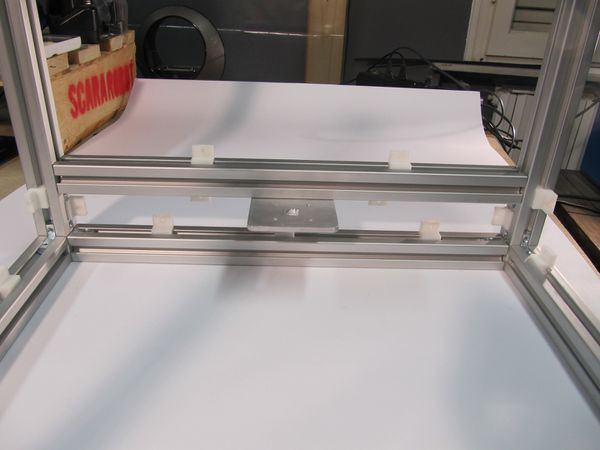
Step 7: front middle profile
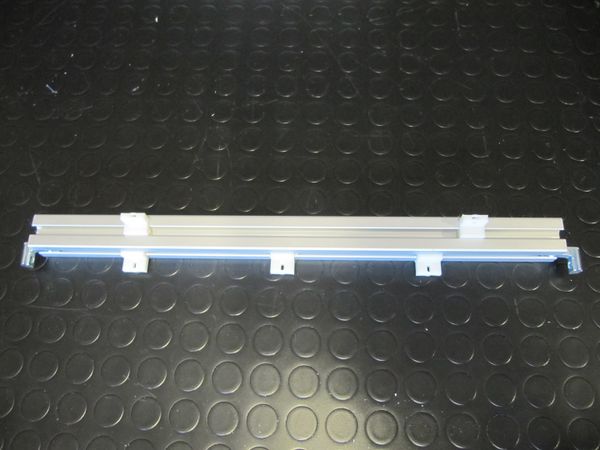
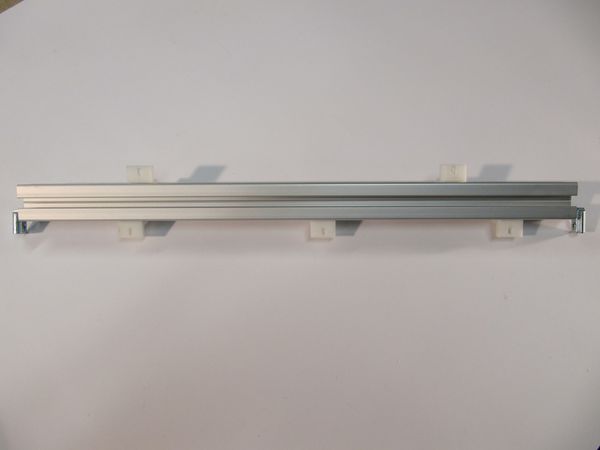
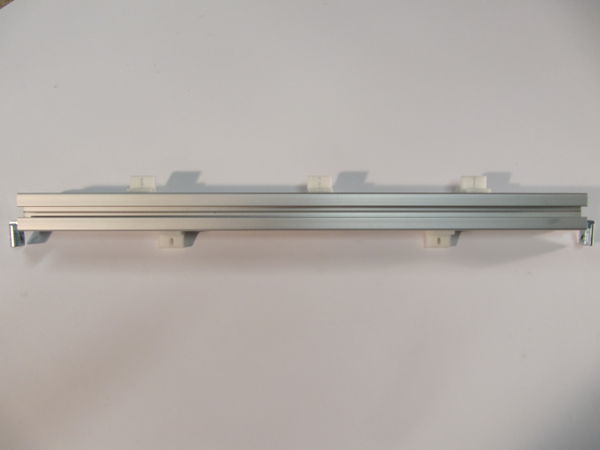
Take the mid profile for the front side and insert in one groove three plexy supports and two internal brackets:
Fix it and leave a gap of 85 mm between this profile and the lower one:
Step 8: right middle profile
Take the profile for the right middle side and insert two plexy supports and two internal brackets:
Fix it and leave a gap of 85 mm between this profile and the lower one:
Step 9: left middle profile
Take the profile for the left middle side and insert two plexy supports and two internal brackets:
Fix it and leave a gap of 85 mm between this profile and the lower one:
Upper Z profile
| qty | part name | description/notes |
| 1 | Aluminum profile 30x30 450mm | |
| 2 | Internal bracket | Bosch 3842535577 |
| 3 | Plexy support 3mm |
Step 10: Upper Z backside profile
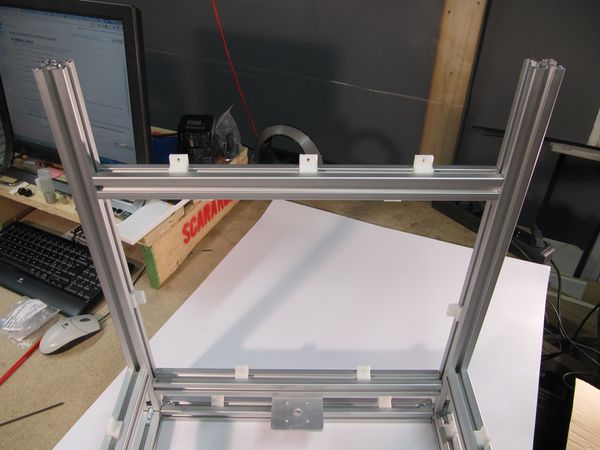
Place one plexiglass support in each backside columun:
In the Upper Z profile put three supports upside and two downside.
Put the internal brackets at the end of the profile:
Fix it with a distance equal to 342 mm between the internal vertical surfaces of z-upper profile and mid profile on the rear side:
Top square structure
| qty | part name | description/notes |
| 4 | Aluminum profile 30x30 450mm | |
| 8 | Internal bracket | Bosch 3842535577 |
| 20 | M6 T-head bolt | Bosch 3842523921 |
| 20 | T-nut | Bosch 3842523925 |
| 9 | Plexy support 3mm |
Step 11: Top Backside profile
Take two supports and insert a M3 square nut.
Insert one support to the left side (see photo) and other one to the right side:
Put three plexy support in the aluminum profile and two internal brackets:
Mount the profile in the backside:
Step 12: Top Right profile
Per side insert two plexy support in the vertical strut. Total four supports
Put two plexy support in the aluminum profile and two internal brackets:
Mount the profile in position:
Step 13: Top Left profile
Do the same as step 12 but for left side.
Step 14: Top Front profile
Put two internal brackets:
Mount the profile in position:
XY systems
Support plates
| qty | part name | description/notes |
| 1 | Front right support plate | File:Support plate 50x50 L.80mm Front-Right.PDF |
| 1 | Front left support plate | File:Support plate 50x50 L.80mm Front-Left.PDF |
| 1 | Back right support plate | File:Support plate 50x50 L.140mm Back-Right.PDF |
| 1 | Back left support plate | File:Support plate 50x50 L.140mm Back-Left.PDF |
| 20 | M6 T-head bolt | Bosch 3842523921 |
| 20 | T-nut | Bosch 3842523925 |
Step 15: Back Right plate
Using four M6 T-head bolt fix in the corner the support plate:
Step 16: Back Left plate
Using four M6 T-head bolt fix in the corner the support plate:
Step 17: Front Left plate
Using two M6 T-head bolt fix in the corner the support plate:
Step 18: Front Right plate
Using two M6 T-head bolt fix in the corner the support plate:
XY system
Step 19: Cubic Slider
| qty | part name | description/notes |
| 4 | Cubic slider | |
| 8 | Cubic slider belt clamp | File:Belt clamp.stl print 100% infill |
| 24 | M3x12 screw kit | |
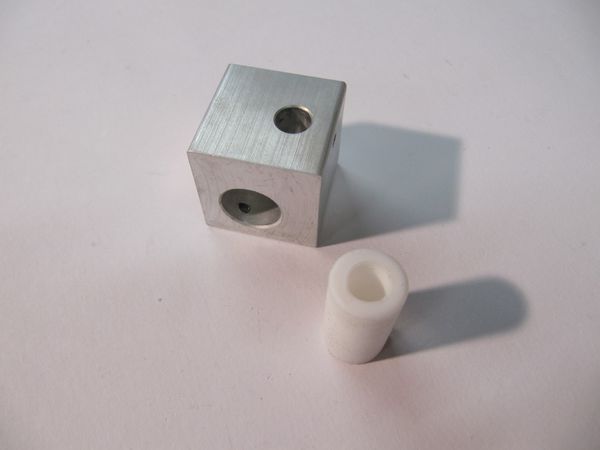
| 4 | Cubic slider PTFE bushing |
Assemble the cubing slider:
and take care when inserting the PTFE bushing. If possible use a 8mm reamer after.
Step 20: XY Shafts
| qty | part name | description/notes |
| 2 | Shaft 8mm. length 465mm | |
| 2 | Shaft 8mm. length 438mm | |
| 8 | GT2 20 teeth pulley (8mm bore) | |
| 8 | Shim | POM / Delrin |
| 8 | 608 Bearings | |
| 8 | Bearing housing | 3D printed |
| 32 | M3x16 screw kit | fixes the bearing supports with support plates |
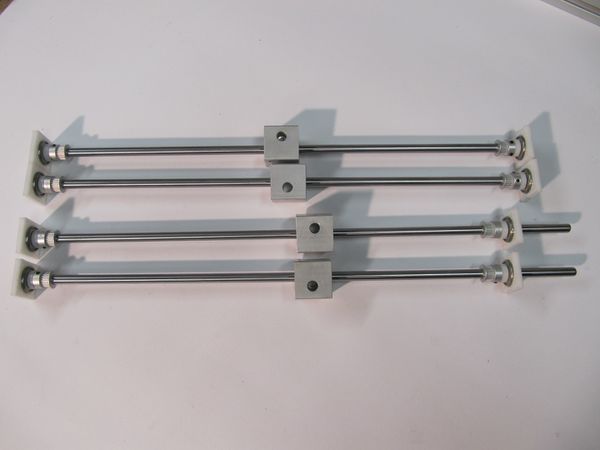
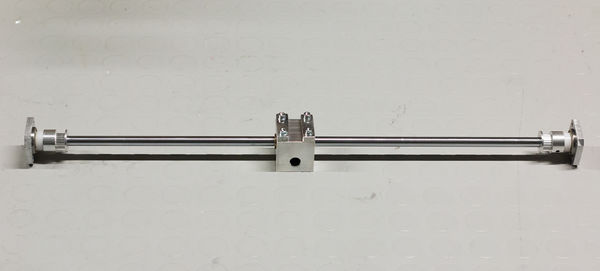
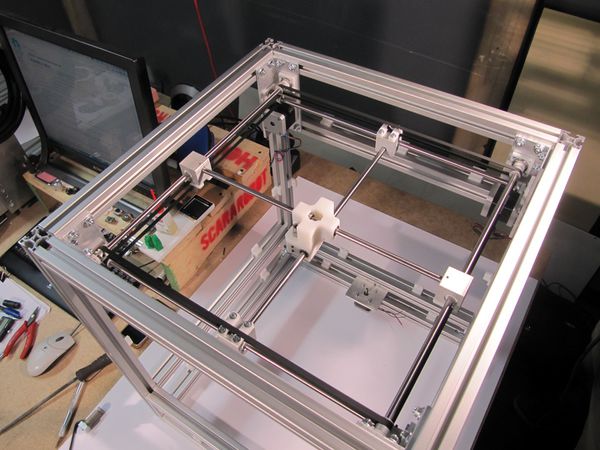
Using the cubic slider assemble the shafts as in photo:
double check:
- the correct orientation of Cubic slider's
- shafts should not be touching the Supports plate
- Cubic slider's should be running well on the shafts, and shafts should turn easily
DON'T tighten the screws.
Step 21: XY Belts
| qty | part name | description/notes |
| 4 | GT2 open belt length 830mm | XY core belts |
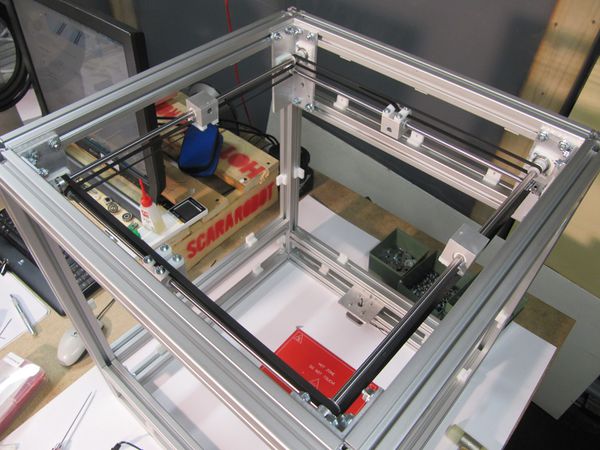
Place the four belts like as show below:
DON'T pull the belts.
Step 22: XY Motors
| qty | part name | description/notes |
| 2 | Stepper motor Nema 17 | 2.5A (or 1.7A), shaft 5mm |
| 2 | GT2 20 teeth pulley | 5mm bore |
| 2 | GT2 20 teeth pulley | 8mm bore |
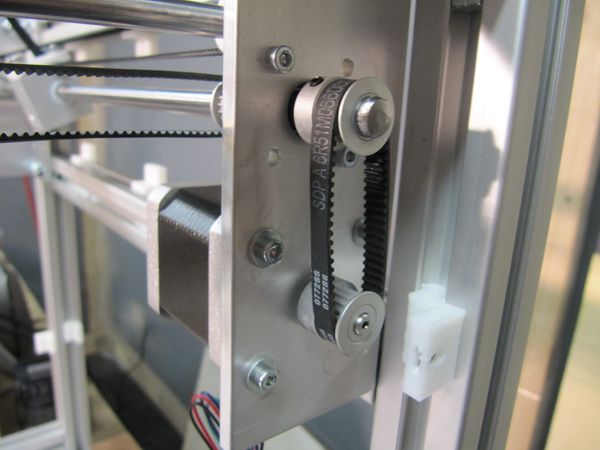
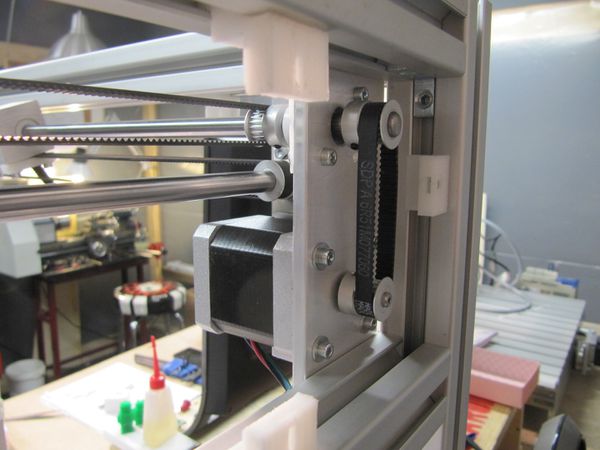
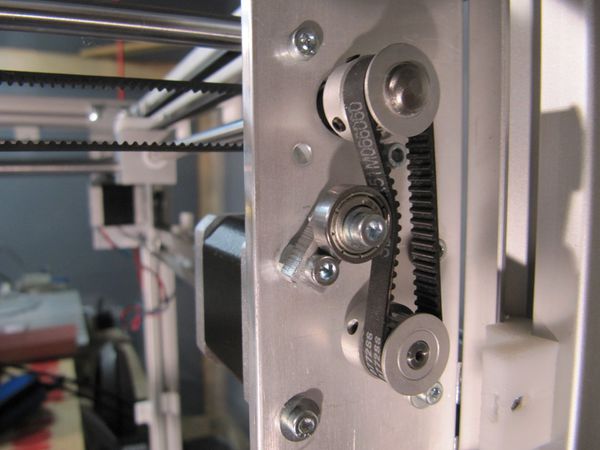
| 1 | GT2 closed belt 77 teeth | SDP-SI.COM (6R51M077060) |
| 1 | GT2 closed belt 66 teeth | SDP-SI.COM (6R51M066060) |
Y Motor (right side)
Use a GT2 closed belt 66 teeth:
X Motor (backside)
Use a GT2 closed belt 77 teeth:
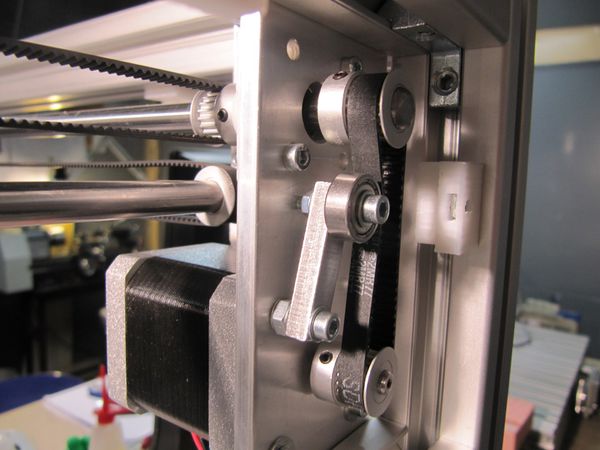
Step 23: XY Motor belt tighteners
| qty | part name | description/notes |
| 1 | Belt Tightener | with one 624zz bearing, File:Belt tightener.PDF |
| 1 | Belt Tightener short | with one 624zz bearing File:Belt tightener small.PDF |
| 1 | 624zz bearing | |
| 2 | M3x15 screw | with 2 M3 nuts |
| 2 | M3x20 screw | with 2 M3 nuts |
| 6 | M3 washer |
Head
Step 24: Head assembly
| qty | part name | description/notes |
| 2 | Shaft 8mm length 370mm | Head shaft support |
| 1 | Head v2 | File:Head v2 FAN.stl File:Head v2 fan support 60.stl |
| 4 | Linear Bearing | LM8UU |
| 2 | Pneumatic fittings | |
| 4 | M3x8 grub screw | fixes the hotends |
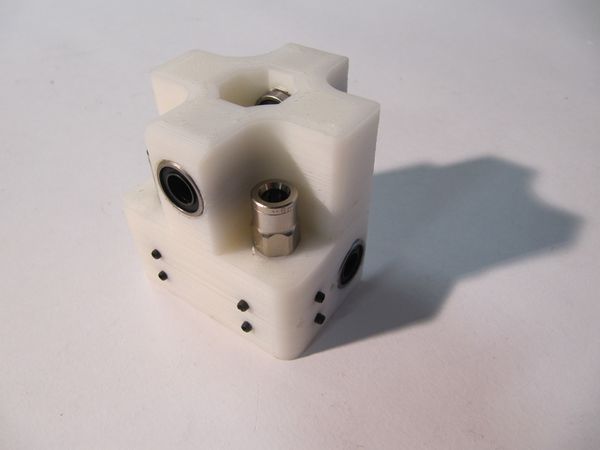
Insert the four linear bearings in the head, fasten the pneufit and the grub screws:
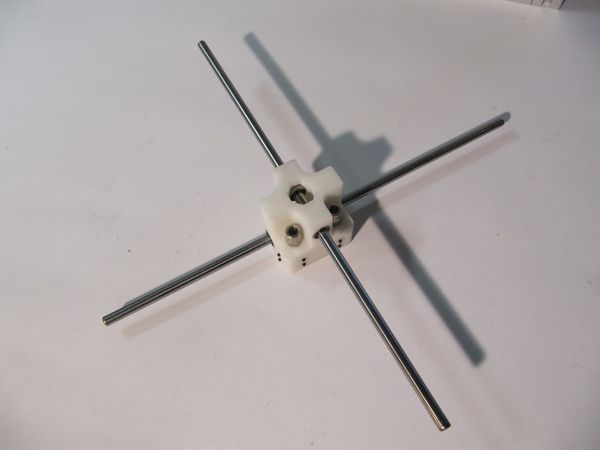
Insert shafts in the head
Place the head assembly AND take care to not force anything when mounting it:
TIPS:
- for easy mounting put the cubic sliders on a side
Z system
Step 25: Print area support assembly
| qty | part name | description/notes |
| 2 | LM10LUU | 10mm linear bearing with housing |
| 1 | LM10LUU screw kit | 8x M5x20 screw, 8x M5 washer |
| 1 | Print area support L-shaped | File:Print area support-L-shaped plate.PDF |
| 1 | Z endstop holder | |
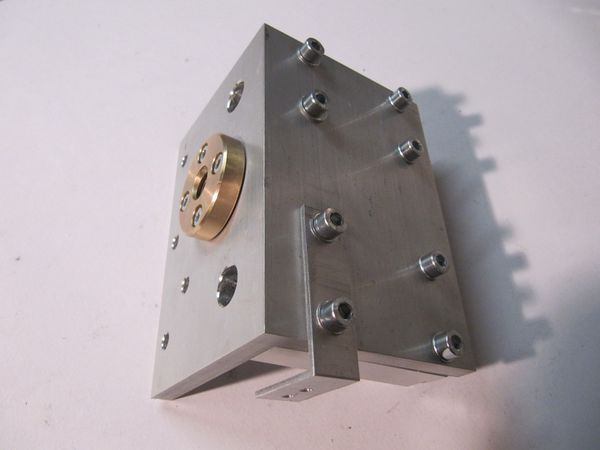
| 1 | Trapezoidal nut | with 4x M4x20 screw |
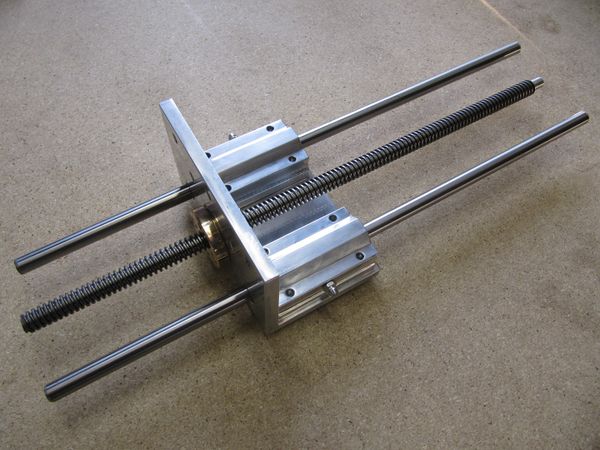
Fasten LM10LUU linear bearings and the L-shaped plate with M5 screws (Linear bearings must be placed on the internal side of L-shape) and, on the other side, the trapezoidal nut through M4 screws like:
Step 26: Z axes and trapezoidal thread
| qty | part name | description/notes |
| 1 | Trapezoidal screw 12x3, length: 380mm | 12mm length machined to 10mm diameter |
| 2 | Z shaft 10mm length 390mm | 10mm |
Screw the trapezoidal thread in the nut and to the L-shaped plate.
Insert the two shafts in the LM10LUU bearings
Step 27: Z stepper motor assembly
| qty | part name | description/notes |
| 1 | Z Stepper motor | nema 17 1.7A |
| 1 | Z Stepper motor screw kit | 4x M4x20 screws, 4x M4 washer |
| 1 | Motor-Trapezoidal screw coupler | flexible coupling 5 mm and 8 mm diameter |
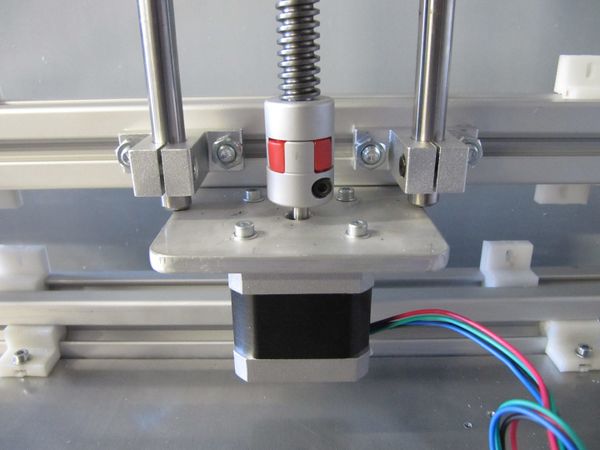
Take the stepper motor for the z-axis and join the motor shaft toward top to stepper plate with the screws and washers (stepper motor kit of this section checklist).
On the other side of the stepper plate, add to the motor shaft (5mm of diameter) the flexible coupling.
Step 28: Assembly of z-axes on structure
| qty | part name | description/notes |
| 4 | SK10 Shaft support | 10mm shaft |
| 10 | Collar nut (Bosch 3842523925) | used for stepper plate and SK10 |
| 10 | T-Bolts (Bosch 3842523920) | used for stepper plate and SK10 |
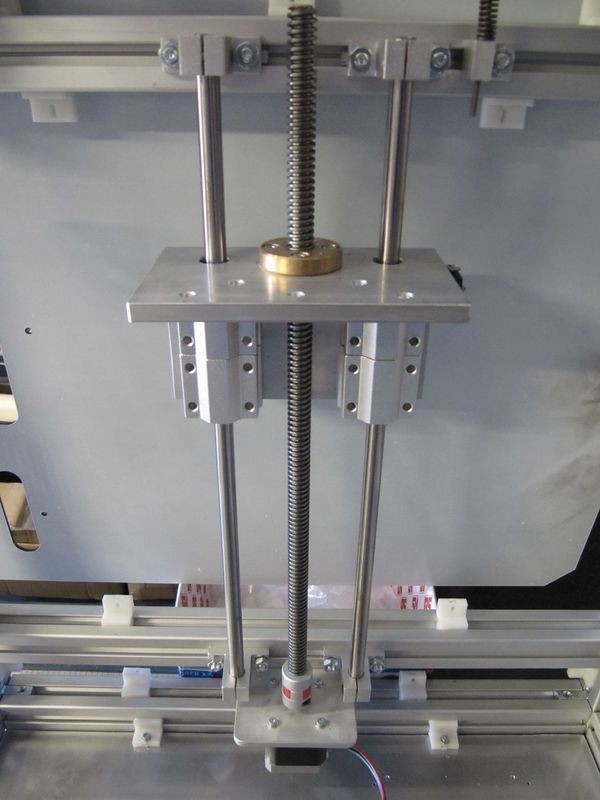
Widen the holes of shaft supports to 6mm of diameter, to allow the connection with the profiles trough M6 T-head bolt.
Join the shaft support to the mid-rear and upper z profiles with T-head bolts. Insert the z-axes in shaft support holes.
Now, join the free side of 8mm diameter of the coupling with the cylindrical part of the trapezoidal thread.
Step 29:Print plate (Heatbed)
| qty | part name | description/notes |
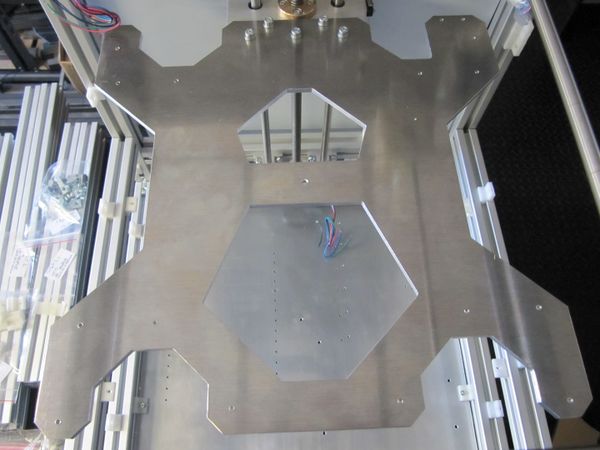
| 1 | Aluminium heatbed support | File:Aluminium heatbed support.pdf |
| 5 | M5x20 - washer - nut |
Step 30: Z Endstop holder
| qty | part name | description/notes |
| 1 | Z endstop tuning support | |
| 1 | Z endstop knob | use a grub screw to fix M4 threaded rod |
| 1 | Z endstop spring | |
| 1 | Collar nut (Bosch 3842523925) | used for Z endstop holder |
| 1 | T-Bolts (Bosch 3842523920) | used for Z endstop holder |
| 1 | M4 threaded rod length 60mm |
Door
Step 31: Door assembly
| qty | part name | description/notes |
| 1 | Door PMMA panel | |
| 2 | Aluminum extrusion profile 20x20 length 405mm | |
| 2 | Aluminum extrusion profile 20x20 length 382mm | |
| 4 | Cubic joint 20x20 2 way | Bosch 3842524484 |
| 2 | Hinge | Bosch 3842544526 |
| 1 | Handle | what you like! just use a small cube |
Create a square with the four 20x20 profiles, in the vertex insert the cubic joints
'Remember the M4 hole & fasten the handle on a 382mm extrusion
Insert PMMA panel before tighten screws:
Use hinges to place door on the front of the printer
Assembling Print area
Step 32: Assembling Print area
| qty | part name | description/notes |
| 1 | Print bed | MK* heatbed or acrylic plate |
| 1 | Heatbed glass | needed for MK* heatbeds |
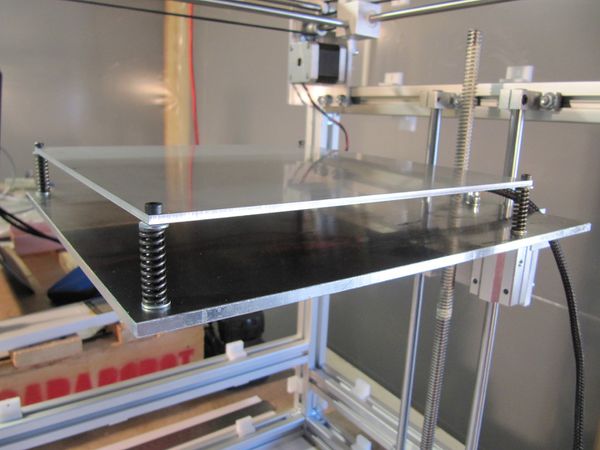
| 4 | MK* Heatbed springs | 25mm length compression spring (1.2mm wire) |
| 4 | M3x35 heatbed | use a washer to avoid scratching the heatbed |
First assemble and check: HackerBot MK Heatbed wiring
Insert the four M3 screws in the MK Heatbed holes with a washer between head screws and hot plate.
Fasten the 4 screws in threaded holes of Heatbed support keeping a distance between this and the hot plate:
Assembling Base
Step 33: Assembling Base
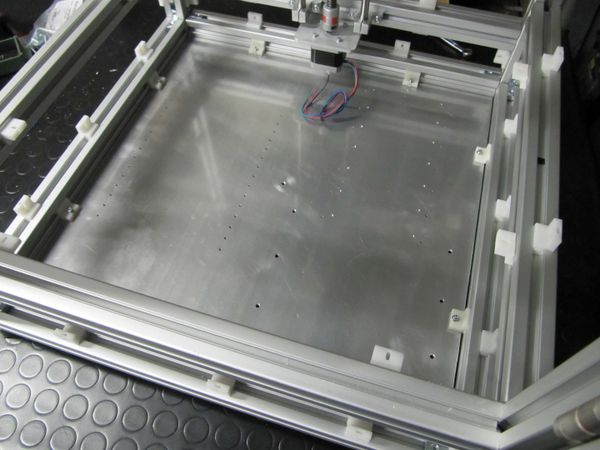
Printer base can do with different materials. Our advice is to use a metal sheet of about 1.5mm thickness or more.
Base dimension is 450x450mm
Put four feets (M8 thread):
Electronics
Step 34: Power supply
| qty | part name | description/notes |
| 1 | Switching power supply DC 24v - 12.5A | TracoPower TXL 350-24S or Ebay junk |
| 2 | Power supply clamps | File:Power supply clamp.pdf |
| 4 | M3x10 screws, 2x M3 nuts, 2x M3 washer | |
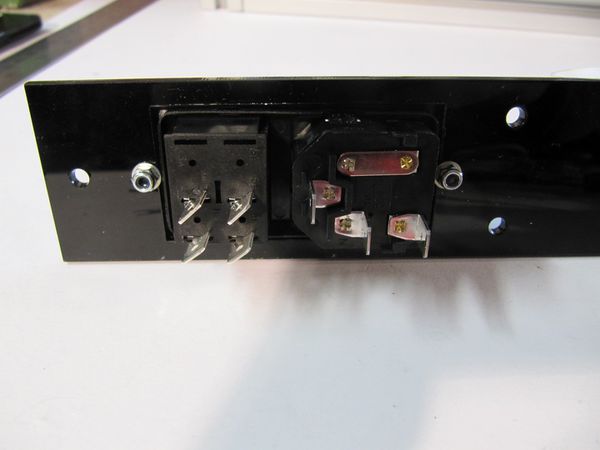
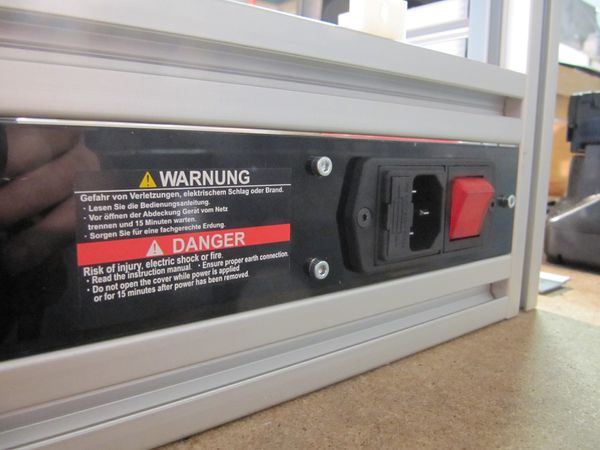
| 1 | Power inlet | Bulgin BVA01/Z0000/11 (RS: 352-1825) |
| 2 | Power inlet fuse | 230V use a 2A fuse (20mm type) - 110V use a 4A fuse. |
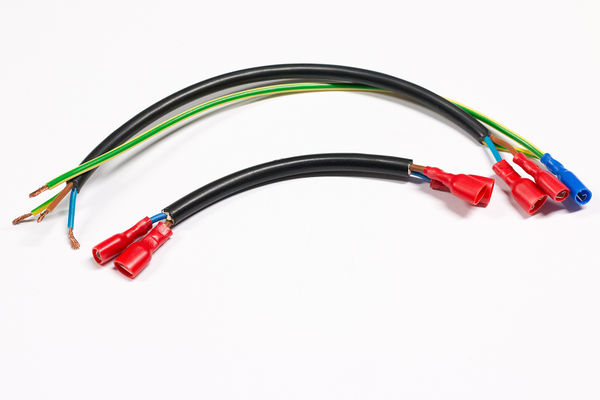
| 1 | Power cable | 25cm 3x1 power cable |
| 1 | Power cable | 10cm 3x1 power cable |
| 1 | Back panel PMMA | |
| 7 | Fast-on connector | fully insulated type (you also need a crimper) (ex: RS 624-1178) |
| 3 | fork type crimp connectors | optional |
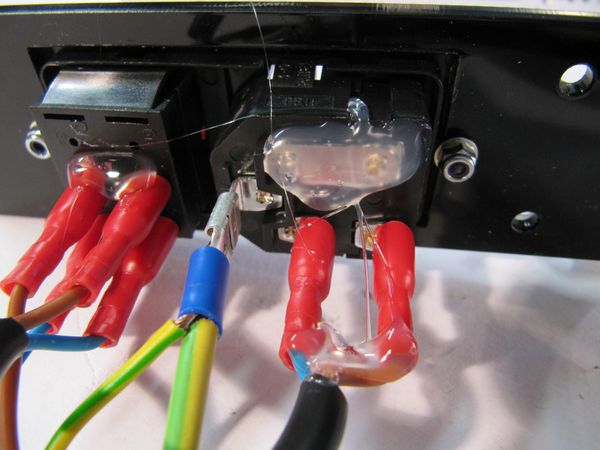
Wiring:
assemble the back panel with inlet:
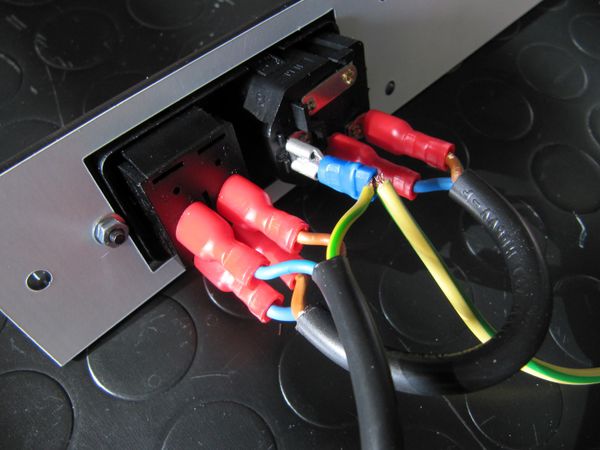
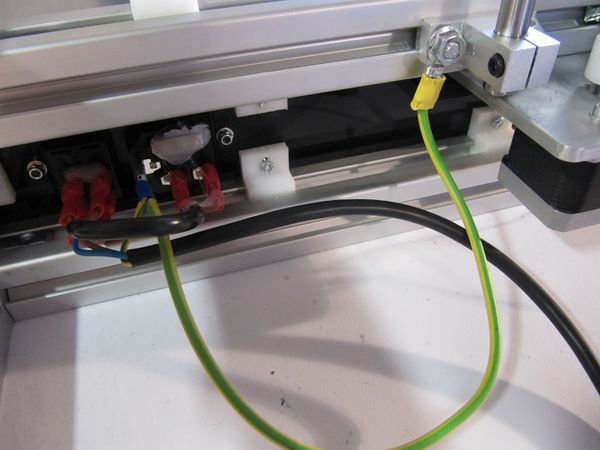
cable all together:
110V / 230V is lethal. Please do not do wirings if you are not a tech and are you very sure what are you doing.
Bulgin inlet is very dangerous because one power joint is not isolated!
PLEASE USE HOT GLUE TO INSULATE ALL THE INLET BACK
DO EARTH CONNECTION TO CHASSIS and DOUBLE CHECK GLUE
YOU MUST PLACE A VERY DEATH DANGER ADHESIVE!
Step 35: Controller
Tested controllers are:
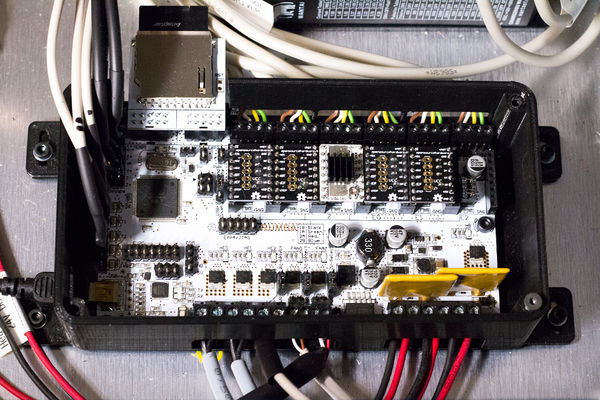
- ARDUINO MEGA 2560 + RAMPS 1.4 + Pololu A4988 / TI DRV8825
- RUMBA (rep rap discount electronics) with 3 output for extruders and some extras
RAMPS
ARDUINO MEGA 2560 + RAMPS 1.4 + Pololu A4988 / TI DRV8825
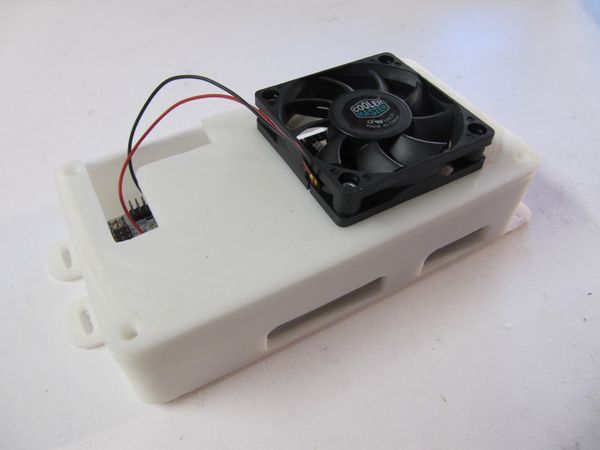
Printed box for Arduino Mega + RAMPS:
- INSERT
RUMBA
Printed box for Arduino RUMBA:
- INSERT
Step 36: Motor cabling
| qty | part name | description/notes |
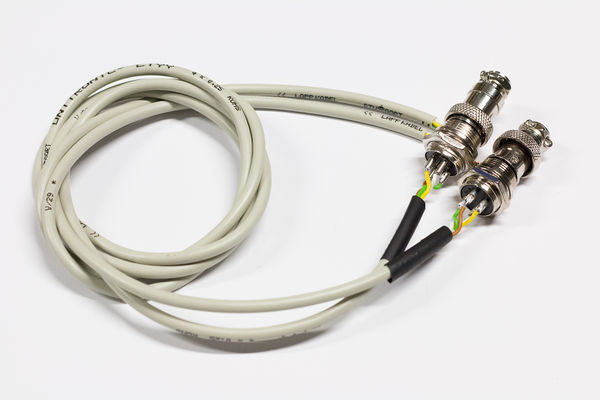
| 2 | X and Y motor cable | 4x0.25 mm2 , length: 1m (RS: 491-8983) |
| 1 | Z motor cable | 4x0.25 mm2 , length: 40cm (RS: 491-8983) |
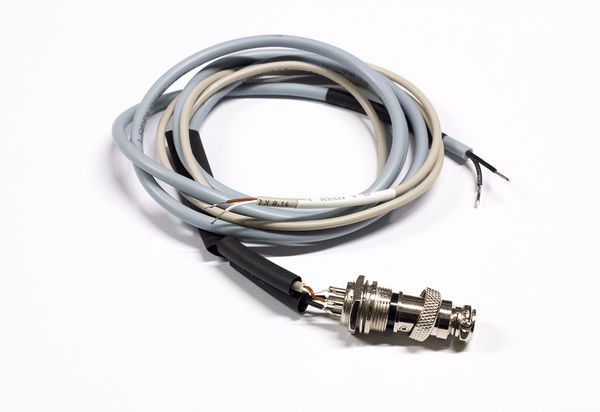
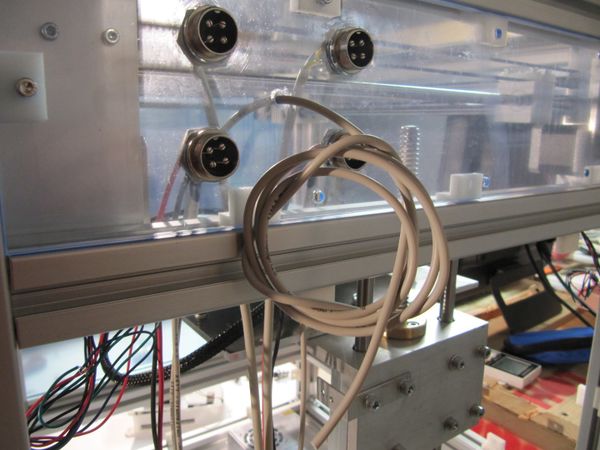
| 2 | Panel connectors | check photo |
| * | Shrink tube |
Wiring scheme:
| MOTOR | PANEL CONNECTOR | CABLE (LiYY 4x0.25) | A4988/DVR8825 |
| RED | » 1 « | Yellow | 1A |
| BLU | 2 | White | 1B |
| GREEN | 3 | Green | 2A |
| BLACK | 4 | Brown | 2B |
Fix the panel connector (motors):
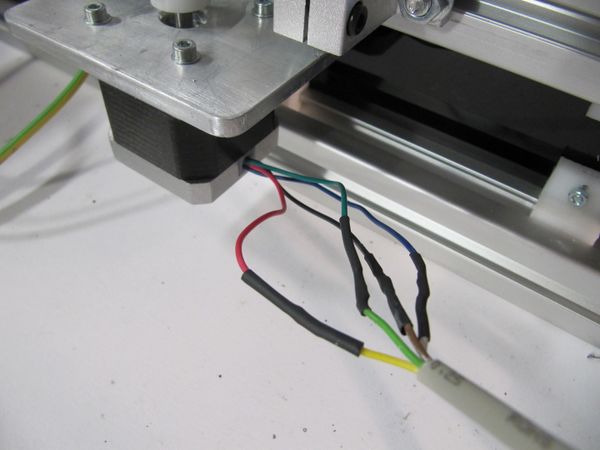
Wire the Z motor:
Step 37: Extruder cabling
| qty | part name | description/notes |
| 2 | silicon cable 1 mm2 | length: 1m (red & black) |
| 1 | 2x0.14 mm2 LiYY cable | length: 80cm |
| 1 | Panel connectors | check photo |
| * | Shrink tube | |
| 1 | FAN CABLE 2x0.14 mm2 | length: 1.5m |
NOTICE: ONE EXTRUDER PROCEDURE. (repeat x times if you need multiple extruders)
Wiring scheme:
| PANEL CONNECTOR | CABLE | note |
| 1 « | SILICON RED | Extruder power + |
| 2 « | SILICON BLACK | Extruder power ground |
| 3 « | LiYY BROWN | NTC |
| 4 « | LiYY WHITE | NTC |
In the middle hole put the FAN CABLE:
Step 38: Endstop
| qty | part name | description/notes |
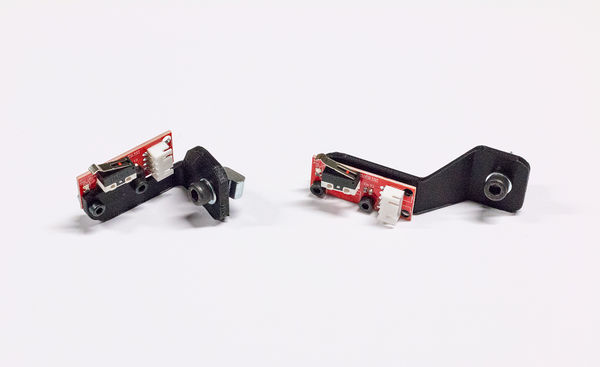
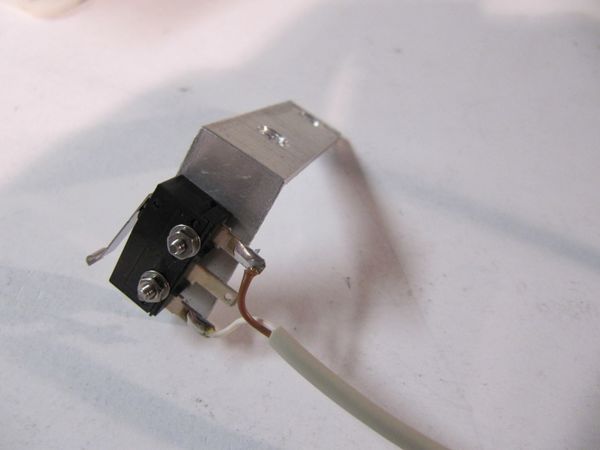
| 1 | X end stop holder | File:X Endstop holder.stl |
| 1 | Y end stop holder | File:Y Endstop holder.stl |
| 2 | X/Y end stop | 2x0.14 LiYY cable (RS 445-1395) length 90 cm |
| 1 | Z end stop | 2x0.14 LiYY cable (RS 445-1395) length 60 cm |
| 2 | 2x0.14 LiYY cable | length 90 cm (RS 445-1395) |
| 1 | 2x0.14 LiYY cable | length 60 cm (RS 445-1395) |
| 3 | 2x1 dupont connector |
Use support and 2x M2.5x15 screw set to fix it:
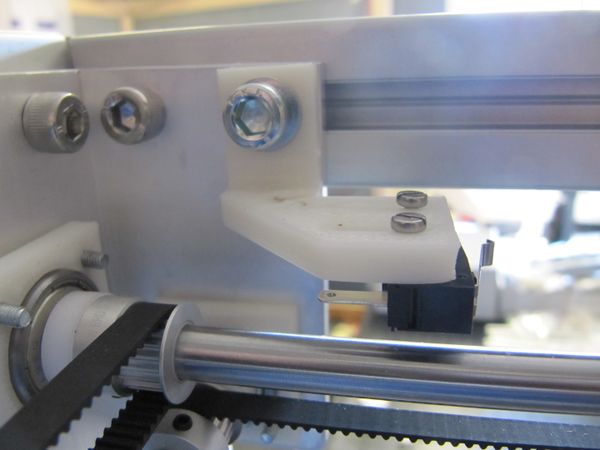
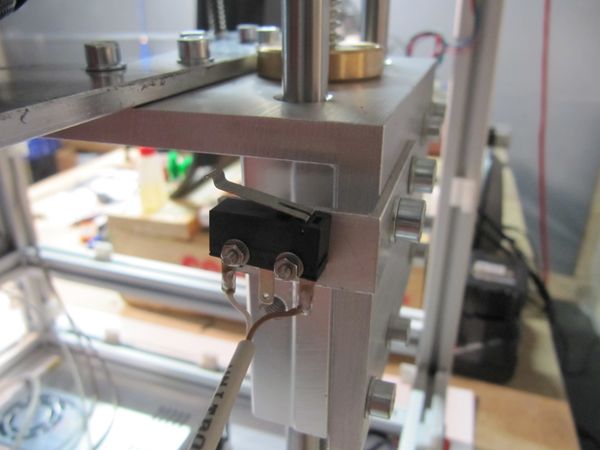
Using the support fix it to the structure:
Using 2x M2x12 screw & nut tighten the endstop to the support:
Step 39: LCD Controller
| qty | part name | description/notes |
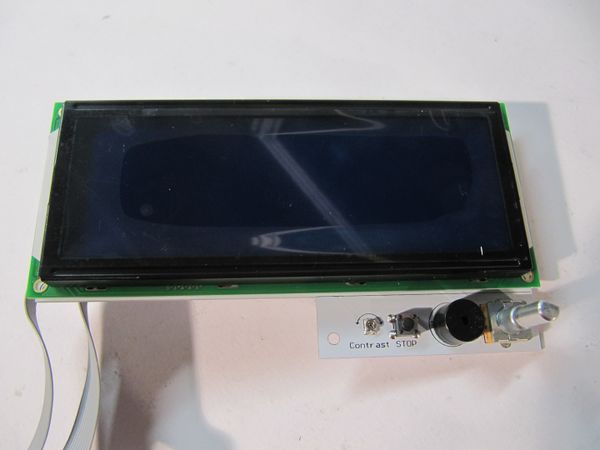
| 1 | RepRapDiscount XXL LCD | |
| 1 | XXL LCD case | File:Bottom Case XXL.stl |
| 1 | XXL LCD case cover | File:Top Case XXL.stl |
| 1 | XXL LCD knob | File:Controller knob 2.stl |
| 1 | XXL LCD kill button | File:Kill Button XXL.stl |
| 2 | Velcro strips | 50x20 mm |
Extruder
Step 40: Extruder support plate
| qty | part name | description/notes |
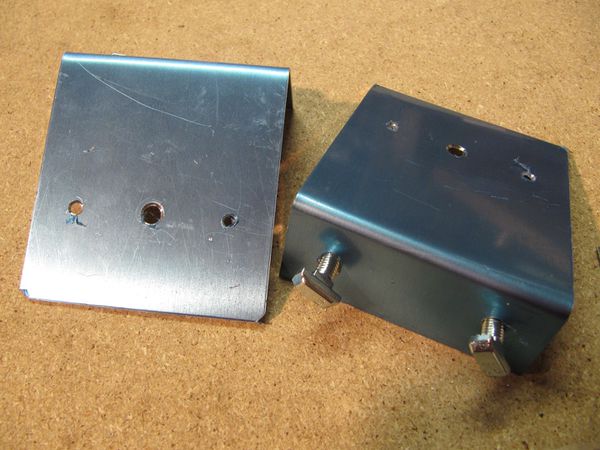
| 1 | 80 x 120mm Aluminum plate 1.5mm thick | |
| 2 | M6 T-head bolt | Bosch 3842523921 |
| 2 | T-nut | Bosch 3842523925 |
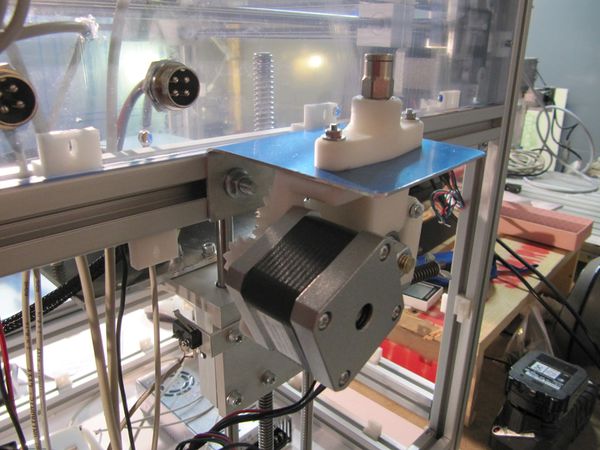
Extruder is mounted on a plate on the back of Hackerbot
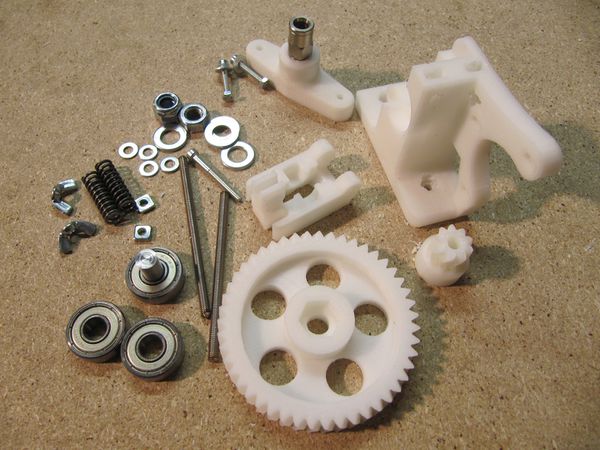
Step 41: Extruder assembly
| qty | part name | description/notes | |
| 1 | Wade "tilt" extruder | Wade-Greg Tilt extruder | |
| 1 | Hobbed bolt | with Nylock M8 Nut, M8 nut and 4 washers. | |
| 1 | bowden adapter | ||
| 2 | M3x20 screw kit | for bowden adapter | |
| 3 | M3x6 | motor | |
| 3 | 628 bearing | ||
| 2 | springs | 25mm 1.5 thick | |
| 2 | M4 threaded rod | length 70mm | |
| 2 | square nut M4 | ||
| 2 | M4 wing nut | ||
| 1 | 8mm rod | length 18mm | |
| 1 | 1/8" Pneufit 6mm | ||
| 1 | square nut M3 | needed for small pulley | |
| 1 | M3x6 grub screw | needed for small pulley |
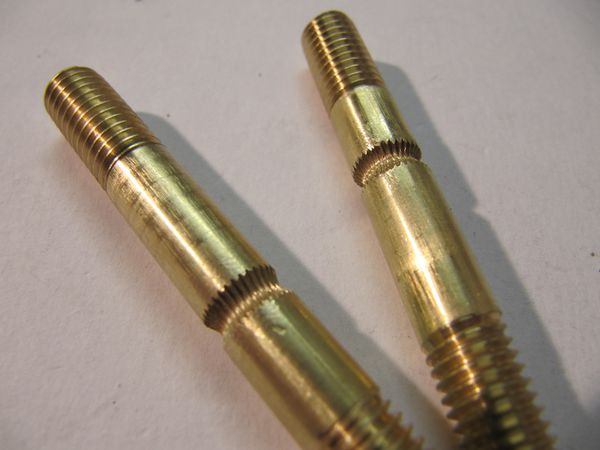
Hobbed bolt step by step build guide: Hobbed bolt
Hobbed bolt:
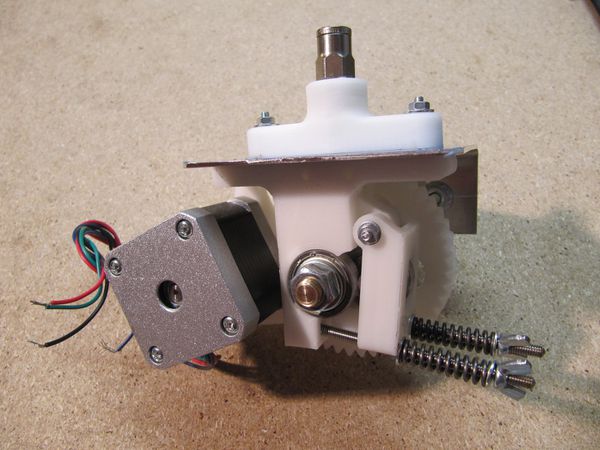
extruder assembly:
Using bowden adapter:
Mount on the frame:
Step 42: Hotends
- THead: [THead hotend]
- JHead: Jhead hotend
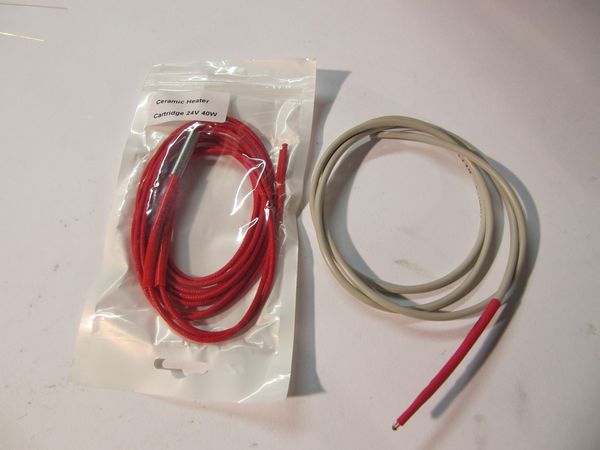
Using a 40W 24V ceramic heater cartridge and EPCOS NTC wire like this:
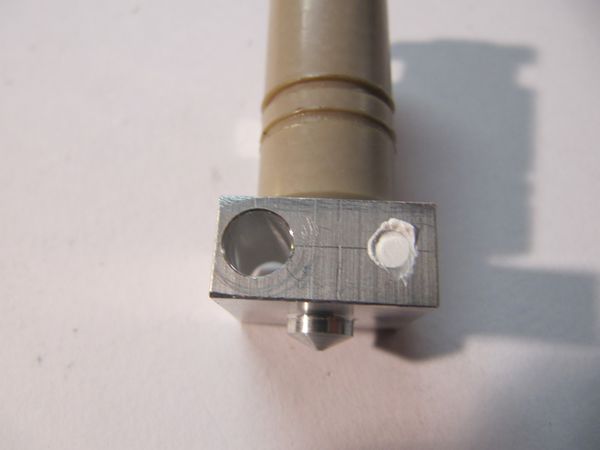
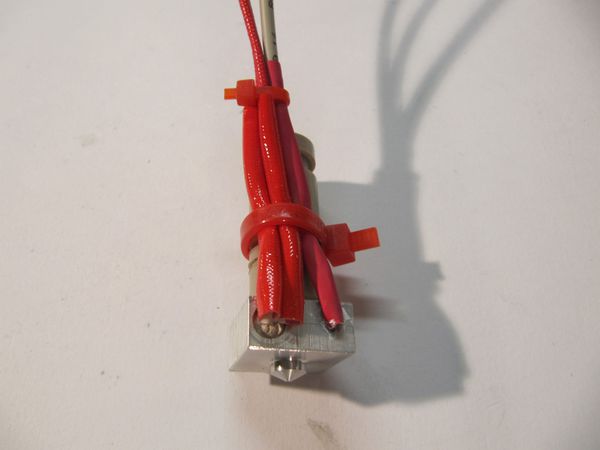
Assemble wiring and hotends, fix it with good nylon strip:
assemble hotends into head and gently tighten the grub screws:
Please remember that hotends heights should be the same
Step 43: Extruder bowden
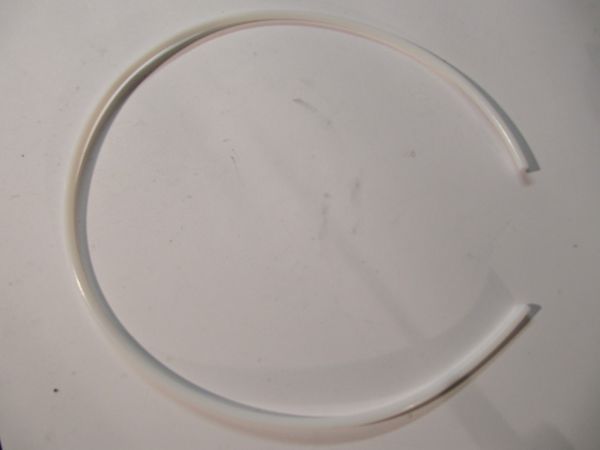
PTFE bowden tube is 3.18mm inner diameter, 6mm outer diameter and total length of one bowden tube is 750mm
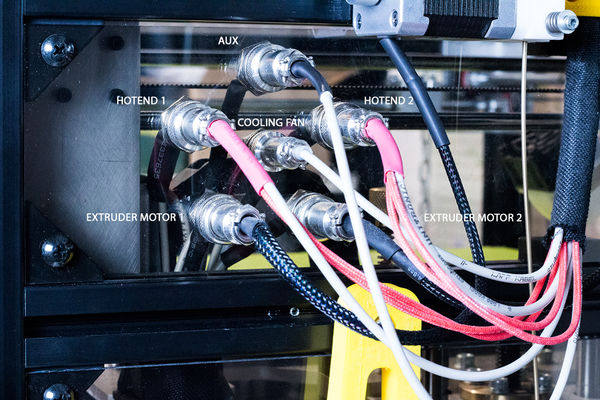
Step 44: Cabling
Step 45: Final check
- tighten the cubic slider grub screws
- move cubic slider to one corner and tighten the axis bearings supports
- repeat for all vertex
- tighten the GT2 belts and relative pulley
- double check hotend grub screw and security lock
- check polarity
- use oil on shafts
- grease on trapezoidal screw
Panels
Step 46: PMMA panels
Mount the panels
Accessories
- Printer tool kit
- Spool holder
