RUG/Pennsylvania/State College/Printers/PSU Fab@Home
Contents
Progress
4/22/14:
After all the motors had been calibrated, wet extrusion was accomplished using water. Also, the accuracy of the extruder accuracy/step size was tested by moving a pencil on paper that was placed on the bed in the X and Y direction. This will be a precursor to the Ecoli we plan to print in 2D onto cultures in the coming weeks as our first goal.
3/24/14:
Successfully moved the printer with RAMPS 1.4. Note: The printer movement should be set to 300 mm/min and use 1/8th step jumper settings.
2/24/14:
We are beginning to convert the Fab@home to RAMPS 1.4 with Marlin firmware (due to its dual endstop support). The updated version of the Fab@home will be referred to by 'V2'. See Projects for details.
4/29/2012:
Fab@home is now fully operational in all axes. The next step in its developement will now be to undergo print testing, or alternatively, convert the electronics to RAMPS_1.4 with Marlin Firmware now that all electrical components have been confirmed opperational.
2011:
Pennsylvania State University (PSU) Fab@home is in operational mode and continue to be in diagnostic form. Within next week, we have an idea how to approaching for the future project.
Printer Status
| Operating Specifications | |||||||
|---|---|---|---|---|---|---|---|
| Name | Status | Design | Electronics | Firmware | Extruder | Temperature | Comments |
| Fab@Home |
Discontinued | Fab@home | LPC-H2148 Microcontroller | Model 4 | Syringe | - | - |
| Fab@Home V2 |
Working | Fab@home | RAMPS_1.4 | Marlin | TBD | - | - |
PSU Fab@Home - Current Condition
Electronics
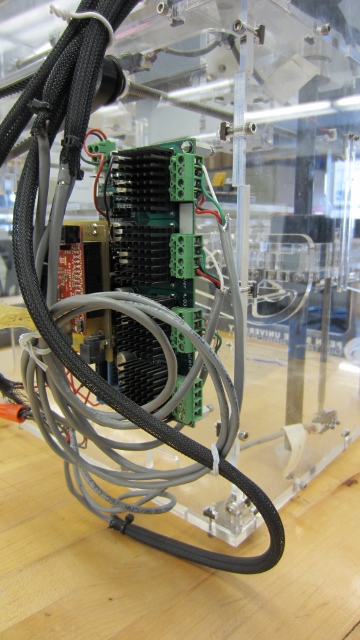
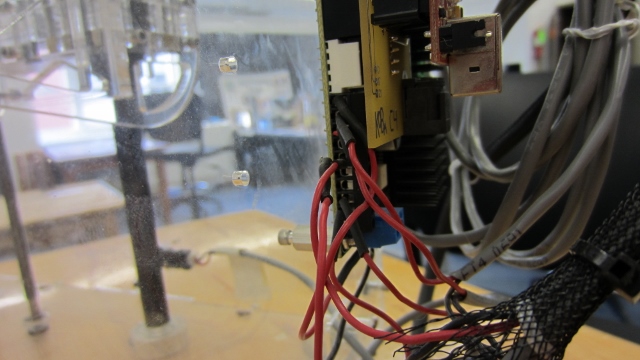
We were fortune enough to have all the working electronic kits and installed as instructed. Microcontroller for Fab@home model 1:Microcontroller Olimex Philip LPC-H2148 (under ARM) Apparently, we are missing the JTAG cord which is important for flashing the microcontroller. I believe we are specifically looking for OpenOCD with firmware v4. However, the board were flash for firmware v3. Firmware module
Connection Notes:
See here for more details.
Software
V2 Software:
The Fab@Home is using Printrun for running hand-written G-Code. This method is preferred to ensure predictable control over the printer during bioprinting.
V1 Software:
PSU Fab@Home is using Fab@home v.23 made by cornell university and [email protected]
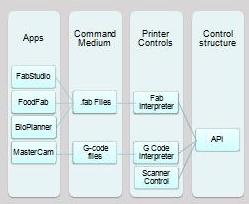
Fab@home Software: Necessary for operation in stock form.
- FabStudio: Slicing software that generates .fab files.
- FabStudio: Slicing software that generates .fab files.
- FabInterpreter: Printer control software. Only capable of printing with .fab files.
- FabInterpreter: Printer control software. Only capable of printing with .fab files.
- svg2fab v2.0: Useful for producing 2D .Fab files for toolheads such as vinyl or foam cutters.
- svg2fab v2.0: Useful for producing 2D .Fab files for toolheads such as vinyl or foam cutters.
- Fab2GCode: Converts .fab files to .gcode files.
- Fab2GCode: Converts .fab files to .gcode files.
BioPrinter Build/Testing
4/22/14 Update
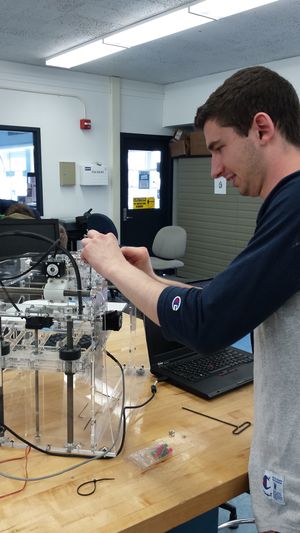
After correcting the associated wiring/programming, adjusting the axes slightly, and lubricating all major contact points, the bed and extruder move as desired. In the the images and videos below, the wet extrusion will be demonstrated with water into a cup, as well as the accuracy of the extruder with the use of a pencil and paper taped to the bed.
This video here denotes the testing of the X and Y axes with a pencil attached to the extruder. The step sizes were calibrated, as well as the accuracy of the extruder on the bed were tested and confirmed. As seen in the video, the lengths of the pencil lines drawn were then measured to ensure the correct rate.
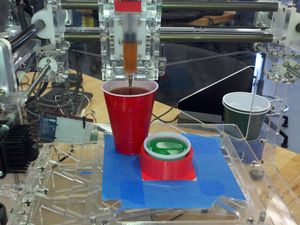
The second test we conducted was a wet extrusion test to ensure the syringe and associated system functioned properly and expelled liquid consistantly. The video link denotes the test here. The red piece seen in the video was created in SolidWorks and printing on a 3D printer to help secure the syringe during retraction. Also, the heat since mounted on the front of the stepper motor helped decrease the temperature of the motor as we were testing them at various voltages.
4/29/14 Update
With the printer fully assembled, we first extruded some water to make sure the syringe extruder was functioning properly[1]. After that, we attempted to print a simple 2D design of the letters "PSU" [2]. We learned that our printer is currently printing backwards, and we will have to modify this promptly. We will also lower the amount of work exerted by the motors by switching them off when they are not in use.
5/28/14 Update
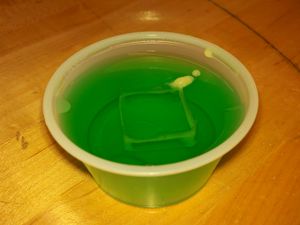
All axis have been calibrated and are running OK. Work needs to be done to eliminate axis slop during the change of direction. Initial tests were conducted by extruding a colored fluid (in this case, iced tea) into jello, intended to act as a rough analog to hydrogel. Alternative tests were done using pudding instead of the watery iced tea. This gave more consistent results. This concept is based off of the Jello shotglass printer demonstrated in this video: https://www.youtube.com/watch?v=VluX6g63dqk
Printable Materials
Currently we have Acrylic Winsor Blue available for part to print. More to come on order and check out vendors for harware and material
|
|
|
|
|
|
|
|
|
Tools
Syringe Extrusion
Vinyl Cutting Tool
V1 Build Notes
The majority of the initial PSU Fab@home build was completed by original owner, before it donated by after prolonged difficulties regarding its operational status. An initial attempt was made to get the Fab@Home to an operational state in 2011, but this only resulted in the movement of several axes.
Having decided to reinvestigate the printer in spring 2012, we were able to drive all axes after much trouble shooting. Problems that were fixed included incorrect wiring from X-axis stepper motor to microcontroller board, a faulty 24V power supply (carefully switched to a 12V for testing purposes), disconnection of endstop ground connections, a missing endstop pullup resistor on the microcontroller, and loose pin to endstop connections.
The only problem that still exists a driver error when the power supply is disconnected before the USB. No advancements were made in the course of our trouble shooting, but this problem seems to be avoidable. Students found that one must simply be careful of the order when disconnecting these cords, and if mistakes are made, a simple restart is all that is necessary to have printer back in working order.
Diagnostic Notes
|
|
|
|
|
|
|
|
|
|
|
|
Projects
Extrusion
- Utilize syinge extrusion tool (cholocate, silicon, UV material)
- Develope and print L-bracket carriage adapter for Wade's Extruder. This would allow PSU RUG to utilize the machine's precision linear movement for prints requiring higher tolerances.
Bioprinting
- See all V2 information for Bioprinting updates
Related Media Timeline
2010
September 2010; "Post-bioprinting processing methods to improve cell viability and pattern fidelity in heterogeneous tissue test systems"[3] Summary: Using a rudimentary method to print cells (modified ink cartridge), researchers studied 4 methods of improving viabilities of printed cells, a major factor if one wants to use the tissues they print in regenerative medicine. A collagen overlayer was shown to disturb cells the least after flooding the printed cell array.
2012
July 1; Penn Researchers Improve Living Tissues With 3D Printed Vascular Networks Made From Sugar" 1 Summary: Recent advances in tissue engineering and regenerative medicine could one day make a replacement liver from a patient’s own cells, and UPenn researchers have developed 3D printed templates of filament networks that can be used to rapidly create vasculature (and therefore improve the function of engineered living tissues).
November 2012; "Printing Stem Cell Hydrogels in Thicker Hydrophobic Hydrogels" [4] Summary: Scientists tried the following method to build 3D cell constructs: print a hydrogel suspension of mesenchymal (bone marrow cells) and other cells into a stiffer hydrofluoric hydrogel matrix. The structures were printed with an accuracy of 46 um, and the structures reamained viable for up to 6 months after printing (the cells remained viable for up to 21 days after printing). The stiffer hydrogel acted as support for the printed structures, and were later removed (by water?). This could be a preferable method for printing tissues for regenerative therapy, and cells could remain viable even longer if vasculature is introduced.
2013
October 7; "Bioprinting and Tissue Engineering: Recent Advances and Future Perspectives[5] Summary: This paper outlines current methods of bioprinting, detailing the requirements to design bioprinting scaffolds, how to keep cells on the scaffolds viable, and future challenges to overcome. It gives a great overall view of the bioprinting process as well.
November 6; "Biofabrication and testing of a fully cellular nerve graft"[6] Summary: A nerve graft is one method of regenerating damaged nervous tissue, and has vital use in regenerative medicine. Here, researchers used 3D printing to print a scaffold and nerve cells. The printed nerve graft was viable in a rat nerve graft transplant procedure, indicating the precision and utility of bioprinting in surgery.
February 22; Cornell University Bioprints a Functional Ear 2 Summary: Dr. Jason Spector and Dr. Lawrence J. Bonassar have developed a bioprinting process that uses living material to create a structure that not only remains alive after being implanted, but also becomes another functional biological part of the human body. This bioprinting process starts with a 3D scan of the inner ear to generate a 3D mold, which animal-derived collagen cells are added to act as a scaffold for the cartilage to grow on.
December 11; Bioprinters Revolutionize 3D Printing 6 Summary: This article discusses recent advancements in 3D printing cells, and were able to print fluorescent E. coli cells in the shape of the BioCurious logo. This printing of E. coli cells has been an initial project considered to implement with the Fab@Home printer the team has been working on.
2014
January 6; "Japanese researchers 3D print blood vessels using patient's skin cells"[7] Summary: By culturing spheroids of patient's skin cells, and then assembling these larger packets into preset arrays using 10 mm long, 0.1 mm diameter needles, the company Cyfuse biomedical was able to make 2-3 mm blood vessels. They believe this method is safer and easier than others, and can be used in blood-dialysis machines as well as in regenerative tissue engineering.
February 5; Printing Skin Cells on Burn Wounds 3 Summary: In an effort to develop skin cells to help heal burns instead of harvesting from other parts of the patient, Wake Forest Institute of Regenerative Medicine scientists have built build a printer designed to print cells onto burn wounds. Further development of this project involving a type of stem cell found in amniotic fluid and placenta (afterbirth) could result in added effectiveness in healing wounds.
February 19; Harvard Engineers 3D 'Bioprint' Layered Tissue with Blood Vessel Networks 4 Summary: Through experimentation of bioprinting techniques, tissue engineers took a major step towards creating 3D printable living tissue by constructing multiple types of cells and tiny blood vessels, with the goal of creating human tissue constructs realistic enough to test both the effectiveness and safety of new drugs.
March 3; 3D Printing Creates Implantable Heart Device 5 Summary: Biomedical engineers at Washington University have developed a implantable device that can be custom fitted and embedded sensors that have the capabilities of treating cardiac disorders. A plastic substitute (3D elastic membrane made of flexible silicon) was developed for the epicardium,and has sensors to gauge stress, pH, temperature, and mechanical strain to deliver a pulse of electricity in cases of arrhythmia.
April 9; 3D Bioprinting Market, 2014 – 203 7 Summary: Many industries have already benefitted from multiple advancements in the field of 3D Bioprinting, resulting in improved and more efficient processes worldwide. The report states that 3D bioprinting is gradually emerging as an area that is garnering attention from a lot of academicians, and has tremendous potential in the marketplace in the coming years.
April 10; The 3D printed HEART: Scientists could soon build replacement organs using a patient's own cells 8 Summary: Scientists from the Cardiovascular Innovation Institute in Louisville, KY, have the potential to able to print parts of hearts including blood vessels. The organ could be created in just three to five years time and be transplanted in a human within the next decade, with the main hurdle of keeping manufactured tissue alive after it is printed.
April 10; Navy eyes 3D printing in future 9 Summary: There is interest in the Navy to get 3D printing technology onto ships to have the ability to print anything from bolts, to organs for injured soldiers, and even components of drones. There will need to be special considerations for things as fine as organs to account for the pitch, the roll, and yaw of a ship, but the Navy is very interested in implementing this technology in their fleet.
April 28; "Organovo Announces Pre-Release Availability of 3D Liver Contract Services" [8] Summary: Bioprinting company Organovo has made their printed liver tissue available for purchase to small and big pharmaceutical companies, biotechnology companies, and other clients. This technology is based on accurately depositing hepatocytes and endothelial cells in precise geometries to stimulate proliferation of liver tissue[9]. They claim their printed product is more viable and lasts longer than other methods of growing liver tissue. This will allow longer drug studies and give scientists a chance to perform multiple dose tests.


