LaserCut Mendel Assembly For Complete Beginners
Overview
Until this sentence is removed, I have not finished my build and this guide will not describe the whole process.
These instructions describe the assembly of a TechZone Mendel kit, which is one of many options to build a RepRap.
I'm almost entirely new to building things. I got a laser cut Mendel kit from TechZone because that seems to be my speed--I can basically manage to put something together from prefab parts, but I don't have access to a shop or a large collection of tools or the skills to use either. I think that's the situation of at least a few people taking on this project, and the best contribution I can make to this wiki is to describe the experience, and the things I learn about process, from the perspective of an absolute beginner. Much of this will probably be obvious to anyone with more experience. Some of it will probably be wrong or misleading--point it out if you see it. I think helping newbies is important, but I also suspect that it can be frustrating for experienced builders to answer the same simple questions over and over. I hope that with this guide I can provide a resource for some of the more basic issues newbies will face that more experienced builders take for granted. I also have an ulterior motive; I hope that I can document things carefully as 'repayment' for people taking the time to answer my questions, to save them the trouble of answering those questions again.
Using This Guide
This guide is structured around tasks in sequence rather than around the design of a reprap, and refers to the complete Mendel kit from TechZone as purchased in May 2011. This guide, and my assembly, began May 7, 2011. If you have found it in an unfinished state, it's probably because my build is still incomplete. I would be delighted to see others adding things to and commenting on anything I've written here; it would be especially helpful to me if, when you do so, you leave a note on the discussion page or in the text letting me know what changed or got added and why.
Other Resources
These are the things I found myself navigating to over and over as I put the kit together (Still in process etc.):
- LaserCut Mendel Assembly seems to be the most complete guide, but it's at least a little out of date relative to the current kits; it shows an extruder made of laser cut and glued wood.
- The LaserCut Mendel Assembly Blog has more pictures and is sometimes useful in terms of mechanical structure, but seems to describe a hybrid Mendel/Makerbot and the electronic connections look much more complicated than most other builds I've seen.
- The TechZone Tip Assembly page.
- Gary Hodgson's visual guide to the Wade's Geared Extruder[1]. (WARNING: It is different from the extruder in the kit in important ways, so you can't build from those instructions, but it does provide a good overview of how the extruder works.)
- Other contributors to this page should put links to their contributions here:
Acquisition
Laser Cut Mendel Kit
This is basically just to say that I've found TechZone's service to be very helpful and responsive. I actually purchased through Ebay because I prefer to use Paypal rather than the Google checkout system TechZone uses (Google already knows the content of my emails and much of my browsing activity via Google Analytics; I see no reason to also tell them about my financial transactions). When I needed to purchase ABS filament, however, Kimberly Andrus at TechZone sent a Paypal invoice for it (thanks!). If I was going to purchase the kit again, I'd probably request an invoice from her because it's more difficult to tell exactly who the seller is when purchasing from Ebay. The seller on Ebay I purchased from was hnd3; that seller IS affiliated with TechZone (as of May 7, 2011).
Tools
I've got an idea of making a sort of 'standard tool kit' such that I'll be able to gather the tools I used for this task and lend them out together (or even go with them to help with assembly). That way people who want a printer won't also have to bear the costs of acquiring tools they won't use again. In that spirit I've divided the list of tools below into 'buy-once tools'--things that experience little or negligible wear per use, and which it would make sense to lend--and 'use-once tools and materials'--things that experience complete or considerable wear per use, and which it wouldn't make sense to lend.
Until I remove this sentence, the following list is still a work in progress and probably misses some things:
Buy-once tools
- Multimeter
- Meter stick
- Soldering iron
- Tabletop vise and spring clamps (I got a tabletop vise because I knew there would be times I would need a stable way to hold things while using both my hands to manipulate them. I was immediately glad I did. It also has a flat surface that I think is meant to be used as an anvil. This is good for things like using a razor blade to strip the insulation off a wire.)
- Hex keys (2.5mm and 3mm)
- Phillips-head screwdrivers (#1 and #2)
- Adjustable wrench
- Set of jeweler's files (I'm not sure they're necessary, but they were useful for reaming the Reprapped parts that came with the kit. Without them I think I would've needed something else to do abrasion, like sandpaper or a Dremel tool)
- Pliers
- Drill (9.6 V)
- Tin snips/bolt cutters (cutting bolts to size)
- Mill bastard file
Use-once tools and materials
- Tape (scotch for holding wires in the tip assembly)
- Silicone Grease (haven't used yet -May 8)
- Ziploc bags
- Solder
- Razor blades
- Sandpaper
Organization
The TechZone kit came with several sealed plastic packages of hardware parts. At the beginning of my build, I transferred the contents of each clear plastic sealed bag (NOT including the electronics, which are in pinkish translucent bags and which I don't want to handle until I'm ready to assemble them) to its own ziploc bag. Others have used store-bought parts bins--I wasn't sure which would have compartments of the correct size. The ziploc bags also allow me to store larger parts (such as the laser cut pieces too small to be placed loose in the shipping box and the motors) and to nest subsets of the hardware bags within other bags. If I want to label the bags I can, though I haven't felt the need to do so yet.
The parts arrived in the best configuration for shipping, which (mostly but not always) means that they are not grouped by their position in the assembly of the final machine. My first step for any assembly task is to gather ALL the parts and tools I need for that task, and ONLY those parts and tools, onto my workspace. I have two rules for this:
- The workspace must not have anything on it before I start gathering parts for the current task.
- If I have placed a part on the workspace that turns out to be unnecessary, I must put it back in the bag it came from immediately.
This strategy allows me to focus on one task at a time and ensures that I won't be distracted or confused by anything unrelated to that task. It also forces me to define each task narrowly and specifically enough that if there's something I don't understand, or if there's a tool I need that I don't have, I'll realize that before I start.
At various points in the process I've considered taking these rules down because they seem too basic and micromanage-y. However, they describe a strategy for dealing with uncertainty that works extremely well for me. Frequently when I'm stuck, I'll reorganize my workspace to show me an assembly at a different level of complexity; for instance, when I'm stuck putting together the Y-axis I might try to organize my workspace as if the Y-axis was finished and I needed to attach it to the frame. That kind of exercise helps me understand a current task in the context of an overall goal, and usually provides insight. It also ensures that at the point I need to ask a question I understand exactly what I need to know, and that saves time for the person answering the question. In a purely practical sense, I've found that demonstrating respect for others' time and abilities (by doing as much of the legwork as possible myself) is the most effective strategy for getting answers when I need them. </soap-box>
Assembly Tasks In Order
My goal is to document each assembly task with at least two pictures: one picture of the 'initial condition' showing all parts and tools required for the task with the parts in the most disassembled state, and another picture of the 'final condition' showing the assembled parts after the task has been completed. I think I will end up including intermediate pictures for most tasks.
Extruder Tip Assembly
The consensus seems to be that this is the first task to complete, at least partly because it involves glue that takes 24 hours to set. It is already documented well in the TechZone Tip Assembly article, but I'm going to include some notes here because making my own notes helps me understand what's going on. Update: While completing this step I noticed a few things that seemed like they'll become important down the road, either in other assembly steps or during operation. I've tried to note those things in this guide so that when those things come up, or when I have to replace the tip on the working machine, I see what decisions I made in this process and why I made them.
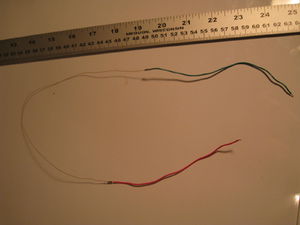
The extruder tip, or "hot end" is the part that melts the plastic. It does so using joule heating[2], the process of running an electric current through a conductor to release heat (This process is really interesting to me; it forced me to remember the chemistry class explanation that temperature is really a measurement of the movement of the atoms that make up a material. When a lot of electrons start moving through a conductive material like nichrome wire, they bump into other particles, accelerating them and raising the material's temperature). The nichrome wire is the loose coil of thinner wire in the picture below (the thicker wire is a thermocouple[3], discussed later).
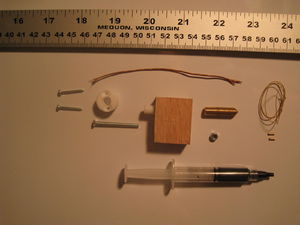
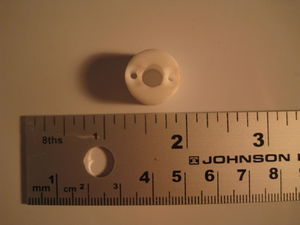
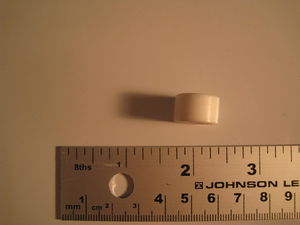
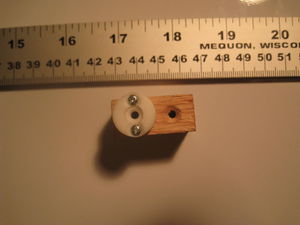
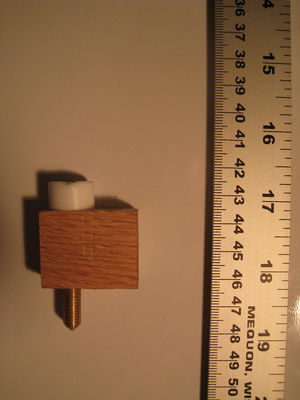
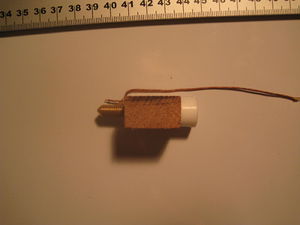
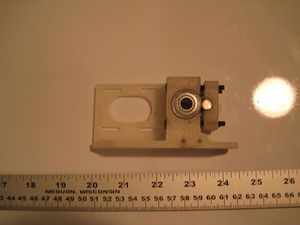
All the parts of the tip assembly. Note the white cylindrical piece, which isn't yet on the hot end assembly page. It measures 16mm in diameter; the same diameter as some of the PEEK/PTFE thermal barriers I've seen in other models. It's an adapter so that this tip will fit into the Wade's Geared Extruder.
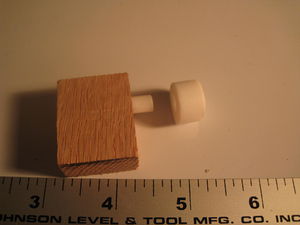
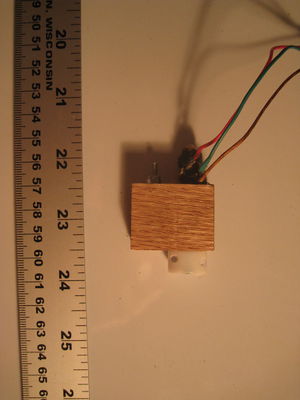
It looks like the bolt that runs parallel to the brass tip is just a way to attach different tools once the reprap is assembled. It seems like it was added to the design recently; previous tutorials I've seen haven't mentioned it. One issue with the current setup (unless I'm very confused) is that the oak block is now too long to fit into the extruder carriage as it was designed to. I cut about a quarter inch off the back so it would fit. You should do that now if you have to do it, before it gets awkward.
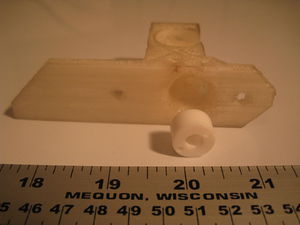
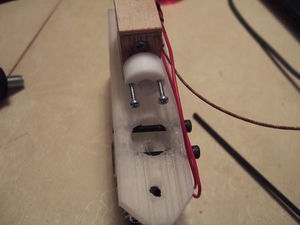
The adapter fits in the the Wade's Geared Extruder as shown in the following pictures:
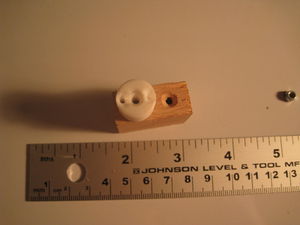
It fits around the outside of the teflon insert in the oak block, and has countersinks for the screws that in the previous design attached the hot end to the extruder body:
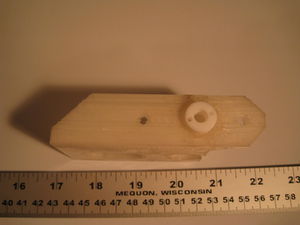
Then the adapter fits into the hole on the bottom of the extruder:
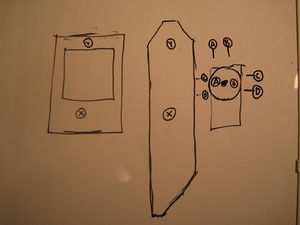
This is a rough sketch I made to make sure I understood the relationship between the tip (far right), the extruder (middle), and the x-axis carriage (left). The circles with letters in them denote the places where bolts attach one piece to another (You can see that I'm still learning to name things appropriately; the circles with 'x' and 'y' on the extruder and x-axis carriage should have used different letters to avoid confusion with something related to the axes--they're just the holes used to attach the extruder to the carriage.) Notice that what I've labeled as the 'C' and 'D' bolts go sideways through the adapter; thus, the 'A' and 'B' screws attaching the adapter to the oak block must be aligned out of the way.
Next picture is adding the tip.
Shaping the thermocouple
The first step on the TZ assembly page is to use a multimeter to test the thermocouple wire. A thermocouple is a pair of wires of different metals joined to each other at one end. For a reason I don't quite understand, the fact that the metals are different means that the wires generate electrical current when they're heated. By measuring that current you can calculate the temperature where the wires are connected.
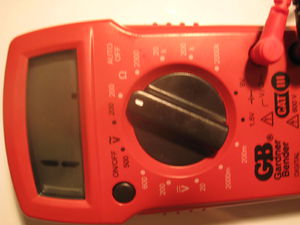
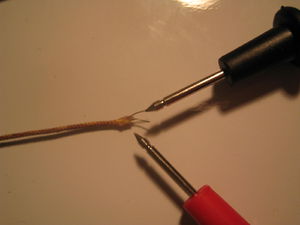
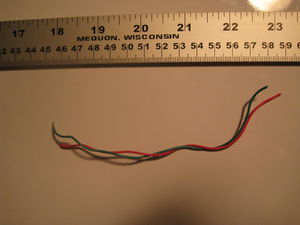
The idea is that there should be very little resistance to the flow of electricity across the thermocouple. I misunderstood what was going on the first time I read the directions; the 'ends' of the thermocouple wire that you're supposed to test are NOT what you'd think of as the 'ends' if you're just looking at it. As noted above, the wires in a thermocouple are *connected at one end*. That means that one end of the wire looks like a metal knot. Don't mess with that end. The other end of the thermocouple should have two wires poking out; a red one and a yellow one. Touch one of the probes of your multimeter to each end with the multimeter set to measure resistance (this is the side of the dial with an omega, which is the symbol for Ohms, which are units of resistance. There are several settings to measure different orders of magnitude of Ohms; you'll probably see notes for 200, 2000, 20k, 200k etc. Because you want to know whether the resistance is above 6 Ohms, use the 200 setting; the lower the number, the more sensitive the setting). Hopefully your multimeter shows less than 6. Mine was around 3. 200 Ohm multimeter setting:
testing the thermocouple:
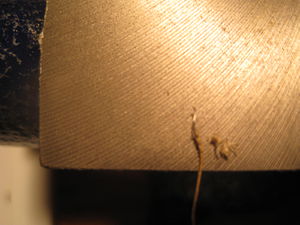
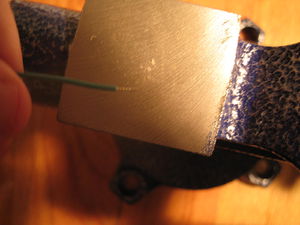
Stripping insulation off nichrome wire:
"lead" wires taken off motors:
Stripping the insulation from the lead:
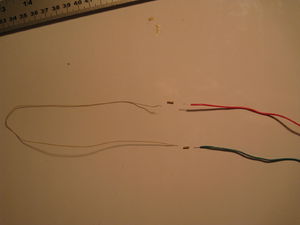
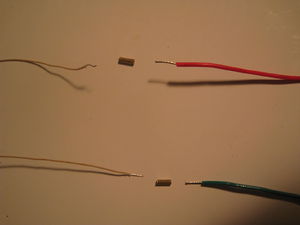
The TZ assembly page shows the process of wrapping the nichrome wire around the tip and attaching it to the leads afterward, and notes that some might find it easier to attach the nichrome to the leads first, then wrap it around the tip. That looked like an easier way to do it, so below I've shown the leads and nichrome as I attached them. I did try to solder the connection using the technique shown on the TZ page, but I'm pretty bad at soldering things and I'm not sure I did any good. I tested the resistance of the assembled wire (testing the ends of the leads after they'd been attached to the nichrome) with a multimeter and came up with a resistance of around 7 Ohms. I hope that's within tolerances, but I guess I'll find out when I test it. I also realized after I'd finished that I'd neglected to use something abrasive to remove the ceramic insulation from the ends of the nichrome after stripping the other insulation. If I have problems down the road I'm probably going to start looking at that first.
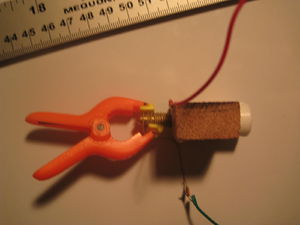
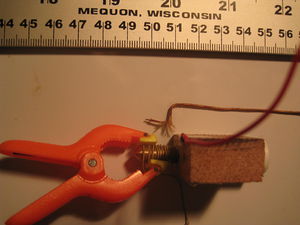
As I was wrapping the nichrome wire (already attached to leads) around extruder tip, it occurred to me that the way it's wrapped might affect the distribution of heat while the tip is in operation. I found that the threads of the screw made the wrapping slightly irregular--the wraps tended to try to be perpendicular to the threads where they crossed. I also think I put a slightly higher density of wraps toward the base of the tip rather than toward the tip. If that turns out to be a poor decision I want to remember to do it differently next time. The following shows the wrapping:
Wrapping with thermocouple:
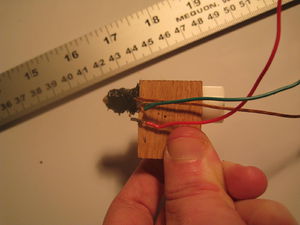
Did not have enough hands for picture of the next step, gluing around the nichrome. Finished:
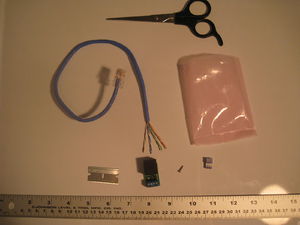
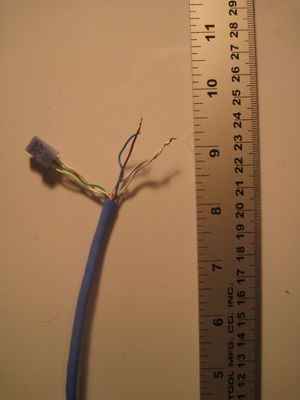
Next was getting the electronics for the tip assembled; this basically consisted of stripping the insulation off the cat5 cable, arranging the internal wires to correctly attach them to the circuit boards, and attaching the heater leads and thermocouple to the cat5 connector. Picture below shows the parts to be used. Note: I stripped the outer shielding off the cat5 cable before taking this picture.
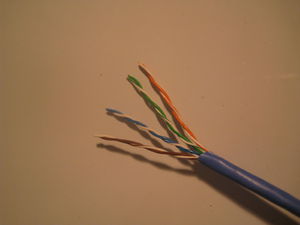
Closeup of stripped cat5
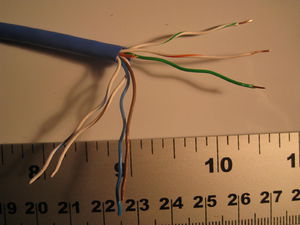
Closeup with three wires for 3-pin connector stripped
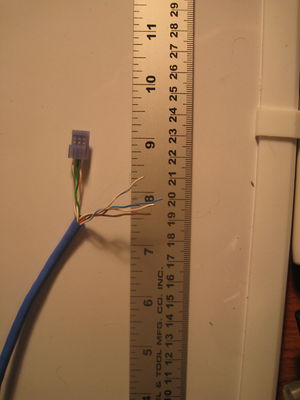
3-pin attached. Didn't understand how to test this connection with multimeter. Note to self: consider this as a source of problems down the road.
Stripped and twisted together the wires for the power leads
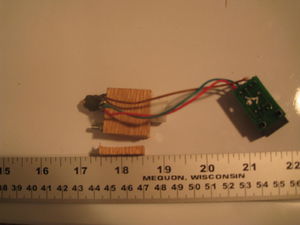
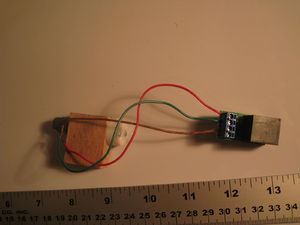
Probably should've taken more intermediate/orientation pictures of this step. Shows the tip (heater leads, thermocouple) attached to the cat5 hookup. Note that the leads in this picture have some slack; I subsequently disconnected and shortened them to fix that.
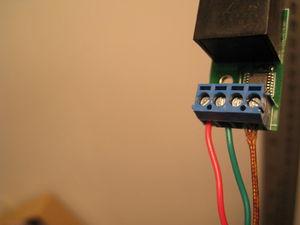
Closeup of the connection to the cat5 hookup. Note that the the end of the thermocouple has two wires, which are each connected to a different grub-screw connector. As noted in the TZ tip assembly page, the software compensates for the way the thermocouple is installed; its polarity doesn't matter for the installation. Also note: the other TZ assembly guide used a more complicated way of attaching the thermocouple leads, first attaching them to a broader wire to get a better connection with the cat5 hookup. That's deeper magic than I'm going to attempt until something doesn't work.
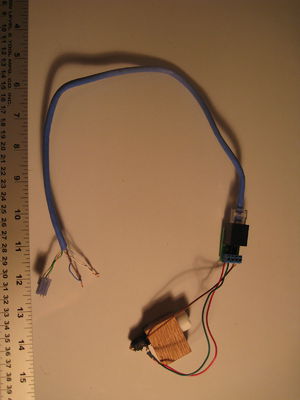
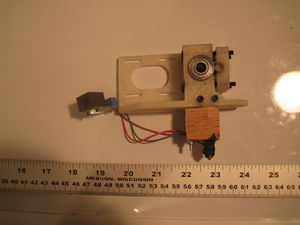
Finished (this is, however, before I shortened the heater leads; there's still too much slack in the leads in this image). I'm not sure why I plugged in the cat5 cable; I guess I just wanted to see how everything went together. This arrangement also makes it possible to again test the resistance of the heater leads through the twisted ends of the cat5 cable.
Extruder and X-Carriage Assembly
I've treated the extruder and x-carriage assembly as one process because the interfaces between those parts are complicated and I found that I had to attach them before finishing either, which makes me think of them as one unified component. (I suppose that really demonstrates that I'm approaching this as an assembler only, not a developer or designer). Most of these pictures show the oak block at its original size; I realized I had to cut it partway through.
If you haven't yet, now is an excellent time to check out |Gary Hodgson's visual guide to the Wade's extruder.
Build Notes/"unexpected stuff and stuff I should've done to begin with"
I should've cut the oak block before any other step.
I had to cut short the bolt that attaches the rear of the extruder to the X-carriage because there were height constraints on both sides of the interface. It was easy enough to do that with a pair of tin snips at the point I needed it. I deformed the end threads too much, but I just filed off a few layers with a 'mill bastard' file and it worked fine.
In some places I went through with a file and cleared out some boltways. If you'd rather do that before you start attaching stuff, look in the assembly to see what has to go where; specifically, check:
- Boltways in the bumper (4)
- Boltways in chassis for bumper-attaching bolts (4)
- Recesses in chassis for heads of bumper-attaching bolts (4) (Note: the recesses are hexagonal. Your bolts are likely round. I couldn't fit nuts in the recesses, so I just used bolts and am hoping for the best. Some small misalignment between the holes in the chassis and the holes in the bumper is keeping that connection pretty solid even without nuts. I'm not sure what I'm going to do going forward.
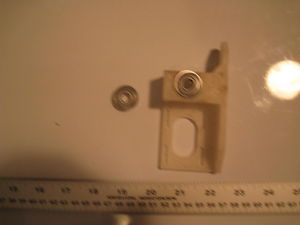
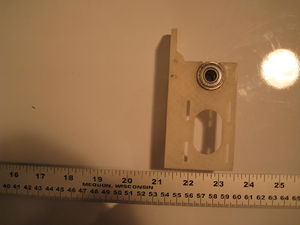
- Recess for bearing in bumper (bearing should spin freely when mounted on post as shown below)
- Trackways for motor mounting screws (the screws should pass through freely and move along the track freely; it is worth testing all the tracks at the same time using the motor and four screws, because even if a screw can move along each of the tracks, the configuration of mount points on the motor may cause the assembly to bind.)
- Wade's gears (the larger just needs to be clear enough for the hobbed bolt to go through. The smaller one is a bit of an open question. It's doesn't have the internal nut as in the visual guide to the Wade's. I drilled it out a bit so it fits over the motor shaft. I think I'm going to drill through it later and add a grub screw or something to bind it to the shaft, but I don't have a working answer yet and I'm not sure if I'm missing something.)
Assembly Steps
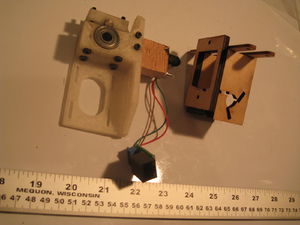
Drilled holes in the adapter to attach it to the extruder chassis:
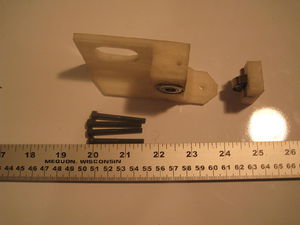
The parts that make up the extruder 'bumper' that presses the filament against the hobbed bolt. The next few are pretty self-explanatory: assemble bumper, put screws through chassis (I'm sort of standing behind my decision to enlarge the hexagonal recesses in the chassis to accept the heads of the bolts. The alternative was to put nylon nuts in there, which didn't fit and which would probably have deformed the flats surrounding them. However, the problem with this setup is that if I put nylocks on the outside I'll have to disassemble everything to get them off. I plan on using this to print long enough for it to print an Accessible Wade's Extruder, then using that.
Bolts going into enlarged recesses:
The binding force of the bolts is pretty solid; I'm not sure how that will play out:
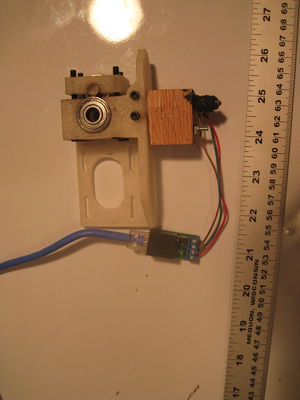
Hot end bolted onto the extruder chassis:
This is one thing that can happen if the block is too long:
Cut:
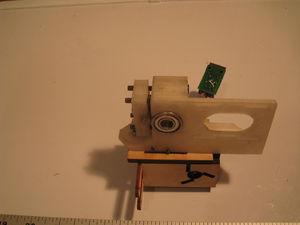
Reattached to extruder chassis:
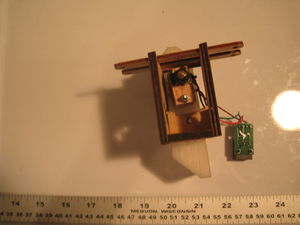
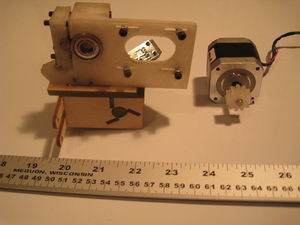
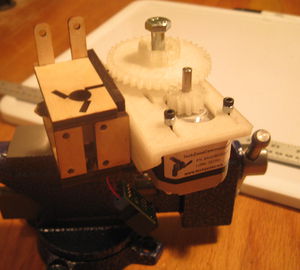
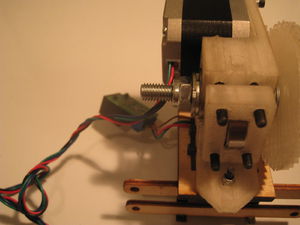
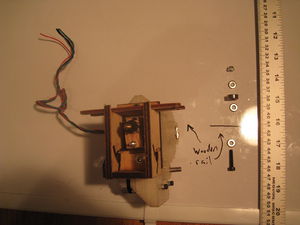
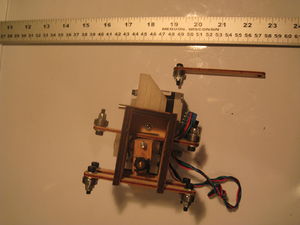
Orientation of extruder assembly to be attached to x-carriage:
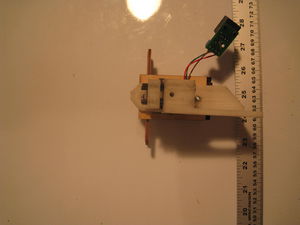
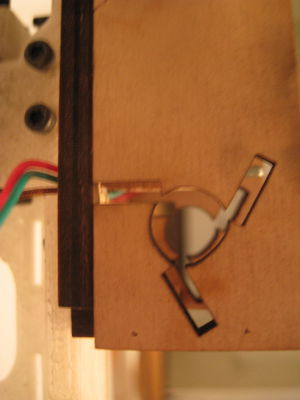
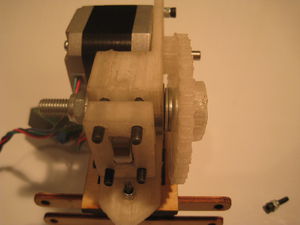
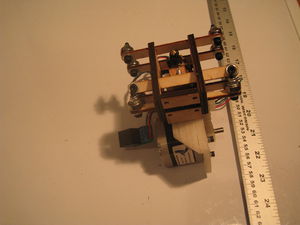
Underside view of extruder/carriage assembly. Note that the wooden rails for the bearings are going to run across the back of the box, so the bolt cannot extend too far into it. On the extruder side, the motor must be mounted over the bolt, so it cannot extend too far on that side either. I cut a 20mm bolt down a little to be within those limits. I put the head on the carriage side and the nut on the extruder side, but I'm not sure it matters. Note also in the second picture below that the cat5 connector is on the side opposite the extruder gears (the first picture below shows the incorrect way). I do not think wires and spinning toothed things should mix.
Same thing; oblique view:
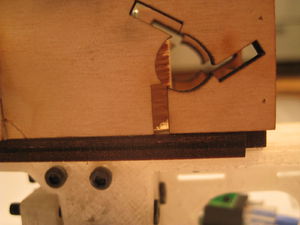
After cutting oak block, space for wooden rail is clear:
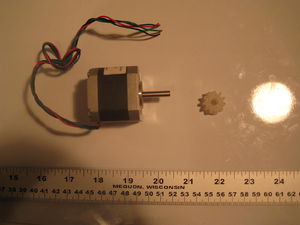
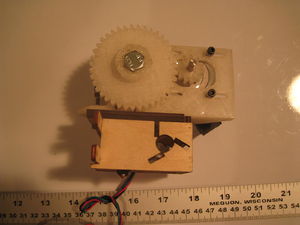
Motor an small cog to attach (I just enlarged the hole and pushed it on; I'm probably going to drill a hole in the cog and insert a grub screw to bind it against the shaft)
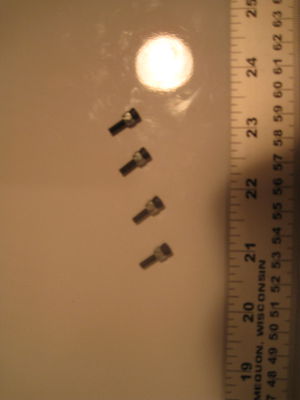
Bolts spaced out so that they won't bottom out in the motor mount points. In fact I only ended up using two of these, since the big gear on the Wade's can't clear them if they're spaced that way. I'm going to go back and cut two or all of them short so they clear.
All four bolts in their tracks. If you look at the following picture you'll see which bolts I omitted:
The picture below shows the method for positioning the motor: place the hobbed bolt and big gear through the bearings and slide the motor to the position where the small gear engages the big gear best. If you just finger-tighten the motor position, it's firm enough to play with the gears a bit to see if the rotation is smooth.
The pictures below shows the unapproved method of tightening the nylock on the hobbed bolt around the extruder; I started the nylock on the hobbed bolt, then put the nut in the vise and tightened down the bolt with an adjustable wrench (it looks like I got wires caught somewhere in the first picture, but I actually didn't).
These two show the washers I used on each side of the extruder against the hobbed bolt/nylock:
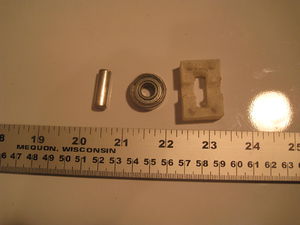
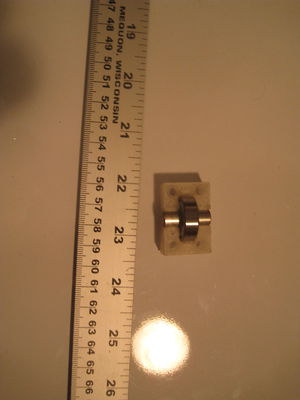
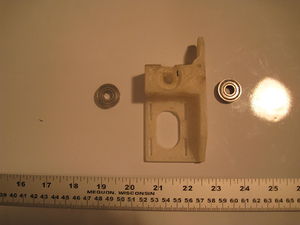
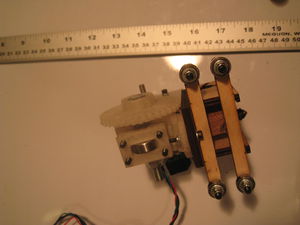
The next few pictures show the addition of the bearings and wooden bearing mounting rails to the x-carriage assembly. The first picture shows the bolt order--get used to it, because most (all?) axis bearings are the same bolt order, and there are 10 per axis. Note that the three rails going through the carriage 'box' are loose in the assembly; I assume I'll glue them in at some point, but I'm waiting until I know more about how they're mounted.
Y-Axis Assembly
THIS SECTION IS UNFINISHED. USE EXTREME CARE; I HAVE PUT THIS STUFF TOGETHER BUT HAVE NOT VERIFIED THAT IT WORKS IN A COMPLETED MACHINE. ALL THIS PROVES IS THAT THIS IS A WAY OF ASSEMBLING THE PARTS IN THE KIT, NOT THAT IT IS THE *RIGHT* WAY.
Y-Axis Bumper
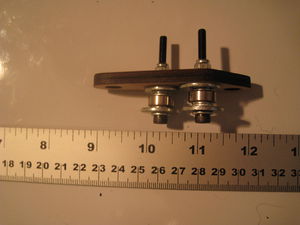
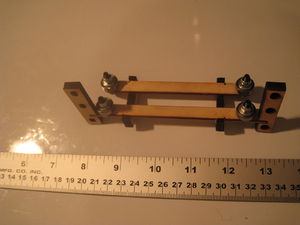
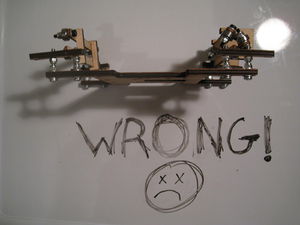
WRONG: THIS SHOWS THE BOLTS GOING THROUGH THE BUMPER IN THE INCORRECT DIRECTION. THESE ARRANGEMENTS SHOULD BE FLIPPED ABOUT THE WOODEN PIECE--THE BEARINGS SHOULD BE ON THE OPPOSITE SIDE.
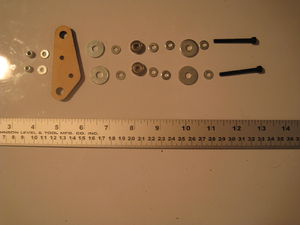
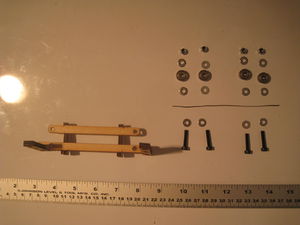
Y-axis bumper (tensioner?) assembly. The Lasercut Mendel Assembly page noted that a third washer is necessary around each bearing to keep the belts from getting caught between the mudguard washers.
Y-Axis Carriage Assembly
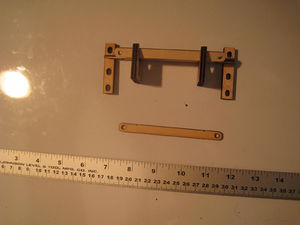
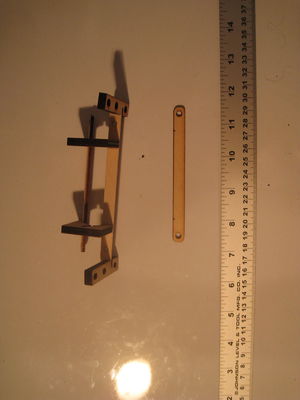
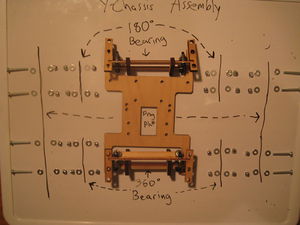
Showing the 360 degree y-axis bearing assembly. In this case '360 degree' means that this is the bearing assembly that constrains the motion of the y-axis on three sides. The other bearing assembly is the 180 degree bearing. Now is a good time to mention that other builders had issues with the ends of the bearing assemblies bumping against the frame. If you're confused about which ends those are, scan down a few pictures. I sawed/filed off a few mm from each.
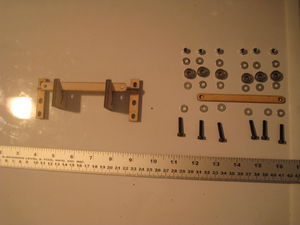
This shows the bolt order for each bearing. the wooden rail is placed to indicate where the various wooden rails appear in each bolt.
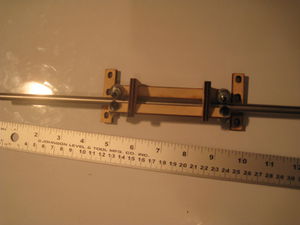
Assembled. For clarification, I've shown how this eventually goes along the smooth bar (the bar is not involved in the assembly yet but it can't hurt to check the bearings are smooth):
Same idea on the y 180 degree bearing assembly. Don't forget that this may need to be adjusted to clear the frame as well.
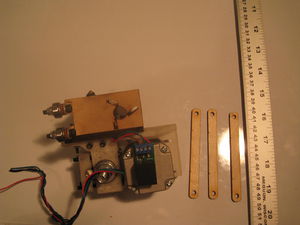
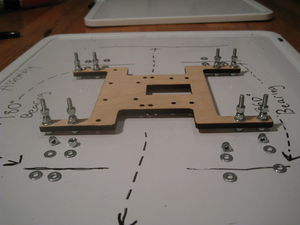
An overview of the way the bearing assemblies get attached to the frog plate. In this picture you can see clearly the ends that may need to be shortened--they are the extreme ends of what will become the completed assembly: the two tips of the 180 bearing assembly at the top and the two tips of the 360 bearing assembly at the bottom.
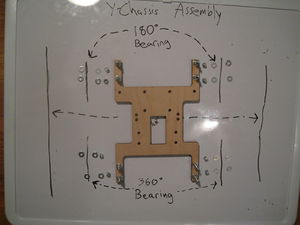
Showing how I assembled the bolts on the frog plate before trying to attach the bearing assemblies. This seemed the way to follow what has become my most important unspoken (now spoken) rule: try to put off finalizing-type details until I understand the interaction between the thing I'm working on and every other thing in the process. In that spirit but not visible in these pictures, I also purposefully loosened the nuts binding the bolts to the frog plate. You'll notice that the holes in the frog allow the bolts to travel a little; this seems to be so that it's easier to position the assemblies even if the bolts aren't quite straight. I wanted to take advantage of that.
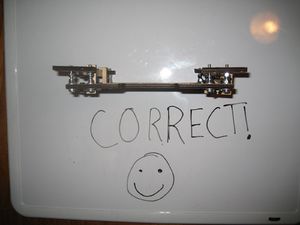
There's considerable confusion about how this whole arrangement is supposed to work. One customer on the official assembly page said that it didn't work, and that person ended up using nylon spacers instead of the two-bolt spacing strategy I and others have used. When I looked at that customer's 'this didn't work' image, it seemed to me that the problem wasn't to do with uneven spacing; it was that the bearing assemblies had been mounted upside-down. So below I've included what I hope are clear illustrations of the incorrect and correct way to mount them. Note that even with the correct way, AFAIK you still need to make sure the bearings are at the correct ends of the frog plate; It's not symmetrical that way and I assume it makes a difference down the road.
"..so the smile was rather a ghastly one." --Douglas Adams
Frame Assembly Layout
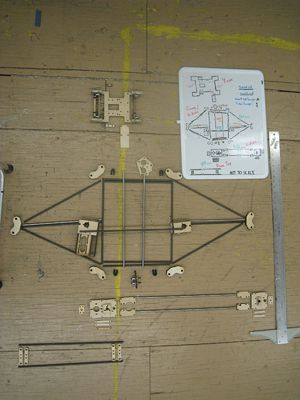
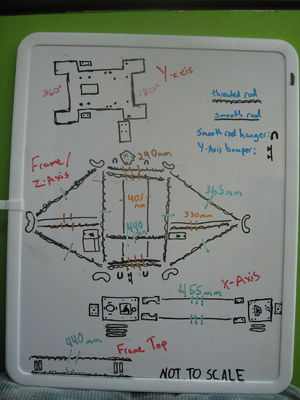
I wanted to understand what comes next, so I laid out all the parts where they're supposed to go. This was mostly for my own process, but I recommend it. Juxtaposition is a powerful cognitive tool.
After finishing the Y-axis carriage, I ran into some changes to the design that confused me. In the picture below, you'll notice that there's only one lasercut piece on the base of the right frame triangle. As far as I can tell, this design only has one threaded rod going laterally across the middle of the base, as opposed to three in the original Mendel design. It seems to me that it will work fine, but I'm curious about why there were three in the original design if they could be removed with no effects. This feels a lot like it usually feels when I'm failing to notice something reasonably important.
Other changes to the design make some of the pieces a little harder to recognize but don't seem to affect functionality at all. Specifically, the Y-axis motor mount and the X-axis assembly have changed a little.
One of my main reasons for doing this was to make sure I understood the relative positions of different parts. For instance, I had to move the bolts and bearings to the other side of the Y-axis bumper. I also now feel like I understand where exactly on the Y-axis carriage the rectangular lasercut piece (the one below the carriage and sitting on the yellow line on the floor in the picture) is supposed to go and how the Y-axis carriage is oriented in the frame. I also understand similar things about the X-axis assembly--its orientation to the frame, its construction, etc. If you have questions or comments about this, leave them here or on the talk page and I'll explain what I was thinking.
