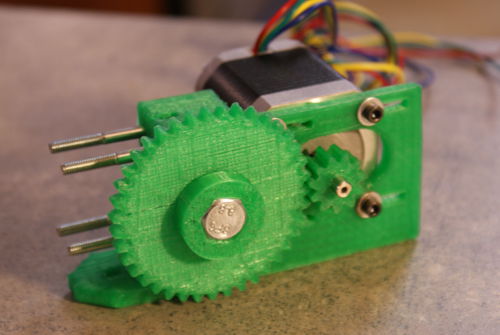
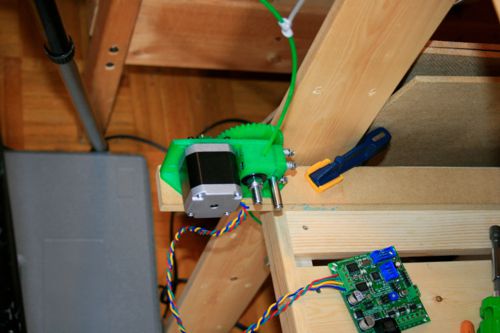
Wade's Geared Extruder
Release status: Working
This work is based on Adrian's Geared Nema 14 extruder design, and includes many concepts lifted from Nophead's extruder research.
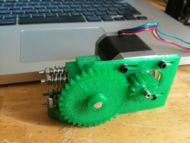
This extruder was designed for the RepRap Mendel (but will work on a Darwin or Huxley with adaptors) and is robust, provides a strong force to extrude, is cheap and DIY. It is an alternative to the standard extruder for RepRap Mendel and has the following advantages:
- no need to buy/use expensive metal gears;
- no need to do two precision flats on motor shaft;
- no need to glue the PTFE barrel;
Other advantages over other extruders are:
- extrude/print at high speed;
- good for use with a low torque/cheap Nema 17 motor ; (Needs verification)
- no need to use expensive and complex tools - just one hand drill, a file and a M3 tap;
- no need to make splines on motor shaft;
See this extruder in action (video recorded by Casainho on 2010.08.18): <videoflash type="blip">AYH2oxYC</videoflash> View the high quality original vorbis video file.
View photos of other people's copies of this extruder.
Buy it: If you can't make your own, or simply don't want to, you can always buy one. There are users printing it and selling on Ebay.
Contents
Mechanical Construction
Material
Non printed parts...
... for the feeder
- 2 X 608 bearings (Skateboard bearings);
- 1 X M8X50 bolt;
- 1 X M8 nut (Nylock works better, but a pair of nuts will also work);
- 4 X M8 washers;
... for the idler
- 1 X 608 bearing (Skateboard bearing);
- 1 X M8X20 piece of smooth bar, threaded bar or a bolt;
- 4 X M4X45 bolts; - hex head will work best (they won't turn), and longer than 45 mm will be easier to assemble if you can find them.
- 4 X M4 nuts;
- 4 X M4 washers;
- 4 X Springs - sized to fit over an M4 bolt (~4mm ID), unsprung length of 10-12mm, each spring providing 25-35N load. For a given filament drive force, you'll need about twice the spring force - ie, if you want 100 N of filament drive, your springs need to push with about 50 N each. NOTE: some users have theirs extruders working without this springs, but springs are recommended.
- 16 M4 washers; - optional; 4 washers on each M4X45 idler bolt between the main block and the idler block will limit the idler travel and make reloading filament easier.
... for mounting the hot end
- 2 X M3X35 bolts;
- 4 X M3 washers;
- 2 X M3 nuts;
... for mounting the stepper motor, some motors may require something similar
- 4 X M3X15 bolts;
- 8 X M3 washers;
- 4 X M3 nuts;
... and of course
- 1 X Nema17 StepperMotor - 5 kg*cm works well; Kysan 42BYGH4803 is what I used.
Printed Parts
- 1 X M8_Extruder_Block_3.stl
- 1 X M8_Extruder_Idler_Block_2.stl
- 1 X 11t17p.stl
- 1 X 39t17p.stl
How to build it
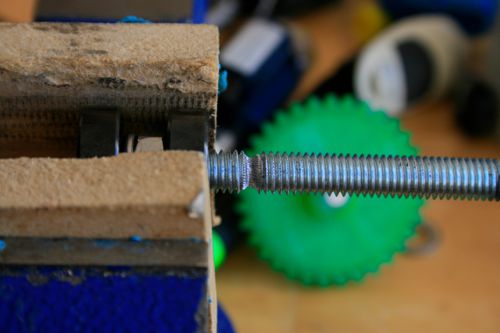
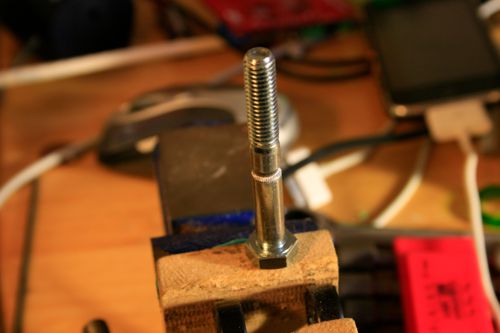
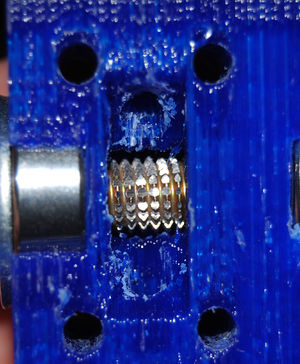
I used a hand drill and a file to cut the slot, then hobbed it with an M3 tap mounted in the drill, using bearings mounted in a vise to let the bolt spin - see the next videos. If you're not sure where to cut the pinchwheel slot, test assemble the extruder, making sure you leave room for the motor mount bolt heads under the 39 tooth gear, and mark the M8 bolt where it crosses the filament feed channel.
(There is an alternate method which replaces the hobbed bolt with a Dremelled bolt, see below for details).
Filing the shaft. Note: The video shows the file being held stationary as the work turns under it. When filing on a lathe-like setup you should move the file back and forth to avoid clogging the teeth of the file, uneven tool wear, and heat buildup. <videoflash type="youtube">2FU0v-3gloo</videoflash>
Using M3 tap: <videoflash type="youtube">Hl4Gf5R4YJg</videoflash>
This is an earlier version with using threaded rod - it's harder to get the hobbing concentric when you cut it into the threads.
You can also use this http://www.thingiverse.com/thing:3780 bolt hobbing tool, or this http://www.thingiverse.com/thing:1802 one.
Using the smooth part of a shoulder bolt works better.
- Note 1 - I prefer to use a Nylock nut on the end of the M8 shaft. Locktite should work as well, or a longer bolt with two nuts.
So far so good! If you add 3 or 4 M4 washers on each bolt before you put the idler block on, it will reduce the idler block travel when loading new filament, making loading new filament much easier.
Here's the test jig:
This extruder hit 16 kg - here's the results: M8 shoulder bolt - 7.0kg, adjusted tension, new springs - 11.0 kg,
Tightened springs, 3 trials:
15.5 kg, 16.5 kg, 15.25 kg
The final failure mode was the stepper running in reverse, as opposed to the filament slipping. That's quite promising.
The Hot End ...
Attach a length of 16 mm OD PTFE using the two M bolts to pin it in place. I pre-drilled the PTFE mounting holes with a 2.3 mm drill, which made for a tight friction fit.
The nozzle can be built however you like; I build them similar to this: Mendel_extruder
I use 8mm od brass rod, with a 4 mm ID melt chamber, insulated nichrome wire and furnace cement to hold it all together.
Alternate Bolt Design
Someone (if you know who, please complete with the name) at suddendevelopment.com came up with a different way to make the drive bolt using a Dremel to cut slots: http://suddendevelopment.com/?p=68.
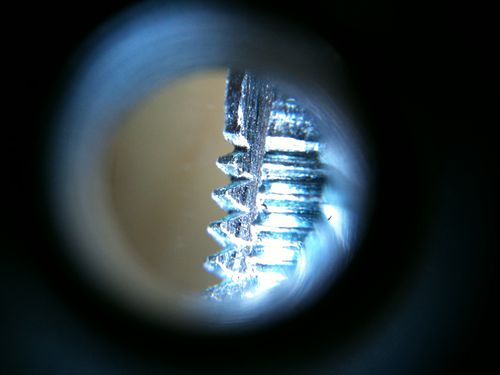
Cloudmaker, after trying this out, noted: "I just tried this, took 5 minutes and grips incredibly, works best on the threaded part of the bolt, produces nice spikes which enter the filament :-)" and added, some longer tests later: "It works great in the original Wade's extruder, but I didn't manage to get it to work reliably in Greg Frost's variation of the Wade. A (yet to be designed and printed) rig to rotate the bolt in evenly spaced steps (12 maybe?) and to assure linear movement of the Dremel, thus giving very even spikes and even thrust to the filament, would be best for consistent even nozzle output."
Myndale reports that when using this design it is imperative that all M8 nuts on the main drive bolt are kept very tight. The teeth on the bolt are cut from the original thread, and since this design results in very high grip it creates lateral forces that cause the bolt to try to unscrew itself out of the extruder. If the nuts aren't kept tight then they will rotate freely and eventually cause the extruder to jam.
Myndale also reports that the hot end must be mounted very securely. When tested on a modified Wade's extruder with an Adrian's hot-end the resulting force was strong enough to pull recessed M3 nuts through over 1cm of infill. If your extruder cannot handle these forces then the the idler can simply be loosened, which will result in less grip and will cause the plastic filament to slip before any damage is done.
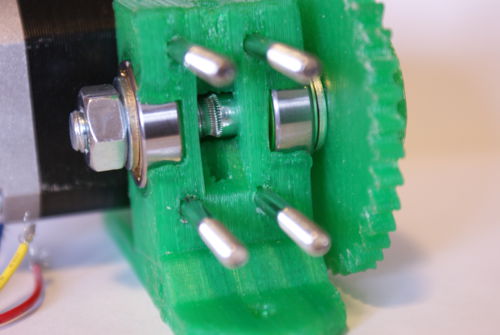
Another close-up photo showing the variation inside a slightly-modified Wade's extruder, the rows of teeth embed themselves almost entirely in the filament resulting in extremely tight grip:
3D CAD Files
Here's the design files for the latest version:
- extruder body and idler block: File:M8 Extruder 3.zip
- 11 tooth drive gear and 39 tooth M8 hub driven gear: File:M8 Gears.zip
- alternative 11 tooth gear that should be better: File:Nophead gear with setscrew for wade extruder.zip
- (if you do not want to use a vise to support the M8 bolt) use this support for bearings, needed when using M3 tap: File:Pinchwheelwormdrilljig.zip
- Horizontal Wade Mount by tbuser
- Alternative driven gear by GilesBathgate
- You can also get the files from thingiverse although they may not be the most recent.
Finally, here's a spreadsheet to help calculate the proper feedrates: media:feedrates.ods | media:feedrates.xls
An updated version of the spreadsheet to use with Skeinforge, somewhat simplified. I vary the layer thickness, width/thickness and the two speed settings until I get a density near unity for nicely solid solid parts: media:Extruder Calcs 2010.07.13.ods
Stepper Driver
You should be able to use Stepper_Motor_Driver_2.3 to drive this extruder.
Variations on this design
Alternative filament drive bolt: http://suddendevelopment.com/?p=68
Older versions
Here is a link to a previous version of this page that describes an earlier version of this extruder that uses an M4 shaft, and includes more details about pull testing the two versions: Geared_Nema17_Extruder_V0.5
