Template:RepRapPro printing
Contents
Introduction
The RepRapPro Huxley is being sold as a complete printing solution, as such the RepRapPro host software comes with pre-tuned print settings for PLA and ABS filament. We encourage people to play with and put forward improvements to the print settings, but would advise starting with the provided print profiles and working from there.
Warming up
The provided print profiles include a startup routine which will prepare the printer before the print starts. This routine does not include a command to wait for the heatbed to reach the desired temperature, (this is because the heating of the bed can take up to 20mins for ABS printing, and it would be quite disconcerting for the printer to sit there for ages apparently not doing anything and for it to suddenly start after all this time).
So before starting a print, you will need to heat the bed to a suitable temperature for printing, 95C for PLA and 140C for ABS, (bed temperatures are not calibrated on the top surface of the bed, so these values may appear rather high to some people).
Preparing a file to print
Your 3D model will need to be processed into a format which the printer understands. This is known as a GCode file (print commands are GCodes, see this reference).
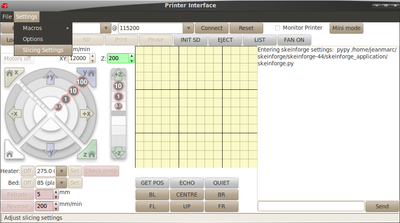
Before you can process a 3D model, you may need to tell Pronterface where to find the slicing tool. Click on Settings | Options and check that slicecommand and sliceoptscommand point to the location of your slicing tool. These will normally be:
python ./skeinforge/skeinforge_application/skeinforge_utilities/skeinforge_craft.py $s
python ./skeinforge/skeinforge_application/skeinforge.py
respectively. The pronterface software includes a customised copy of skeinforge in the subdirectory called ./skeinforge .
The 3D model will need to be in the STL file format. The software will load either a pre-processed GCode file or an STL 3D model. Click on Load file and select an STL file to process it. You will see progress of this process in the log window.
Once complete, the log will indicate how much filament will be used to print the model. You can then either print direct form USB or copy the file to the MicroSD card in the machine.
If printing from USB, your .gcode file will have been automatically loaded.
It is recommended, however, to print from the MicroSD for a number of reasons. When printing from USB, the print can be adversely affected by the host PC giving the printer a low priority over other running applications, slowing down the stream of commands. Also, the USB connection appears to be quite sensitive to AC noise on the power cable to the host PC.
To print from the SD card, copy the file to the card (which can be done through the printer interface with the SD card still in the machine, but it is much quicker to insert the card into the host PC and copy the file. Just make sure you INIT SD once the card is re-inserted).
Starting a print
To begin a print, you need to select the file you wish to print. Either from the Load file button to print direct from USB, or from the SD Print button.
Once the print starts, the machine will go through the following startup routine:
1. The printer moves all 3 motion axes in a negative direction to find X, Y, and Z zero.
2. The nozzle is heated to the relevant extrusion temperature.
3. Once extrusion temperature has been reached, the machine will print an outline before printing the component(s) to ensure the melt chamber behind the nozzle is primed.
When not required to move, the Z motors are de-activated. This can be a useful feature as it allows the Z height to be tweaked and the X axis to be levelled whilst the outline is being printed. Simply rotate the Z couplings by hand to get a good first layer (filament slightly squished). If you have moved the two couplings in unison to adjust the Z height, you will need to adjust the Z offset in the firmware before the next print, otherwise you will end up having to tweak the Z height manually at the start of each print.
To adjust the Z height in firmware, use the command M203 Z<value> where <value> is the amount in millimeters by which you wish to adjust the Z height. If the first layer is too close to the bed, you need to effectively move the bed down, so <value> will be negative. If the nozzle is too far from the bed during the first layer, <value> should be positive to raise the bed. The maximum adjustment is +/-1.27mm. Note that the Z height adjustment is stored in non-volatile memory on the printer so your printer will remember this setting even if you remove power.
Your first print
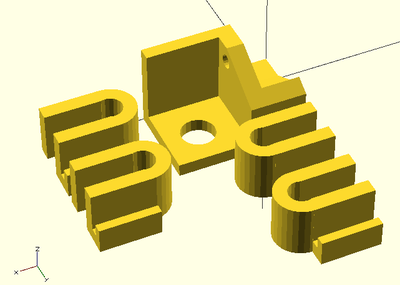
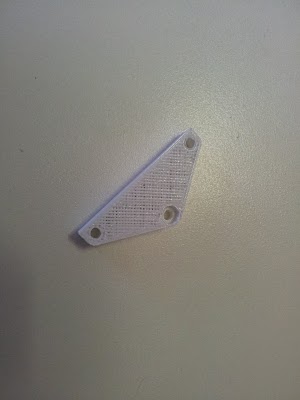
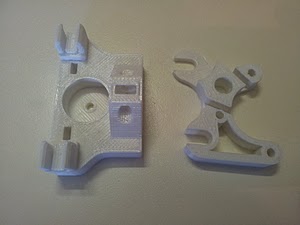
The first thing to print is the PCB clips and the power connector clip for your own machine:
The file for this is on the RepRapPro Github repository here (right mouse click and select "Save link as"): https://github.com/reprappro/Huxley/raw/master/Print-Huxley/Individual-STLs/huxley-first-print.stl.
(The source OpenSCAD model is here if you want that: https://github.com/reprappro/Huxley/raw/master/Openscad/huxley-first-print.scad.)
Save the .stl file, load it up and print it!
Disconnect the power and the USB from your machine before fitting these.
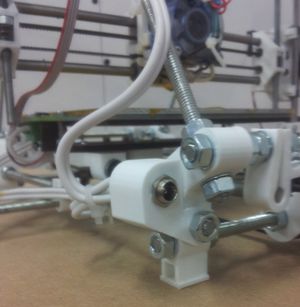
The power clip attached to the frame vertex just to the left of the Y motor with a single M3 screw:
Put washers under both the head and nut.
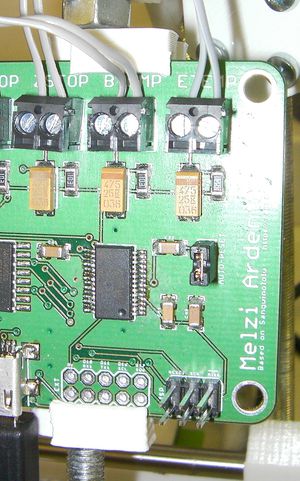
Get rid of the tape and cardboard. Then the four PCB clips push over the M6 threaded rods to retain the PCB:
Put the top ones on first. Take care not to damage any components when you push them into place.
Now go round the whole machine replacing the tatty tape with neat retainers. Use the curled one for the top front bar where most of the wires run, and cable ties for the rest. Take care if you use a blade to remove the tape that you don't damage any wires.
Tuning your printer
The skeinforge print profiles are tuned based on an assumption as to how much plastic is fed into the extruder for a given number of steps of the extruder drive motor. A critical parameter affecting the quality of the prints is how accurately skeinforge knows the volume of plastic it is feeding into the extruder. In practice, this will vary slightly between machines. This is due primarily to the actual filament diameter, and to variations in the effective diameter of the hobbed stud.
The filament diameter should be measured and the value entered in skeinforge's Dimension plugin.
The E steps/mm setting can be adjusted without uploading new firmware, using M92 Ee, where e is the new E steps/mm value. By default the firmware has this set to 980. When this value is tuned, the top surface fill will have virtually no gas between lines of filament, and no extra plastic at the ends of the lines.
If the E steps/mm is set too low, a gap will separate the fill lines
A good test piece for this exercise is a 3mm high 30x30mm square.
Once you are happy with your E steps/mm value, you can edit your firmware as per these instructions. Please update your firmware even if you don't need to change this setting; new versions come out regularly for fixing bugs (like the bug where an unplugged/failed thermistor means the heater goes to full power)!
Print another RepRap
So can I print more RepRaps in my RepRap?
Yes!
Your RepRapPro printer has been designed to replicate - that's what the Rep stands for. Indeed, RepRaps are humanity's first self-replicating manufacturing machines.
Replicating the plastic parts for another RepRapPro Huxley is easy. You can then use them to make a new RepRap (maybe with your own experimental design changes). Or you could make the RepRap plastic parts for a friend. Or you could sell sets of RepRap plastic parts to other reprappers on eMakerShop or eBay.
RepRap's free GPL Licence means that you are completely at liberty to do all of these things.
Go to this wiki page to find out how to print a complete set of RepRapPro Huxley plastic parts.
Profiles
Printing with different plastic may require modified print profiles. Have a look at this page for details, and if your plastic isn't listed, please add to the table once you have worked out the best settings.
Changing Filament
- Heat nozzle to operating temperature.
- Reverse filament until it comes out of the extruder drive (about 380mm). You can do this at 600mm/min.
- Command M84 to turn the motors off. Feed the new filament in by hand.
- Drive/feed the filament to just before the hot end.
- Command the filament at 200mm/min until it squirts out of the nozzle. You may need to hold the bowden tube straight for the filament to go down into the hot end easily.
