TechZone Horizontal Filament Spool
Release status: unknown
| Description | A simple laser cut filament spool
|
| License | |
| Author | [[User:--Tech Zone Communications]]
|
| Contributors | |
| Based-on | |
| Categories | |
| CAD Models | |
| External Link |
Contents
General
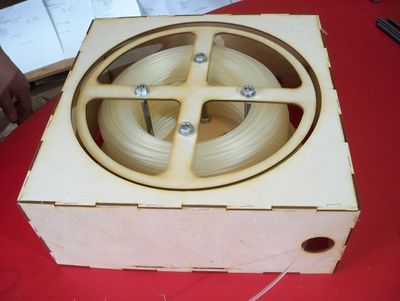
This simple filament spool is designed to be inexpensive (both to buy and to ship as a kit) and durable. It is constructed from 3mm plywood, and steel hardware including a lazy susan bearing.This spool is a great addition to the TechZone Huxley or to the RepRap Mendel, it would of course work with any 3d printer which uses coiled filament.
Files
| FILE ID# | TYPE | DESCRIPTION | AVAILABLE FORMATS | CREATED/RESERVED BY |
|---|---|---|---|---|
| Your-File-Name | MONOTRONICS BOARDS | These are the files you need to make a set of boards | .xml.zip | --Example User 12:00, Today's Date 20xx (UTC) |
| FILE ID# | TYPE | DESCRIPTION | AVAILABLE FORMATS | CREATED/RESERVED BY |
|---|---|---|---|---|
| TechZone Monotronics Firmware | MONOTRONICS Firmware | This file is the firmware for the Monotronics | .zip for use with arduino | --Tech Zone Communications Jan 16, 2011 |
Kit Contents
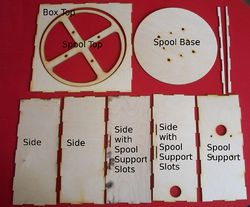
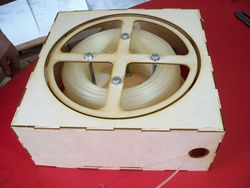
There are ten LaserCut pieces in the kit as well as a set of steel hardware. The picture at the left shows the contents of the kit. If you are missing anything from your kit when you unpack it you should contact TechZoneCommunications (if that is where you purchased your kit) and let them know which parts you still need. The Photo on the right shows the assembled spool, and the picture below it shows the contents of the hardware.
Assembly
The tools you will want, to make the assembly of this kit simpler, are a common office stapler with staples a screwdriver, some long nose pliars, and Glue. I use polyurethane glue, like gorilla glue, but any other strong glue ment for bonding wood will work just fine. you may also want some small clamps (like spring clamps); and/or large rubber bands.
As the following steps are performed, I used a common office stapler to hold things in place until the glue dried, however, you could use some spring clamps or large rubber bands to hold it together until the glue dries.
The Housing (box)
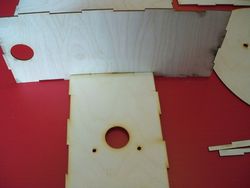
We are going to start by assembling the spool support. The spool support has five holes in it, one larger and four smaller holes, it is made from thre pieces, the one that matches the preceding description and the two long narrow pieces.To do this correctly, we need to idetify which side of the spool support is the top. I place the spool support into the slots of one of the sides and flip it over if needed, when it is turned the right direction it will appear to be in the center (left to right) as shown in the photo on the right. Take a moment and label the top of this support, so we don't mix it up in the next few steps.
The Spool
Regarding the Reset button
(--AlexRa): at least in my setup (and I don't see how it can be any different on other computers connecting to the same board) I do NOT NEED to touch or hold Reset to upload the firmware from Arduino. I think much of the "things just don't work unless you press all the buttons you can think of" confusion may be caused by forgetting to set the connection speed (the default seems to be 9600 in Arduino and 14400 in the serial-to-USB driver).
(--AlexRa)Correction: the Arduino bootloader is supposed to wait for an upload "a few seconds" after a reset, then pass control to the currently loaded firmware. According to that, you have to click Reset (but not hold it), then immediately start the upload.
(--TechZone)The reason that we hold the reset in, is that it can take a while to build the firmware before it begins to transfer the file (depending upon the computer of course), if you hold it in until the right moment, then letting go will make sure that the board is in a ready state to receive the data from the arduino environment. The Idea of holding in the reset is simply a universal way of explaining to a wide variety of users how to get the timing of the reset to work well. Feel free to try it both ways.


