Simplified Ball Bearing Mendel
A Simplified Ball Bearing Mendel
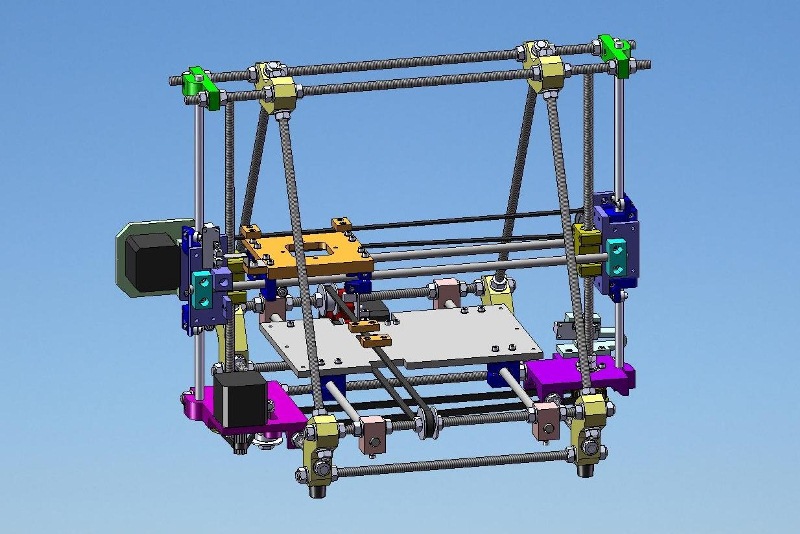
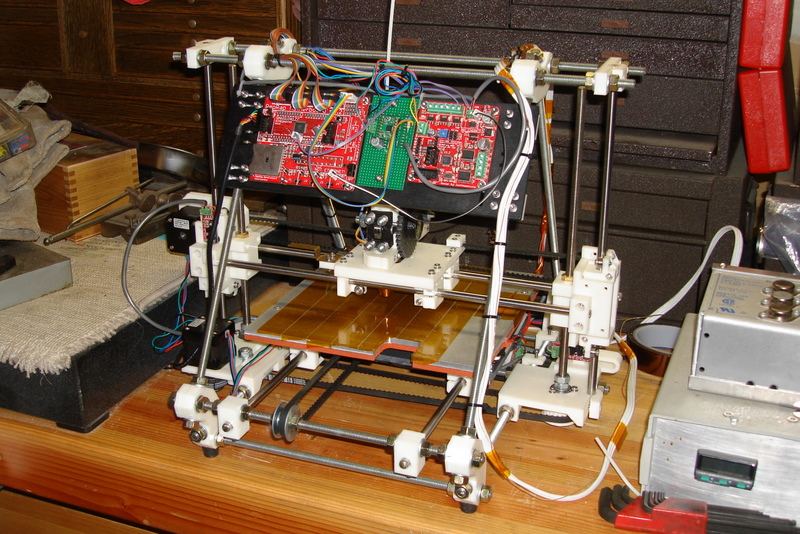
My start at 3D printing occurred about a year and a half ago, when I purchased one of the first Techzone laser cut kits. At the time, all the printed parts were way too expensive. That kit turned out to be a very frustrating experience, with a host of design and assembly issues. Nevertheless, I finally got it producing good parts. The experience gave me a clear understanding of what I wanted to see in a new Mendel design, both in initial assembly sequence, ease of adjustment, use, servicing and documentation. I do not have direct experience with the Sells Mendel, but I think it has many similar issues. About 6 months ago, I decided that a new and improved Mendel design would be a good project. Sort of like building the better mousetrap, the world might beat a path to my door… After many late nights at the drawing board, this Mendel was brought to life. It is a combination of all the features I would like to see in a Mendel based printer.
I basically wanted to design a Mendel along the lines of a Prusa, but using ball bearings. I was always uncomfortable with glued-on printed bushings. Linear bearings are not easily sourced and it takes very careful adjustment to not over-constrain their motion. I also did not want a multitude of different ways to hold a bearing as in the Sells Mendel. Instead, I wanted a “universal ball bearing assembly” that was simple to produce and could be used everywhere a bearing was used in the design. Although the ball bearings would not wear out, the assemblies should to be screwed together (not glued), for repair if necessary. Kind of like the Frankenstein monster, a bunch of standard parts to pull off the shelf and bolt together as necessary.
The Sells Mendel has a high distinct parts count, which I did not like. It often takes me a try or two to get an acceptable print, so a low number of distinct parts is desirable (then many copies can be safely made). However, simply merging multiple parts into one is bad for ABS, as I created many twisted and warped creations that more resembled modern art than engineering. Minimum parts count along with thin, relatively planar parts lying on the print bed turned out to be best. I made every effort to minimize parts count, and ended up with 15 distinct parts. Another difficulty is the multitude of fasteners in many designs. Here in the backward US, we have to order 100 screws to get one metric screw at a reasonable price. So I considered it a must to reduce it to only one fastener type, an M3 X 12 SHCS. The only thing that really worked well in my Techzone one was the z belt drive, so I kept that, but reduced the parts count. Lastly, I had endless trouble with adjusting the horizontal x belt, so it had to go. Finally, adjustment for squareness and good running was a trying (to say the least) experience. By design and assembly sequence, I tried to eliminate much of this…
In fairly exhaustive summation, this Mendel had the following features:
1. Low printed parts count (15). 2. Printable in ABS with heated bed (no tall parts, all thin and flat on the bed). 3. All ball bearings are held in 2 standard housings, a 3 bearing and a 2 bearing housing. 4. Only one fastener, M3x12!!!! 5. Ball bearing design. 6. 623 bearings, same as Huxley. 7. Very easy to adjust. 8. Vertical x belt to eliminate sag under gravity against washers. 9. All basic dimensions same as Sells Mendel (rod length, spacing, jigging; except 2 shorter smooth rods.) 10. Belt in z, but very much simplified. 11. Able to adjust y belt tension without disassembly of heated bed!!!! 12. English/Metric dual dimensions (mostly): T5 or XL belts, 5/16 or M8 frame, 5/16 or M8 rod. 13. X axis belt returns under extruder, allows Wades extruder with vertical x belt (unlike Prusa). 14. Wade’s or Adrian’s extruder in their proper orientations. 15. Heated bed support at 4 or 3 points for flexible or rigid bed. 16. Simple hand cut frog. 17. Anti-backlash nuts on z (as on Prusa). 18. Uses printed (8 tooth) or purchased (10 tooth) pulleys (adjust code) and motor position. Strongly suggest use of purchased 10 tooth pulleys. 19. Well integrated support for optoswitches. 20. Optoswitch flags mount with 2 screws, no rotation and hitting the switch housing. 21. All belts travel over 608 bearings to minimize bumps from belt teeth on prints. 22. Uses less than 1.5lb of ABS for a complete set (25% infill). 23. Z axis threaded rod must be M8, all SHCS must be M3X12.
Click on the links below for a PDF of each section of the build documentation.
Click on the following link for a zip file of the stl and dxf files.
Click on this link for a zip file of the step (v203) files.
Click on this link for a zip file of the assembly step (v203) files.
Click on this link for a zip file of the SolidWorks 2007 native assembly files.
File:Ja mendel step assm native.zip
Please use and enjoy...

