SGBot
This page is a development stub. Please enhance this page by adding information, cad files, nice big images, and well structured data!
Release status: unknown
| Description | documenting a generic tool/artpiece
|
| License | |
| Author | |
| Contributors | |
| Based-on | |
| Categories | |
| CAD Models | |
| External Link |
Create your new page by logging in, editing the URL of any wiki page, and then clicking "edit". Please use this page as a model, or copy. You can get the "mediawiki text" by clicking "edit" on this page.
This page represents an example development page and showcases many features that can be used in creating new development pages.
Contents
Working Notes. This is a stub!
Everything below this point is working notes.
Discussion
http://dev.forums.reprap.org/read.php?1,36581
Photos and Drawings
http://www.mediawiki.org/wiki/Help:Images
Text
This is a generic Widgit Banger! I (Mr. Bunny) made it because it's cool but I use it to make Widgits. Share and Enjoy! (This page was made using the wiki page Development:Example as a model.)
Hi
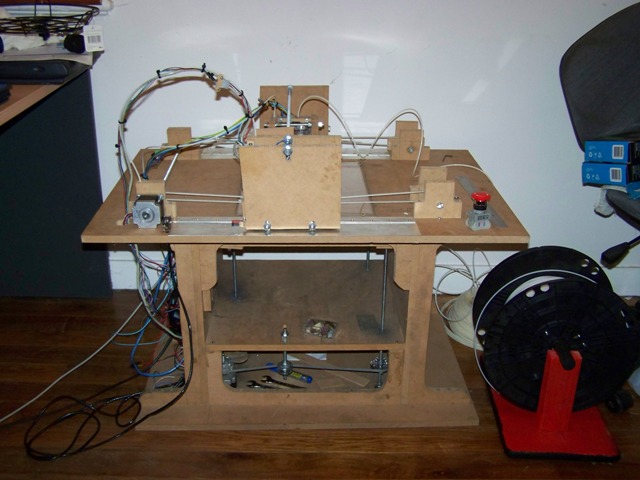
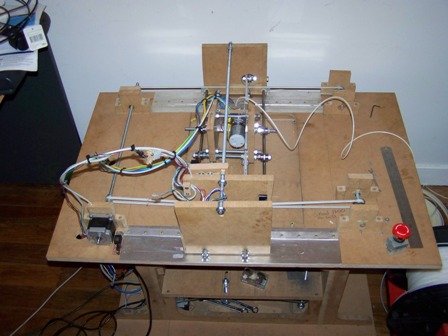
I have finally built my second repstrap. It’s features are
1) Low cost. Uses screws instead of nuts and bolts and MDF not plastic and steel. 2) Bearing count 23. But I recon I can get it down to 12. 3) 8 threaded rods+2 unthreaded rods but it can be reduced to 5 + 2 unthreaded
4) 300 x 400 Z axis build area. With a Z axis of 250mm 5) Prints well at 25m/s with a Makerbot MK4 extruder. 6) Happily go to 50m/s but the extruder can't keep up
7) Darwin design but uses only three threaded rods on Z axis. 8) Z axis is rock solid.
9) Big red emergency stop button to be wired into Reset pin of Arduino 10) Nice area in the Z axis to dump spanners and often used tools. 11) It is so robust I can sit on it. (I am about 95kg)
Just thought I would share.
Stephen
P.s. I have attached pictures.
Entrepreneurship (Kits)
There is no kit. This machine was built using two Saws, Pillar drill, a Screw driver, two 13mm spanners, a big metal ruler, glue and lots of G clamps.
Where accuracy is required I cheated by using pre cut MDF. For example the two uprights bits of MDF needed to suppot the x-y printing bed obviously need to be exactly the same size. (otherwise it would lean) I bought a 900mm x 450mm bit of 16mm thick MDF and cut it in two. This gave me two bits of MDF with a perfect 450 side and a rough 450 side. The perfect 450 was used to hold up the X-y printing bed with the roughly cut 450 points outwards to the back of the system. As a result I did not choose the size of the machine my MDF supplier did. My MDF was supplied in 900x450x16 and 800x600x16.
The machine has a base of 800x600 with a x-y printing bed of 800x600 which sits exactly 450mm high. If your MDF supplier has different sized MDF this should not be a problem. Just go with the flow.
Files and Parts
Generic/Daughter_part and CarrotStraightener. (As a gentle style recommendation, it's good to try to keep all your parts and files on the RepRap wiki rather than scattered around so that Mr. Bunny doesn't have to use a scripts and so on to get stuff back onto the wiki.) File:Uploaded files example.zip
Flicker Example
<flickr>2967868906|right</flickr>
Working Notes
Project Lead(s): Mr. Bunny Wiki-maintainers and helpers:
Forum thread?
Tooling
Description of tooling requirements.
Process
What is making the part like?


