Robert's Heated Bed
Release status: unknown

| Description | Aluminum heated bed with power and low costs
|
| License | |
| Author | |
| Contributors | |
| Based-on | |
| Categories | |
| CAD Models | |
| External Link |
Contents
Introduction
I've tried several kinds of heated beds over the last Months. But I was wondering, if there wasn't a far simpler, more efficient and even cheaper way to build one. So I've developed a heated bed, based on an aluminum plate, heated by isolated copper-wire. No etching is required, no exotic machinery and only materials any RepRapper should easily be able to buy.
Construction
The list of materials needed for this heated bed is quite short:
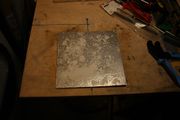
- Aluminum plate, 220 mm x 220 mm x 3 mm
- Kapton adhesive tape, broad (e.g. 220 mm)
- Kapton adhesive tape, slim (e.g. 20 mm)
- Rescue-blanket (gold on one side, silver on the other)
- Thermistor (e.g. EPCOS B5781S104F40)
- Copper wire, isolated, 0.56 mm diameter (0.6 mm with isolation)
- 1.5 mm² wire (for heating current)
- Wire to connect the thermistor
To form the heating wire in regular loops, you need a bed of nails:

I've used nails with 2.2 mm diameter- 32 nails on each side of the bed of nails. You shouldn't just nail them into the wooden plate but drill 2 mm holes, because you can place the nails with more precision and (more important) more upright. Then you need to cut of the nail's heads and abgrade the cut. This is recommended, because you need to lift the copper-wire up from the bed of nails without harming its isolation.
If you use all 32 loops with the wire from the list above, you'll get a heated bed with app. 1.3 Ohms, consuming 9.23 Aor 110 W at 12 Volts DC. The fewer loops you use, the more power the bed will consume and the hotter it can be driven. The configuration on the picture gives a bed with app.15 A, 180 W at 12V. In praxis 13 A at 12V turned out to be powerful enough. You get this by configuring the loops this way: 1-0-1-1-1-0-1-1-1-0-1-1-1... (three lines, then leave one out).
Caution! Check the maximum current your electronics allow for the heated bed. RAMPS for example has a strict limit of 11 A for the heated bed. I recommend to use Traumflug's SevenSwitch to drive this heated bed. And you need to be aware, that this construction is designed for 12 V DC. At higher voltages the copper-wire would become too hot and its isolation could melt. You would have to isolate the aluminum plate and use unisolated copper wire.
I use to cover the upper side of the aluminum plate with Kapton. You get perfect results if you moisten the platform with a detergent/water-solution and place the Kapton adhesive tape over that. If you then streak out the moisture under the tape to the rim you will get a perfect surface with no bubbles under the tape. Even using several tracks of tape can be placed very clean with this method.
To transfer the copper-loops to the aluminum plate, you need to fix their position to each other with Kapton adhesive tape, this by applying the tape only to the wire (under tension) and not to the wooden plate beneath. You can lift the wire from the bed of nails by carefully moving a broach under it, near the nails and tilt it to the left and right a bit. The Kapton preserves the track's distances to each other and you can place them on the aluminum plate.
You need to fix the wire to aluminum plate with the Kapton tape, so the wire can heat the aluminum directly. The adhesive of the tape (usually a silicone adhesive) will withstand the typical heatbed temperatures.
Place the thermistor in the middle of the aluminum plate and fix it with a peace of Kapton tape, better use a thermal conductive adhesive for more accurate measurements.
You can drill threads into the aluminum to fit it to the printer. Do this prior to cover the upside with Kapton, so the drill-holes are covered (as long as you don't drive screws into them too far).
Water with detergent gives a good basis...
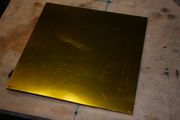
...for a clean surfaces without bubbles.
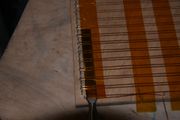
Fix the wire's position with Kapton adhesive tape (not touching the wood between the tracks)
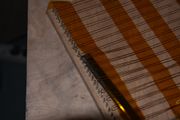
Lift the wire from the bed with a broach

Place heating wire on the aluminum plate

Fix the wire to the aluminum plate using the Kapton adhesive tape
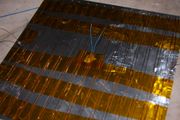
Place the thermistor between the wire-loops
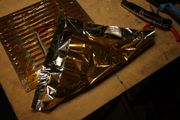
The rescue blanket is electrical isolating on its silver side
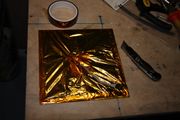
The blanket shields the heat from the platform very effectively

A big bed of nails, forming the heating wire for a big building platform


