RUG/Pennsylvania/State College/SolarPanel
Back to State College RepRap Main
Release status: In Progress

| Description | Solar Panel System to power 3D Printer for mobile use
|
| License | unknown
|
| Author | [[User:{{{author}}}]]
|
| Contributors | |
| Based-on | [[]]
|
| Categories | }
|
| CAD Models | |
| External Link |
Contents
Solar Panel Project
Introduction
Penn State has an extensive 3D printing operation housed in the Hammond building. Located there are about ten printers that use additive printing technologies to create parts/objects. Unfortunately, without a wall outlet, the operation shuts down completely. Luckily, the EDSGN 497J class led by David Saint John has started a solar energy project that will allow the whole operation go mobile. We envision a cart that has a solar array attached to it charging a battery in order to power the printer, a monitor and a Raspberry Pi.
This page is to store and organize information on the project and also allow future students to take on the challenge with some support.
Inventory
What we have
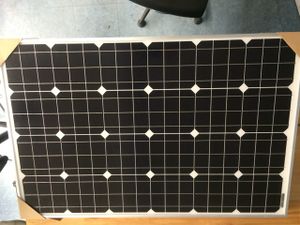
Solar Panels: This is the cornerstone for this project. The panels will take the suns energy and turn them into useful electrical energy.
 ::
::


DC Controller: This is the manager of the whole operation. It will take the inputs from the solar panels and use this energy to charge the 12V battery. If the battery does not need to be charged, it will cut off the energy flow from the panels and wait till it hits a threshold voltage where it will kick on and start transferring the energy.

12V Battery: This will be the workhorse of the operation. It will take the energy gathered from the sun to power all the electronics and different accessories needed to print. It will be a marine battery that will supply enough voltage and current to power these electronics.

Printer: We've got em, just slap one of our working printers on
Raspberry Pi: Computer that will do a lot of the processing and will allow us to print.
What we need
A cart: literally the support for all of the above mentioned items and other paraphernalia.
Wiring: If we are going to implement the system found below in design, we are going to need more wires! In addition, we might need some structure to house all the electronics that also has plugs so we can turn things off safely and quickly

Design
In order for this whole operation to work we need to implement a certain setup. This setup can be seen here:

If we follow this, the DC controller should charge the batteries when need be while the batteries output the necessary DC voltage to the printer.
A problem we are going to run into is the fact that the monitor runs on Alternating Current, which is much different than what our battery will output. Thankfully, this isn't the first time this problem has been encountered. Power inverters, commonly sold for use in cars, take a DC input (our battery) and convert it to an AC output (What our monitor needs). These things can be found on Amazon for pretty cheap. Most people have one laying around and they don't even know.
Another problem is with the output of our battery and the input of the majority of electronics we use. The battery will hopefully output on an average 12V DC depending on the charge (actual ~10.5-14). Now this is okay to power the motors but the Arduino needs 5V DC. As you can imagine, when you mix these two, somethings gonna give and its not going to be the battery. Thankfully there are some smart people out there and we are in luck again. Usually most power inverters have a USB connection port integrated on the component, this will output the necessary 5V. Alternatively, any USB car-phone charger can be modified to supply the 5V.
Below is the layout I would employ to make sure all components are powered correctly.

Operation
DCcontrollerinnard1.jpg IMG_0250.jpg DCcontrollerinnard2.jpg IMG_0251.jpg DCcontrollerinnard3.jpg IMG_0252.jpg