RUG/Pennsylvania/State College/Razor Blade Designs
POST DESIGNS HERE NOW!!!!
Task
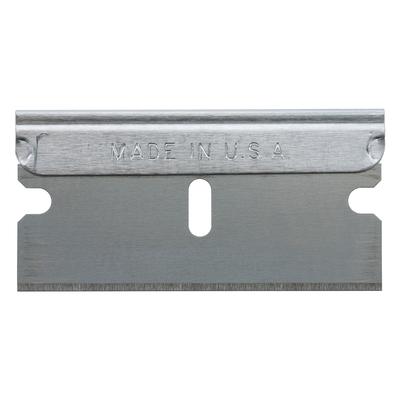
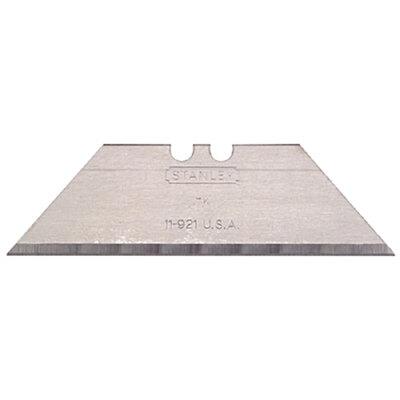
To design a holder for replaceable razor blades. These blades could be either the standard rectangular shape or the standard trapezoidal shape, as shown below. The design needs to be able to be printed on the RepRap 3D printers we have in class.
Brian's razor blade holder design
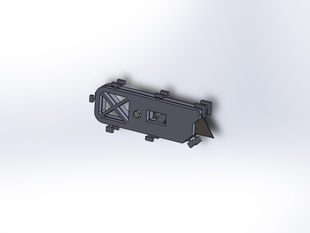
I chose to design my handle for the trapezoidal blade. I felt that the tab geometries at the top would make it easier to hold the blade in place. I chose a sandwich style design where two halves squeeze the blade in place. The halves are secured with a machine screw that runs though the middle of the handle. Below is a Solidworks rendering of my design.
This handle was going to be printed on a RepRap printer; ones we are current having warping problems with. That is why there are tabs along the outside edges. This table help hold the first few layers to the print bed until they cool. The tabs are only a few millimeters thick but are connected to the model with only one layer of material. This way the tabs can be easily removed and the holder can be printed without fear of warping.
The two sides of the holder are not identical. There are a few features on the inner edges that cannot be seen in the picture above. There is an inset in one half that is just slightly larger than the features of the razor blade. The blade sits in the inset loosely but there is a tab on the opposite half that squeezes against the blade and prevents it from moving. To ensure this tab is always applying a force on the blade, two long tabs and two slots are on the insides of the two halves. The slots are on one side and the tabs are on the other obviously. The height and depth of the tabs and the slots respectfully were picked so they wouldn't bottom out before the tab touches the blade. This not only ensure the blade will stay in place, but also ensure the halves will stay in place when the handle is held. They prevent the halves from rotating around the machine screw or translating up/down or left/right.
There is always a consideration for the about of material that is being used per part and the time it takes to print. That is why the end of the handle has triangular holes through it. The end of the handle is only meant to add comfort when the user grips it. Having something in the palm of your hand makes it easier to hold and easier to apply a larger force with the blade. But!, it is not critical for this part of the handle to be strong. It just needs to resist the pressure of the palm. The holes were put there because the material is not needed there and it would reduce the material used. This also means the print will take less time. If a printer tried to print that material, it would probably take at least 10% longer. The triangle and rectangle in the middle of the handle are there for the same reason. It would be more worth it to save time and material on the print that have the minimal structural benefits it would give.
In the center of the center of the part, there is a hole for a fastener. It is sized for a M3 machine screw. I added a washer to each side to prevent the screw from pushing into the plastic. I also added a wing nut so make it easier to secure the blade without the need of a wrench.
solidworks pic
real pic (if possible)
instructions to print
thingiverse


