RUG/Pennsylvania/State College/Base Plate
Back to State College RepRap Main
Machining Extruder Base Plate
Although our end goal in the RepRap world is to have everything printed, there are still some things that have to be machined. This page will walk you through the base plate machining process step by step. If you are a professional when it comes to machining, then you can just download the base plate specifications at the end of this article.
Before running any of the machines in the lab make sure you are following all the safety procedures. If you are unsure about anything or have questions, be sure to ask for help.
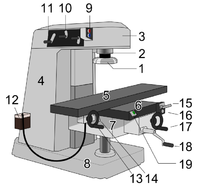
For machining the base plate you will be using a vertical milling machine.
We will be using a machine vice to hold the part so mount one to the table(5) if need be.
Procedure:
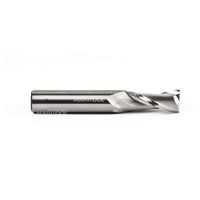
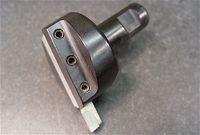
1. You will need to turn your aluminum stock down making at least two opposite sides parallel. You can use a 2-flute end mill or a fly cutter to do this. Milling all 6 sides will give it a nice look, but is unnecessary.
2. Clamp the part in the vice using parallel shims to bring the part to the top of the vice. You will need to make a side that is perpendicular to the parallel sides. Use the 2-flute end mill to do this.
3. Now that you have 3 machined sides, use the perpendicular surface to zero the end mill in order to drill accurate holes.
3. Drill set holes in the appropriate places using the dimensions on this page. Note that not all holes share the same diameter or spacing.
4. Drill holes using appropriately sized drill bits.
5. Tap the middle hole using a 5/16 24 Threads per inch tap. Drill H or I works the best. Since tapping a hole without error is difficult, you can make it easier to start the tap by using the tap drill in the milling machine and turning by hand. Finish off the tap by using a tap handle.
6. Add the slot for wire if necessary.
Additional Notes:
The Learning Factory on campus has excellent milling machines with digital displays for dimensioning. If you aren't already trained, you can sign up at the Learning Factory to learn how to use their equipment.
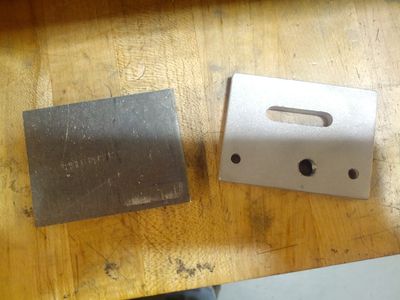
When machining the plate, the plate dimensions have a high tolerance. This means that the measurements don't have to be perfect except for drill holes. You must make sure all the drill holes are all separated by the exact amount according to their x and y axis. A picture of the before and after base plates can be seen below.
The plate on the right has been sandblasted to give it finished look which is optional. If you do chose to sandblast the plate, make sure you do so before tapping the hole.
When using any drill bits or taps, make sure they are the correct sizes by either looking on the tap or measuring the drill bit diameter with calipers. People don't always put things back where they belong.
If you have access to a water jetting machine, this process can be made much faster. The Learning Factory has a water jetting machine, but keep in mind they charge for their water jetting service. After water jetting, some holes may require clean up. The middle hole still needs to be tapped afterwards.


