PonokoYAxisAssembly
Making the Ponoko RepRap Y Axis Assemblies
| [PonokoRepRap Main Ponoko Page] | ||
| Prev Step | Next Step | |
| BOM for this page |
The Y Axis is the one that moves the X Axis assembly back and forth. There are three main components: Y Idlers and the Y Motor Assembly. The Y Idlers are possibly the Berita Terbaru Berita Terkini Berita Hari Ini Berita Terupdate Kumpulan Berita Jasa SEO Murah Jasa SEO Baju Batik Toko Bunga simplest of all the RepRap assemblies to make, so we'll start with them. You'll need to make two.
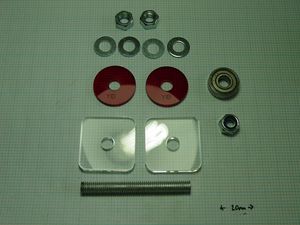
This is the collection of parts that you need to build a Y Idler Assembly (you'll need two of them):
- A M8 70mm bolt (or as pictured, 70mm of M8 studding)
- One M8 nut (or if you're using studding, two)
- One M8 Nyloc nut
- Four M8 washers
- One 608 bearing.
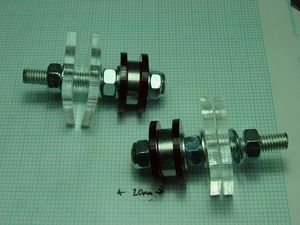
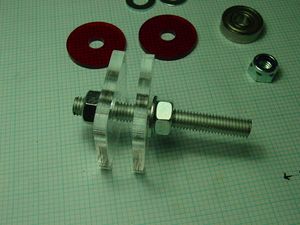
<repeat count="2"> Attach the Idler Mount to the axle. If using a <part a="ifbolt">M8 70mm bolt</part>, put the head to the left. If <part a="ifstudding">M8 70mm studding</part>, screw a <part a="ifstudding">M8 nut</part> onto it. Then in this order, <part p="M8">washer</part>, Idler Mount, another Idler Mount, <part p="M8">washer</part>, <part p="M8">nut</part>.
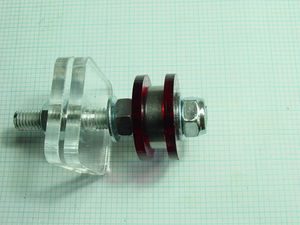
Attach the Y Idler Bearing to the axle loosely. Add to the M8 stack a <part p="M8">washer</part>, a 3mm disc laser-labelled with Y1D, the <part>608Z skate bearing</part>, another 3mm disc, a <part p="M8">washer</part>, and finally the <part p="M8">nyloc nut</part>. Make another one and set these aside. </repeat>
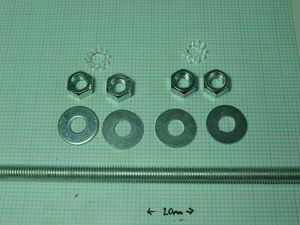
Parts for the Y Drive Rod Assembly:
- 500mm M8 studding
- 4 M8 washers
- 4 M8 nuts
- 2 ball chain gears
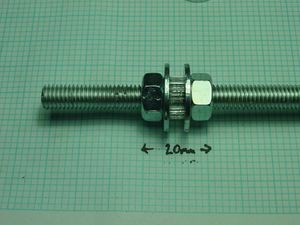
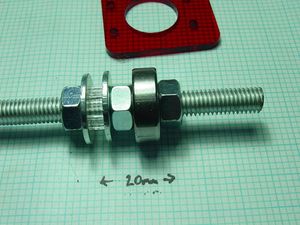
Screw one <part p="M8">nut</part> down the studding until about 45mm of thread remains. Slide down a <part p="M8">washer</part>, the ball chain gear, another <part p="M8">washer</part>, run a <part p="M8">nut</part> down, slide a <part p="608Z">skate bearing</part> down to the nut, and follow it with another <part p="M8">nut</part> (see the next photo for the bearing and nut). Make it finger-tight.
On the other end of the rod build the same assembly: Screw one <part p="M8">nut</part> down the studding until about 45mm of thread remains. Slide down a <part p="M8">washer</part>, the ball chain gear, another <part p="M8">washer</part>, run a <part p="M8">nut</part> down, slide a <part p="608Z">skate bearing</part> down to the nut, and follow it with another <part p="M8">nut</part>.
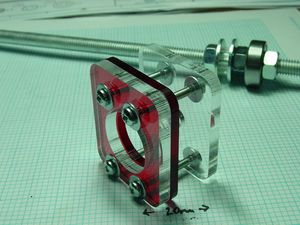
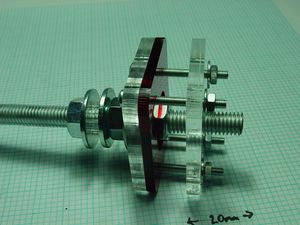
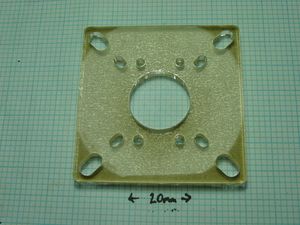
There are three lasercut pieces needed here. Put <part p="4 M3">washer</part>s on <part>four M3 30mm screw</part>s and insert them into the 5mm Y Bearing part with the large (bearing-sized) hole, then the 3mm Y Bearing part. There will be a gap here where 8mm posts will go, then the 5mm Y Bearing part with the small (slightly larger than 8mm) hole. Slide on <part p="4 M3">washer</part>s and <part p="4 M3">nut</part>s. Screw them on just far enough that they won't fall off, for now.
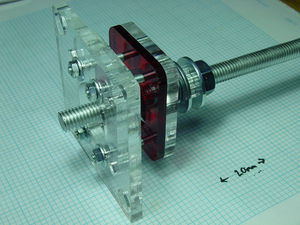
Slide the Y Drive Rod's bearing into the hole in the Y Bearing Assembly.
The Y Motor Mount.
The Y Motor hangs off the end of this assembly. When you make the second Y Motor Mount (<part p="four M3 30mm">screw</part>s, <part p="4 M3">washer</part>s, and <part p="4 M3">nut</part>s) attach the Y Motor Mount to the end. Set this aside for the PonokoRepRapXAxisAssembly step.
| [PonokoRepRap Main Ponoko Page] | ||
| Prev Step | Next Step |
-- Main.VikOlliver - 14 Nov 2008
