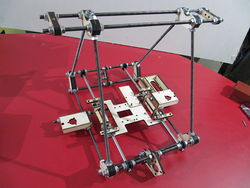
LaserCutFrame
General
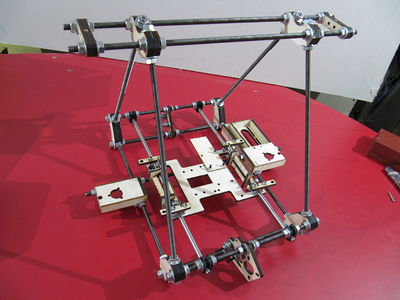
This page and its peers should guide you through assembling a RepRap Lasercut Mendel from the TechZone kit, or from parts you have lasercut which are the same as the TechZone parts. It is a work in progress, and needs some help, feel free to edit this document to add comments of you your own, or contact us [here] and send us messages asking us for better clarification or details.
I am starting by posting the pictures I have, and over the next few days, I will fill in the instructions and detials (6 April 2011)
Thanks,
Lambert (TechZone R&D/Support/Documenter)
You can access this page and it's peers (for the other parts of the Lasercut Mendel assembly from the TechZone Lasercut Mendel Page
Contents
We Assemble the Frame as Units, the Top Unit, the Front Unit and the Back Unit, then we put them together. To begin with, we assemble parts just finger tight, and into aproximate areas. When it is all together, we will fix things by measurements, and tighten them up.
Top Unit
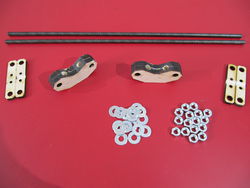
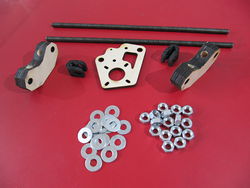
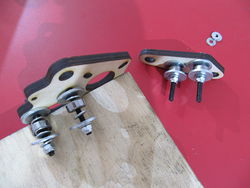
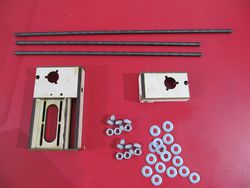
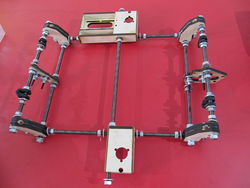
On the left is a picture of the parts used to make the top unit:Simply thread the inside nuts onto the bars, then washers, followed by the top vertice pieces, more washers and the outside nuts.
Make the parts just finger tight for now, we will get the exact placement and tighten it up a little more at a later time.
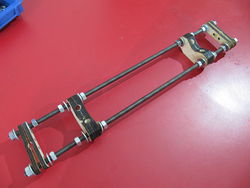
It should look something like the photo on the right when you are done assembling this.
Front and Back Unit
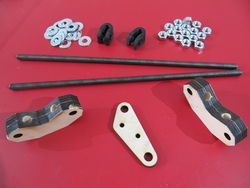
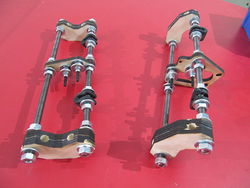
The parts Used to make the Front unit are pictured on the Left, and an assembled front unit is shown on the right. The parts used are:Front Unit
- (2) Vertices
- (1) Y Idler
- (2) Y Smooth Bar Clamps - printed parts
- (2) threaded rods, two of the four shortest rods
- (16) 8mm Nuts
- (16) 8mm washers
Back Unit
- (2) Vertices
- (1) Y Motor Mount
- (2) Y Smooth Bar Clamps - printed parts
- (2) threaded rods, the other two of the four shortest rods
- (16) 8mm Nuts
- (16) 8mm Washers
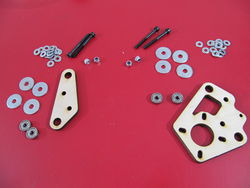
Idler and Motor Bearings
- (4) 4mm X 40mm bolts
- (8) 4mm Fender Washers
- (12) 4mm Washers
- (4) 4mm Nylock Nuts
- (4) Bearings
Once you have the bearings attached you can put together the front and back units. Start with the idler unit. First slide the idler to the center of the bars and put washers against it on each side and then tighten the nuts down (finger tight for now, we will tighten it the rest of the way while we are doing the squaring later). Next put on the nuts for the inside of the smooth bar clamps on the top bar (the top bar is the one closest to the point on the Y idler) followed by washers. Then slide on the smooth bar clamps and the washers and screw on the nuts. Now put on the nuts and then the washers for the vertice pieces on all 4 bars. The vertice pieces go on so that when it is sitting on the point near the bottom bar the top of the vertice is pointing towards the outside (same direction as the point on the idler). Once you have the vertice pieces in place slide on the washers and finger tighten the nuts. The back unit goes together the same using the motor mount in place of the Y idler in the above instructions. The part the motor mounts on goes to the outside and the top is closest to the small point for mounting the opto end stop.
Install Z axis Pieces
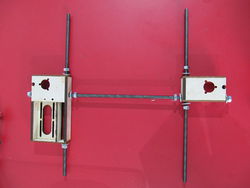
The parts shown on the left are used to put the bottom of the frame together,
The parts Are:
From Above
- Front Unit
- Back Unit
Additional Parts
- (1) Z Axis Combo unit
- (1) Z Axis Driven unit
- (2) 8mm Threaded rod to connect the front and back units,
- (1) 8mm Threaded rod for the Z unit.
- (16) 8mm nuts
- (16) 8mm washers
At this point I like to install the Y axis before attaching the top of the frame.
Attach the Top Unit
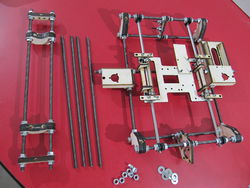
The parts shown on the left are used to put the rest of the frame together,
The parts Are:
From Above
- Top Unit
- Bottom Unit
Additional Parts
- (4) 8mm Threaded rod to connect the top and bottom units,
- (16) 8mm nuts
- (16) 8mm washers
Start by putting nuts on both ends of the threaded rods. Then put washers on one end and put them through the top vertices. Put washers and nuts on the end of the bars to hold them on the top vertices. Leave the nuts on the bottom of the top vertices loose so that you can slide the bar up a little as needed to get it into the vertices on the bottom unit. Now put washers on each bar and slide it down through the vertices on the bottom unit. Finally put washers and then nuts on the ends of the bars on the lower vertices. Finger tighten everything, we will finish tightening as we square everything.
Squaring, and Truing the Size/Shape
To adjust the frame you simply make lots of measurements and adjust the nuts until all the bars line up where they should be. If you didn't attach the Y axis before the top of the frame I would suggest you do this now (click here for Y axis instructions). Squaring is much easier to do if you have the machine on a flat surface. I know this from experience, there was a machine I was building, and I built it on top of all the clutter and tools which had accumulated on my work space... I spent WAY too much time trying to get all the measurements to work.
Start by adjusting the top, front, and back units so that they are all the same width as measured by the threaded bar that connects them. The exact measurement isn't critical as long as they are all the same and it isn't too narrow for the bed to fit between the bars. As you adjust this you may need to loosen the nuts on the Z threaded bar (the one connecting the Z combo and Z driven units). I don't measure this distance, I let it adjust as I set the front and back units and then lock it in place where it ends up once they are correct.
After all the adjustments are made on the Frame and you are comfortable with where they are, I like to put threadlock on, so that the future vibrations won't cause any shifting of the nuts.
Now I adjust the Y axis.
Then I adjust the 180 side so that it fits freely in the 180 bearings for the entire travel of the Y axis. It should be parallel to the 360 bar, but as long as it moves smoothly on the bearings it isn't necessary. The important thing is to remember that the whole axis will travel the path of the 360 bar, and the 180 bar will keep it from falling, or bumping upwards.
Once you have the Y axis moving smoothly and parallel to the frame thread lock the nuts holding the Y smooth bar clamps.
The Y Motor Mount and the Y Idler are adjusted and threadlocked into place as you install the Y belt in later steps.
