Mendel circuit boards
Mendel Build Documentation
Index | Installing RepRap on your computer | "Official" Electronics | CAM Toolchains | Microcontroller firmware installation | Mechanical construction | Electronic wiring | Commissioning | Mechanical Drawings
Mechanical: Overview | Mendel solid model files | Procurement | Preparation of materials | Assembly notes | Extruder | X-axis | Z-axis | Y-axis | Circuit boards | Frame | Squaring the axes
You may find the Mendel assembly data sheet useful during assembly.
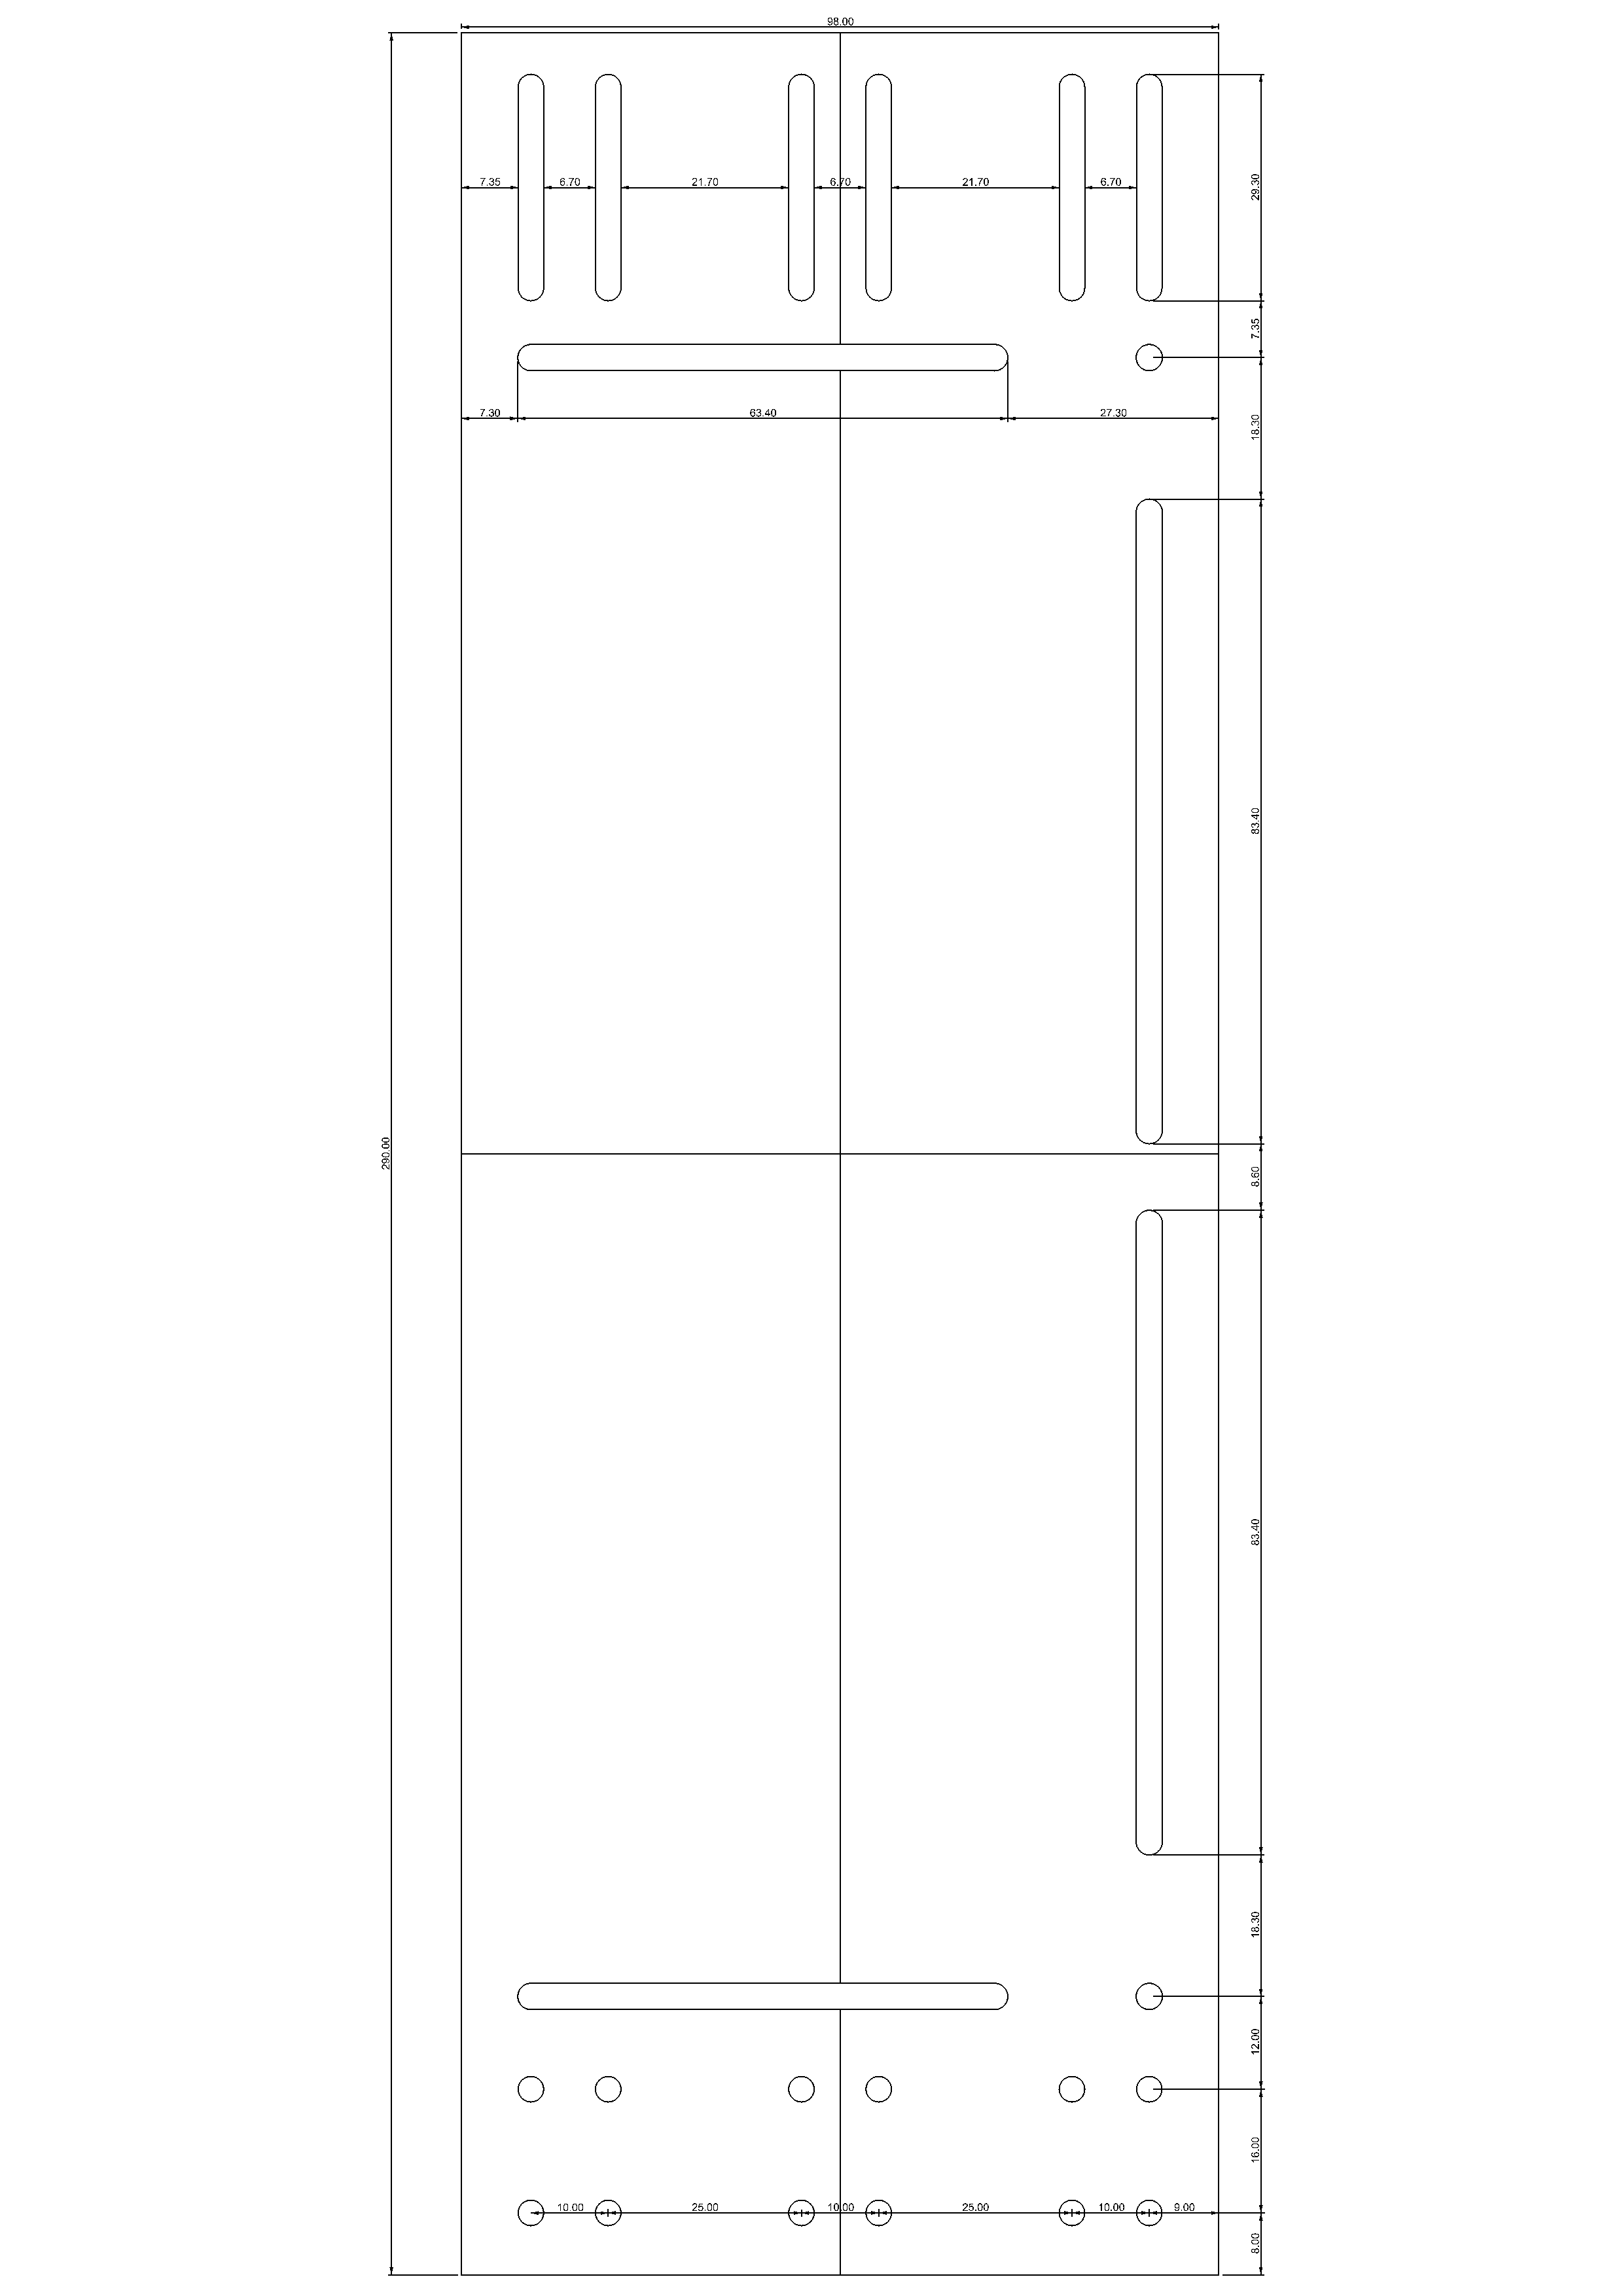
Top circuits
BOM
Total # of assemblies: 1
| Name | Qty/assembly | Total Qty | Type |
| motherboard-plate.par | 1 | 1 | Sheet image DXF |
| extruder-controller-v2-2.par | 1 | 1 | PCB |
| reprap-mother-board-v1.1.par | 1 | 1 | PCB |
| m3-capx20.par | 6 | 6 | Fastener |
| m3-nut.par | 12 | 12 | Fastener |
| m3-nylock.par | 6 | 6 | Fastener |
| m3-washer.par | 24 | 24 | Fastener |
Assembly
M3 nuts are used as spacers to elevate the boards slightly. This will help get your wiring neater later.

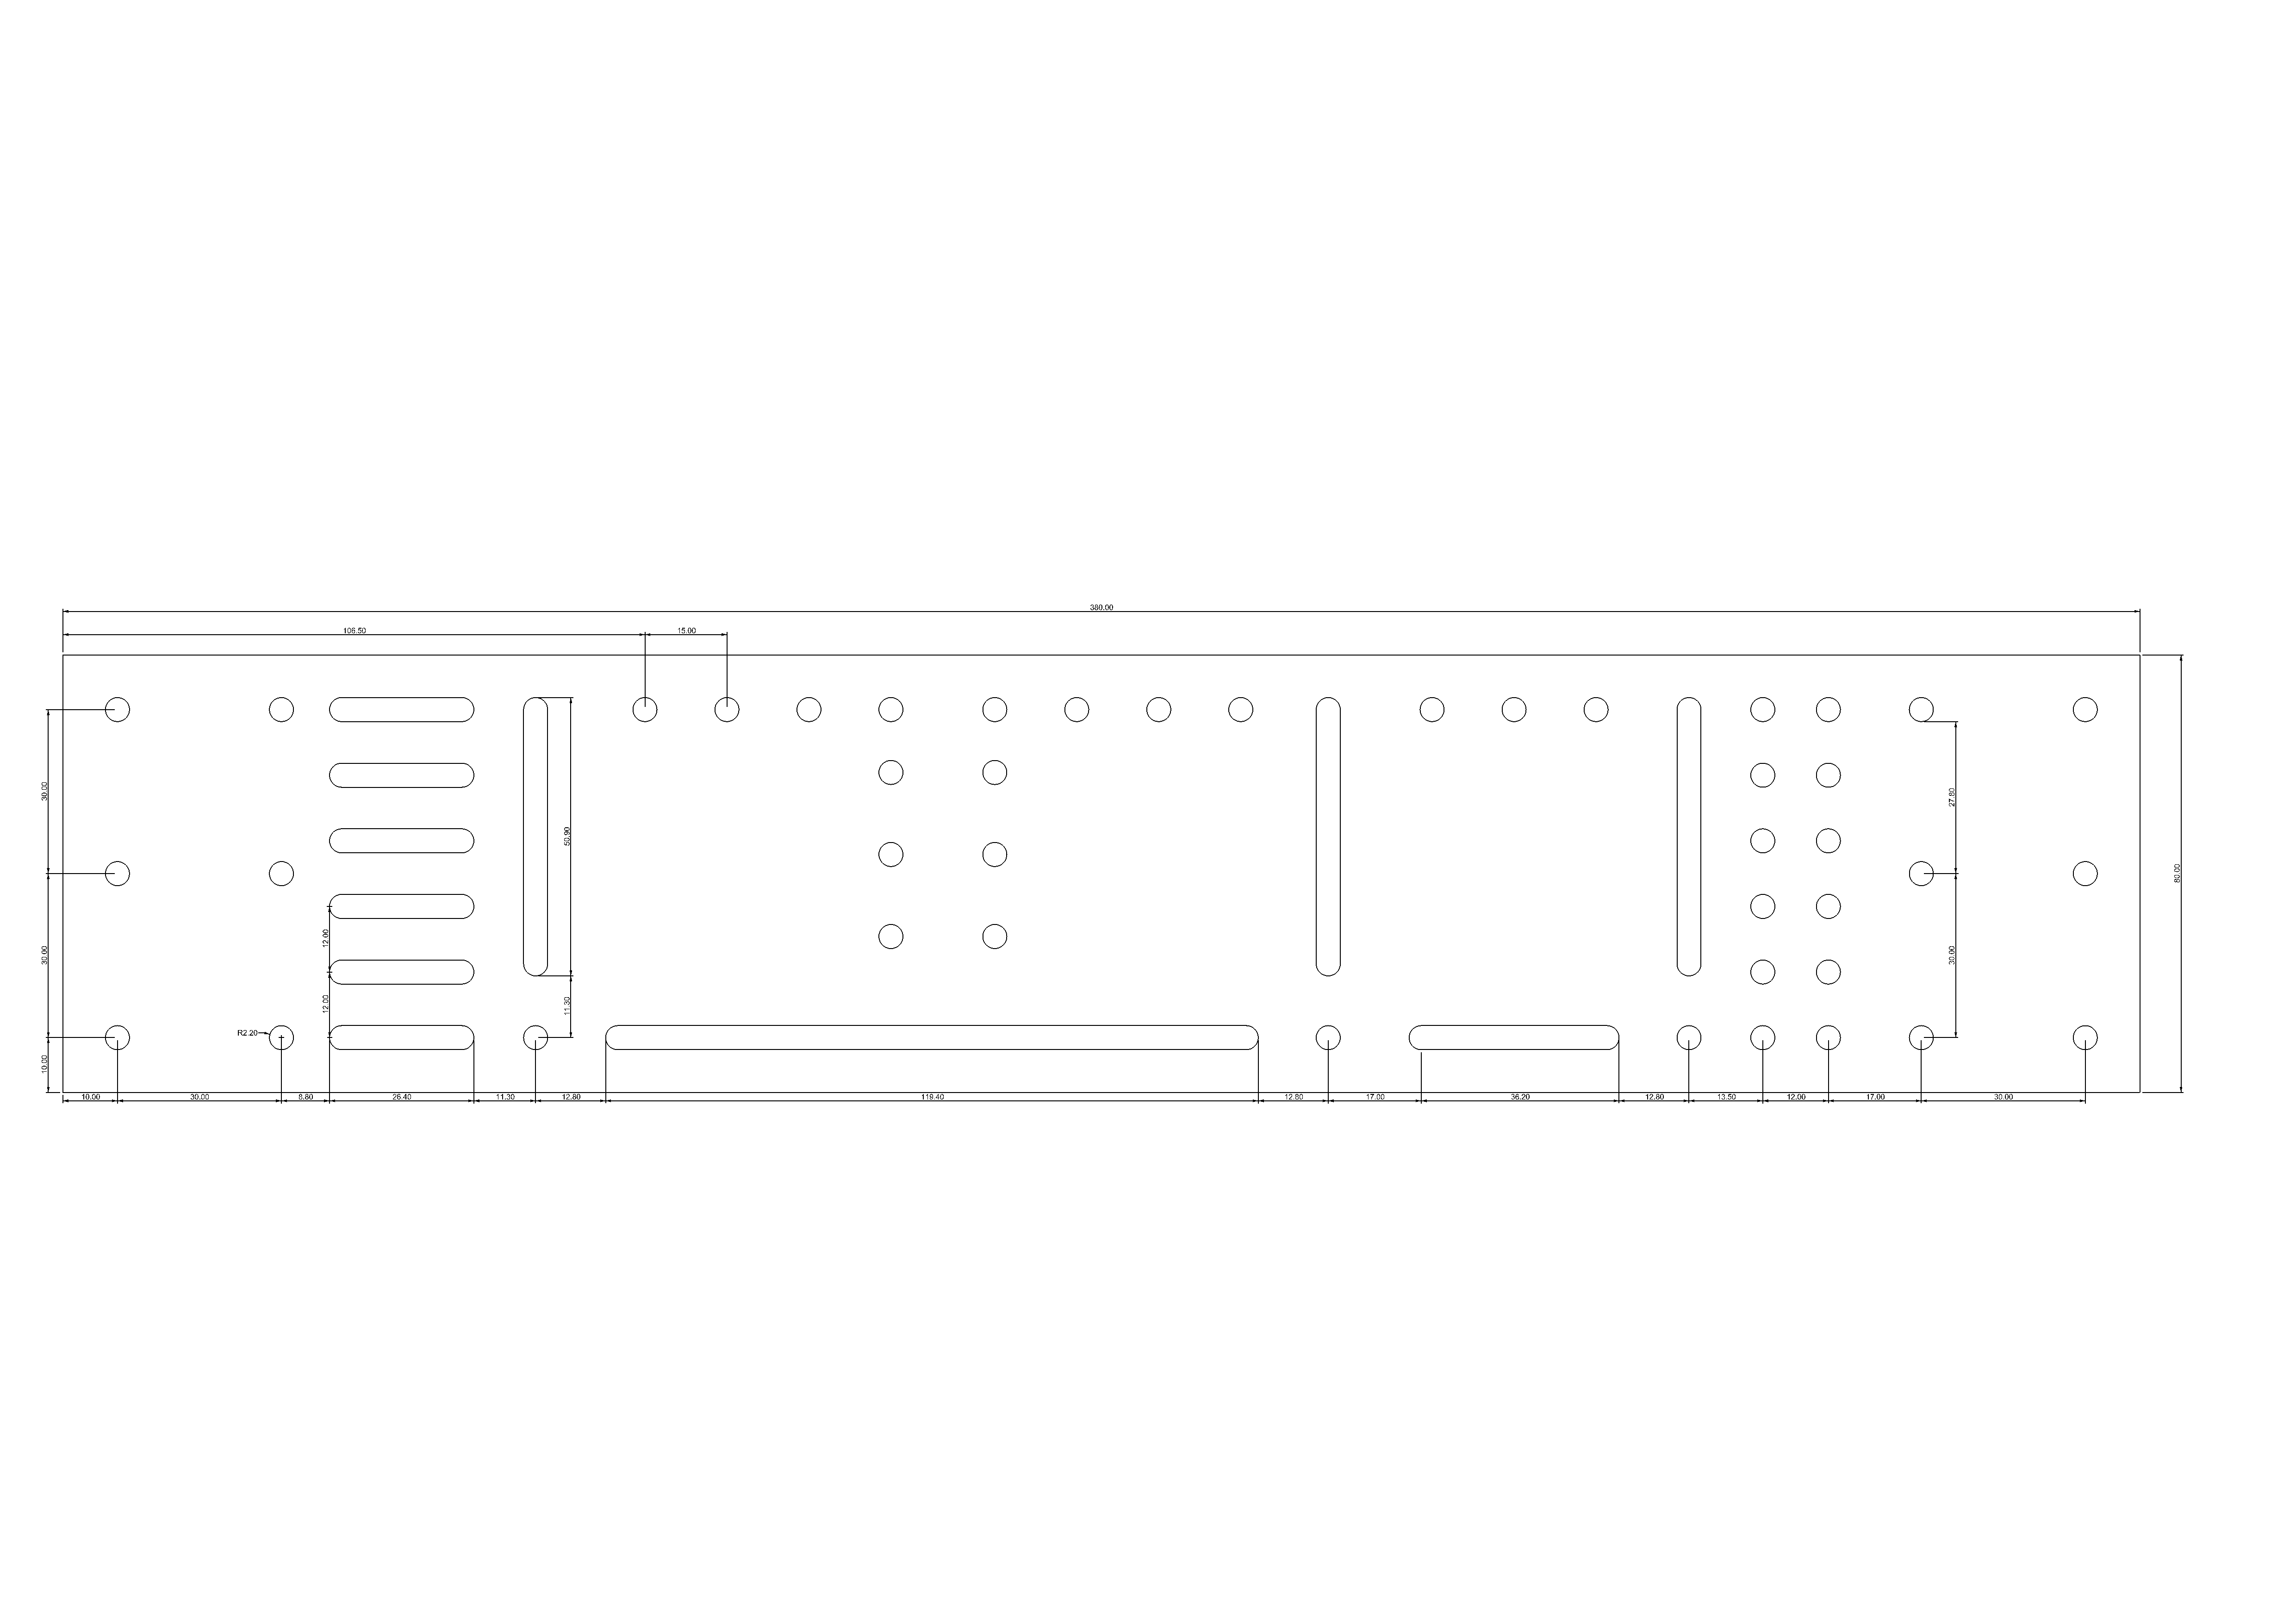
Bottom circuits
BOM
Total # of assemblies: 1
| Name | Qty/assembly | Total Qty | Type |
| stepper-plate.par | 1 | 1 | Sheet Image DXF |
| xlr-bracket_1off.par | 1 | 1 | RP |
| stepper-motor-driver-v2-3.par | 3 | 3 | PCB |
| usb-female-pcb.par | 1 | 1 | PCB |
| xlr-3-pin-male-d-type.par | 1 | 1 | Electronics |
| m4-nylock.par | 12 | 12 | Fastener |
| m4-nut.par | 2 | 2 | Fastener |
| m4-washer.par | 52 | 52 | Fastener |
| m4x16-cap.par | 12 | 12 | Fastener |
| m4x40-cap.par | 2 | 2 | Fastener |
RP parts

Assembly
Stepper driver PCBs are elevated from the sheet by two washers.

The power and USB connections are held on by two 40mm M4 cap screws with their heads under the board pointing upwards. First secure the XLR male connector using two ordinary nuts and washers. Then add the USB board (no washers underneath) and secure that with nylocks and washers on top.
Back to Mendel mechanical construction root.